EARLIER RELEASE NOTES FOR THE WEBROOT® BUSINESS MANAGEMENT CONSOLE
- Management Console Update 42.0 - May 18, 2020
- Management Console Update 41.0 - July 10, 2019
- Management Console Update 40.0 - June 18, 2019
- Management Console Update 39.0 - April 30, 2019
- Management Console Update 38.5 - January 28, 2019
- Management Console Update 38.0 - January 8, 2019
- Management Console Update 37.0 - August 28, 2018
- Management Console Update 36.0 - May 1, 2018
- Management Console Update 35.0 - March 6, 2018
- DNS Protection Console Update 3.10.0 - November 20, 2017
- Management Console Update 32.0 - July 25, 2017
- Management Console Update 31.0 - June 14, 2017
- Management Console Update 30.0 - May 15, 2017
- Product Update Bulletin GSM Console Build 3.4.0 - April 3, 2017
- Management Console Update 29.0 - January 5, 2017
- Management Console Update 27.0 - November 7, 2016
- Management Console Update 26.0 - June 2, 2016
- Management Console Update 25.0 - March 30, 2016
- Management Console Update 24.0 - March 1, 2016
- Management Console Support System Update 2.1 - November 17, 2015
- Management Console Update 22.1 - November 9, 2015
- Management Console Update 22.0 - October 14, 2015
- Management Console Update 21.0 - July 28, 2015
- Management Console Update 20.5 - June 3, 2015
- Management Console Update 20.4 - May 7, 2015
- Management Console Update 20.3 - April 16, 2015
- Management Console Update 20.2 - February 4, 2015
- Management Console Update 20.1 - November 27, 2014
- Management Console Update 20.0 - November 20, 2014
- Management Console Update 19.2 - September 11, 2014
- Management Console Update 19.1 - August 12, 2014
- Management Console Update 19.0 - July 1, 2014
- Management Console Update 18.0.3 - May 7, 2014
- Management Console Update 18.0.2 - April 16, 2014
- Management Console Update 18.0.1 - March 27, 2014
- Management Console Update 18.0 - March 20, 2014

Please choose from the release notes listed below:
PRODUCT UPDATE BULLETIN 42.0 - May 18th 2020
New Management Console features in this release include:- New Evasion Shield Script Protection policy setting to Detect and Report or Detect and Remediate.
- Updated the needs attention flag for any device that has seen or been infected by a Script threat.
- Added reporting on Script threats seen and devices that have script protection enabled with ability to Whitelist a Script threat.
- Increase Domain Bypass entry limit from 50 to 500 for DNS Protection.
- Added new link to the Universal Reporter videos & download in the Reports tab, under the heading API Reporting.
PRODUCT UPDATE BULLETIN 41.0 - JULY 10, 2019
This release includes a revised version of the most used Agent Commands and Scan History and Threat Reports now being available in both the Business and MSP Management consoles,The highlights of the release are:
- Improved – Agent Commands
- New – Threat Reports
- New – Scan History
- New – Dark Web Breach Report
- New – Training Navigation Enhancements
1. Threat Report
New URL reports have been added to the On Demand section of the Reports page.
These new reports are:
- All Threats Seen
- All Undetermined Software Seen
- Devices with Threats Seen on Last
- Devices with Undetermined Software on Last Scan
The data from that report will be displayed on screen and from here you can choose to drill down further into the data produced by clicking on a chart or file information.
To download a copy of the data displayed, you can click on the Export to CSV button and a copy of the report data will sent to your account email address.
2. Scan History
A new tab will be been added to the Devices page when you select a Device to view from the groups page. When clicked this will display a list of every scan that has taken place for that particular device including any threats that have been found during the Scan.
You can then drill down to get detailed information regarding each threat and choose to either run a Clean up Command, Restore that file from Quarantine or add a Whitelist Override.
By clicking on each Filename, you can then see a detailed view of the infection encountered.
3. Dark Web Breach Report
The new Dark Web Breach Report and risk assessment tool now allows Security Awareness Training admins to quickly generate a report to outline any breaches associated with any client’s domain, organized by user and breach. The report includes a breach summary, a list of breached data by category, as well as the users impacted at each client site. The report provides ideal documentation to help admins determine and demonstrate real-world risks, so they can advise clients’ executive management on services and tactics accordingly to avoid future security incidents.
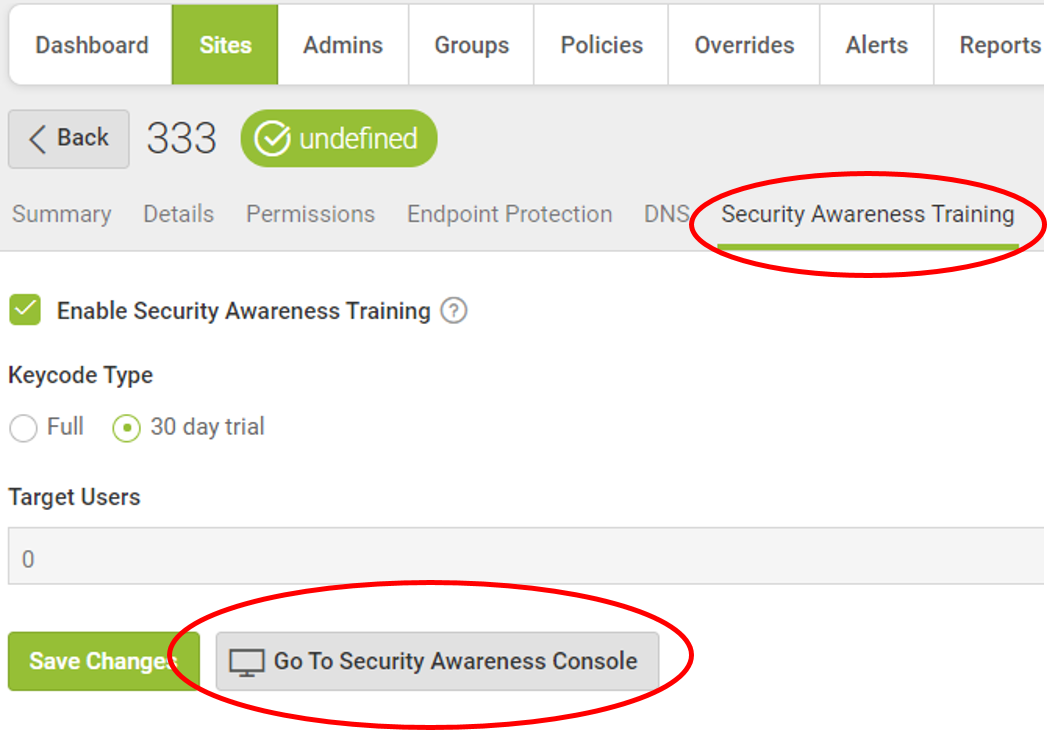
4. Training Navigation Enhancements
First, we added a shortcut that launches the Security Awareness Training console from the global training dashboard to make it easier and quicker to move between dashboards.
Second, we added a new site selector to the console to make it simpler to navigate between sites. This update also better aligns the Security Awareness Training console with our overall goal of streamlined management across client sites.
PRODUCT UPDATE BULLETIN 40.0 - June 18th 2019
The highlights of the release are:
- New – Agent Commands
- New – URL Reports
- New – Web Based Policy Overrides for DNS Protection
- New – Usage Data
1. Agent Commands
From the Groups page, there is now an additional menu item called Agent Commands. This menu becomes active, once you have selected one or multiple devices from the sites list. Twelve commands are displayed along with the View Command Log and each command displays either a PC or a MAC icon, to show if that OS supports this command.
To run a command simply click on the command you would like to run and you will see the relevant dialogue box appear, with the option to Run or Cancel. If you click on Run, this will send the command you have chosen to the device/s that you have
selected.
If you wanted to see all of the commands that you have sent to every device on that site, click on View Command Log from the drop down menu and a report will display on screen with a list of all commands sent. You can also choose to export this log to a CSV file.
2. URL Reports
Two new URL reports have been added to the On Demand section of the Reports page.
These new reports are:
To run any of these reports, select one from the drop-down list and then choose to run it against the site of your choice or All Sites. Once you have chosen your date range, simply click Submit to generate the report.
The data from that report will be displayed on screen and from here you can chose to drill down further into the data produced by clicking on a chart or file information.
To download a copy of the data displayed, you can click on the Export to CSV button and a copy of the report data will sent to your account email address.
3. Web Based Policy Overrides for DNS Protection
For all DNS Protection customers you can now add Web Based Overrides at the Policy level to give allow you a more granular way of applying Block and Allow rules for Domains.
To access this click on the Overrides tab and then on Web Block/Allow List to display the newoverrides section, with new Search, Filter and Column Sorting display.
From here, you can Add a new Web override by clicking on the Add button. This will display a new dialogue box where you can enter a single or up to 50 valid domain names for a Block or Allow override. You can choose to add the entry as a Global or Site specific override and then choose an associated Policy to add the override to.
4. Usage Data
You can now access your usage data for Endpoint/DNS Protection and Security Awareness Training, with the new usage console for detailed breakdowns of your Webroot products and services.
To access the Usage Console click on Settings, then Account Information and you will see a new option called Usage Data.
If you click on the Usage Console button, a new window will open and automatically log you into the new Usage Console.
From here, you can view your total amount of Endpoint devices, DNS protection and Security Awareness Training Usage for both full and trial subscriptions from the previous 3 months. You can also choose to view each sites usage individually and export that data to a csv file.
PRODUCT UPDATE BULLETIN 39.0 - April 30th 2019
OVERVIEW
This is the latest release of Webroot® Global Site Manager Console, which includes a dedicated new page for Security Awareness Training, where you can launch Global campaigns for both training and Phishing. New reports and domain verification are also available in this release. For full details of these new features, please see the Security Awareness Training notification.
New Management Console features in this release include:
Security Awareness Training:
A new, single-pane-of-glass management dashboard within the management console, which allows you to create Global campaigns and shows campaigns that are in progress or completed across all client sites. The new dashboard provides an overview of recent campaign statistics and details including: campaign type, owner, duration / date, site(s), activity status, and actions.
Additional Fields for csv Sites Page Export:
Three new fields have been added to the sites page csv export feature, to help customers easily manage their sites billing and expiry dates.
The new fields are:
- Site Expiration Date
- Billing Date
- Billing Cycle
A new Data Filter indicator has been added to the devices column on the sites page to indicate if a data filter other than the default Show All Data has been added, at either the Global or individual site level.
Back to Sites button:
A new dedicated Back to Sites button has been added to The Endpoint Protection console in addition to the usual drop-down Back to Sites button, to help you easily navigate back up to the Global Site Manager console sites page. You can choose to use either option to go back to your Global Site Manager sites page.
Link to Product Training:
In the help menu you will now see an additional link called Product Training. When you click this link, you will be taken to the Partner Certification page. From here, you can explore the numerous Webroot® Partner training and certification links and courses.
Please click here for more details on this release.
PRODUCT UPDATE BULLETIN 38.5 - January 28th 2019
OVERVIEW
We’re pleased to announce a series of updates to our Console based on feedback we’ve received over the past several weeks. There are no functionality changes at this time, but we hope you love the enhancements we’ve made to the look and feel.The highlights of the release are:
- Site enhanced to improve page loading time to help accommodate a greater number of sites.
- Updated filter option so it appears on the right hand-side.
PRODUCT UPDATE BULLETIN 38.0 - January 8th 2019
OVERVIEW
The latest release of Webroot® management console offers a new look and feel, as well as enhanced functionality.
Updates include:
- New look and feel for the Sites page
- New DNS Protection and Security Awareness Training subscriptions page
- New guided setup for DNS Protection and Security Awareness Training
- New policy settings and site admin overview
- Improved performance, keycode export, and Downloads page
What to Expect:
As usual, no action is necessary on your part.
Management Console Update 37.0 - August 28th 2018
OVERVIEW
This Global Site Manager console release contains a series of updates and improvements.
The highlights of the release are:
- New Spotlight Tour
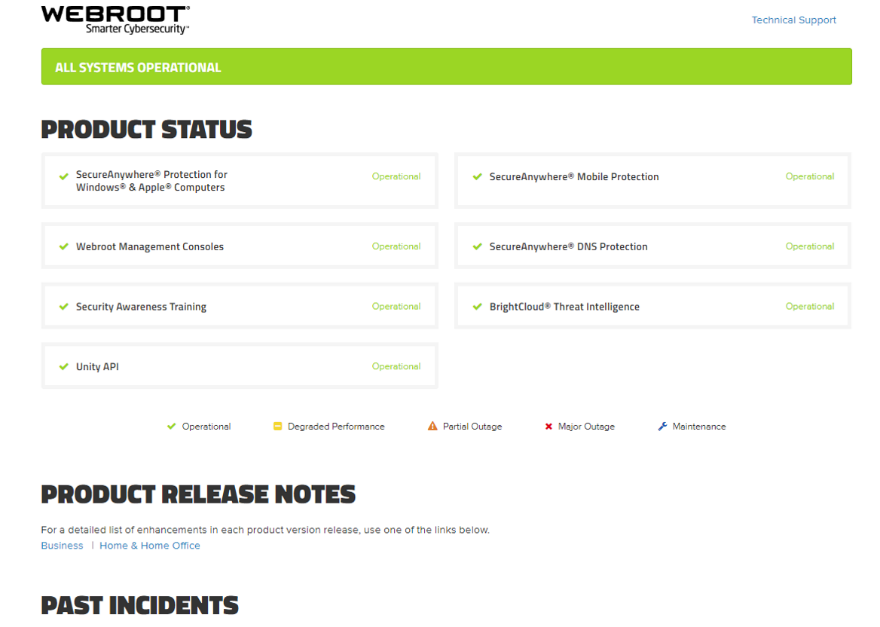
- New Service Status Page
- New Import Policy
WHAT TO EXPECT
No action is required on your part to take part in the new functionality. Simply log into the console and enjoy!
DETAILS
- Spotlight Tour
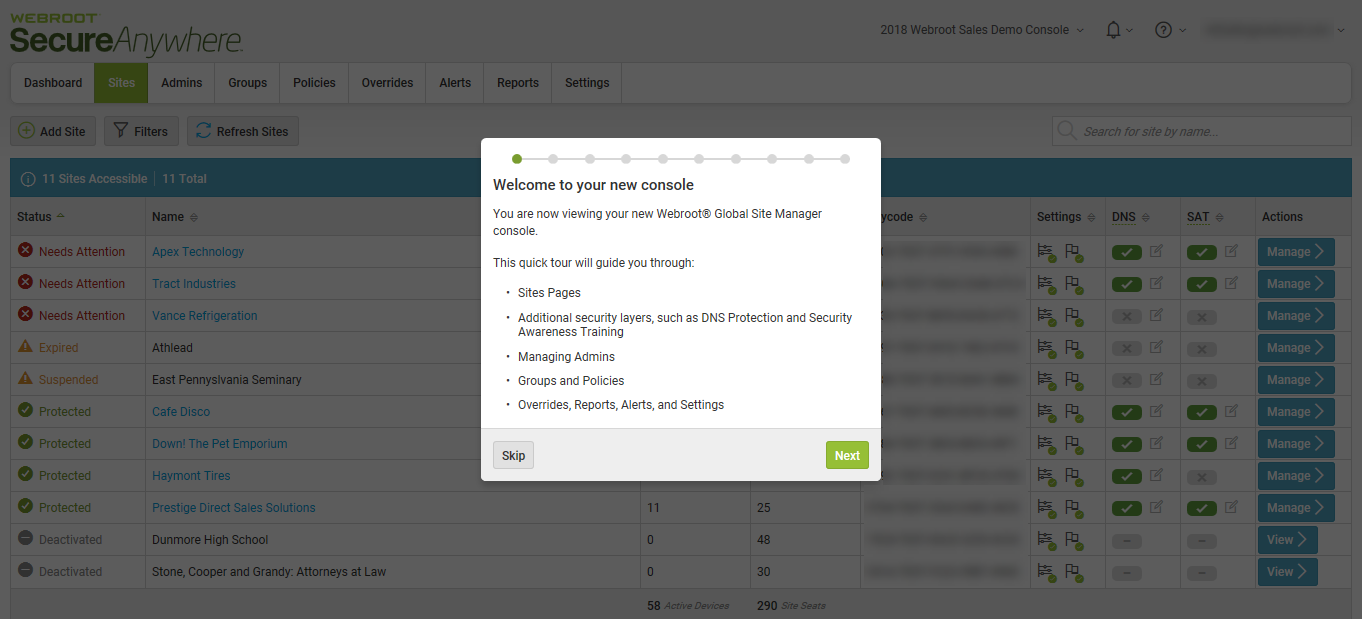
You can access the Spotlight Tour at any time from the Help menu.

- Service Status Page
We’ve added a link to the Help menu to open the new Service Status page. This page displays the current Service Status for all of Webroot® products and services.

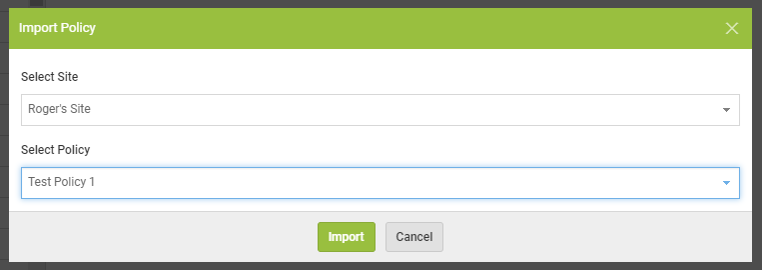
Import Policy
We have reintegrated the ability to Import a Policy in the Global Site Manager. You can find and use this functionality on the Policies page.
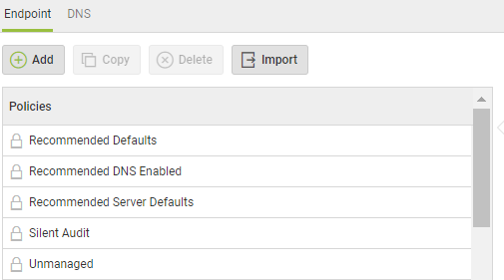
When you click the Import button, you will be asked to choose the site from which to Import a Policy. Once you’ve selected the Site, you can choose which policy to import.
Management Console Update 36.0 - May 1th 2018

OVERVIEW
This GSM Console release contains exciting new functionality for Webroot’s DNS Protection Business product.With this latest release we are extending the capability within the GSM console to apply custom policies at Group, Site, Global and Individual devices or IP Address for DNS-Protection. The DNS Protection Top Active Hosts Report can now be emailed and exported as a CSV file. We have also launched a new Subscriptions Page, so that you can initiate trials and purchase Webroot products from within the Global Site Manager console.
The highlights of the release are:
• New - DNS Protection Granular Policy Management
• New - DNS Protection Export and email to CSV the Top Active Hosts Report
• New - DNS Protection Display Device Agent information
• New - DNS Protection Display Blocked URLs in device list
• New - DNS Protection and Security Awareness Training subscriptions page for initiating trials and purchases
• New - DNS Protection (DNS)and Security Awareness Training (SAT) columns appear as default in Sites page with hover over click to subscriptions page
• New GSM - Quick Console switcher
• New EP Business - Run Blocked URL report for a period up to 90 days
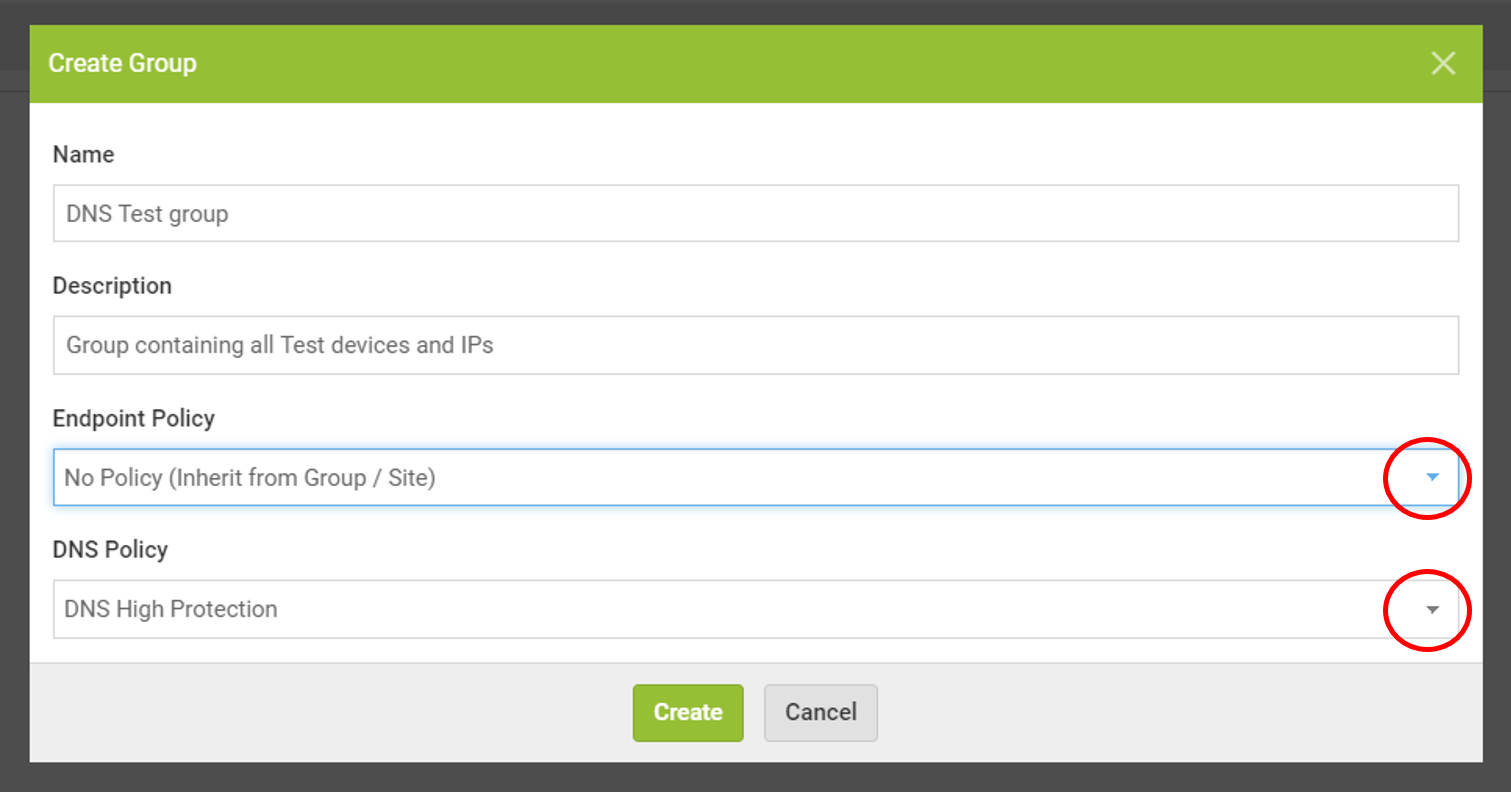
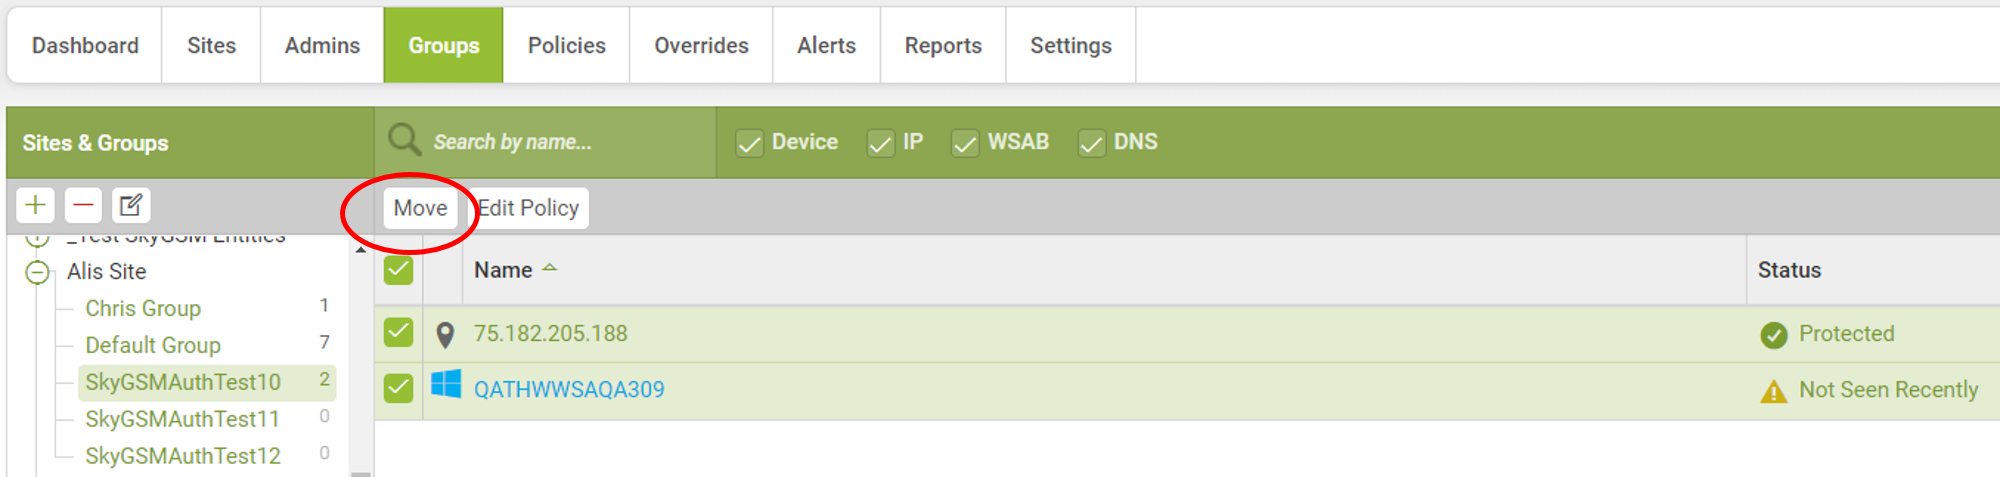
1. DNS Protection Group Management
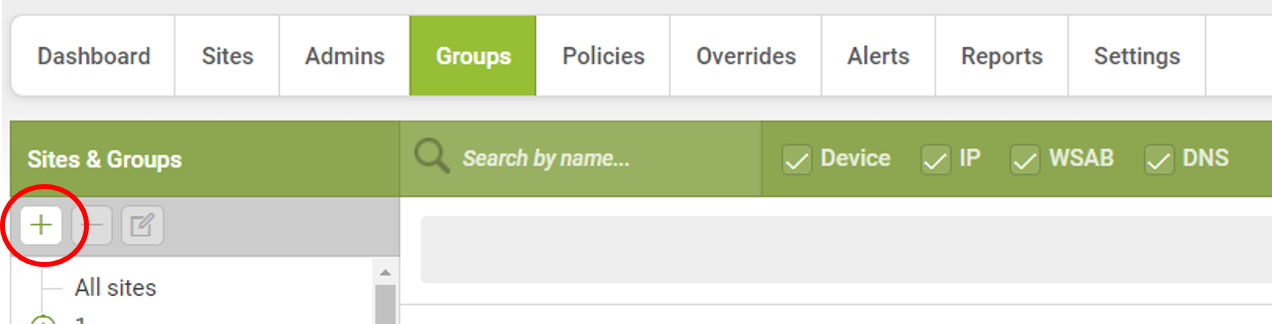
You can either choose to have the Group use the Site Policy or choose from the drop down list one of the Default Policies or Policies that you have previously created. You can do this for both the WSAB endpoints or DNS Protection devices and IPs. See example below:
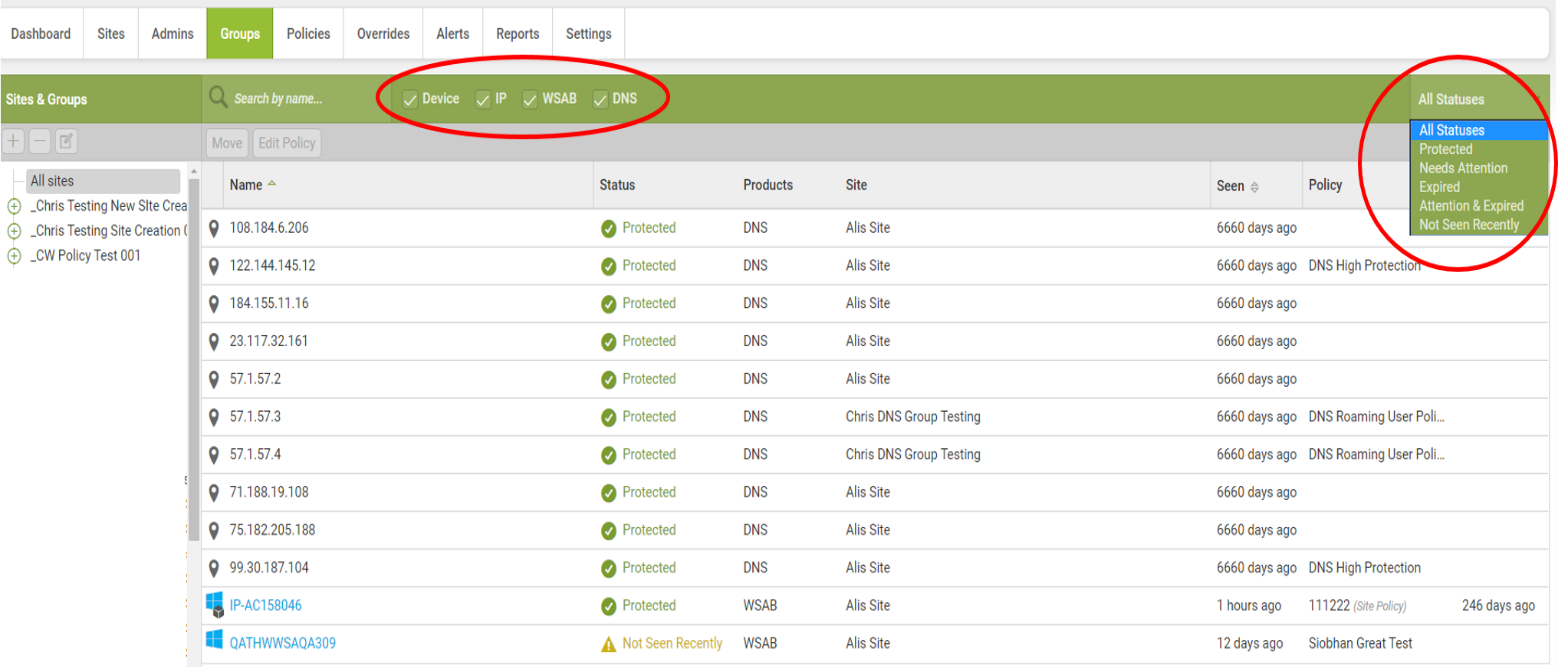
Once you have created a Group or Groups you will then see a list of all of your sites and by clicking on the + button next to each site this will show all of the groups that exist for each Site. You can choose to filter your view by clicking on any of selection items displayed.
To move a Device or IP address from one site Group to another Group within the same site you can first select the device/IP that you would like to move and then click on the Move button.
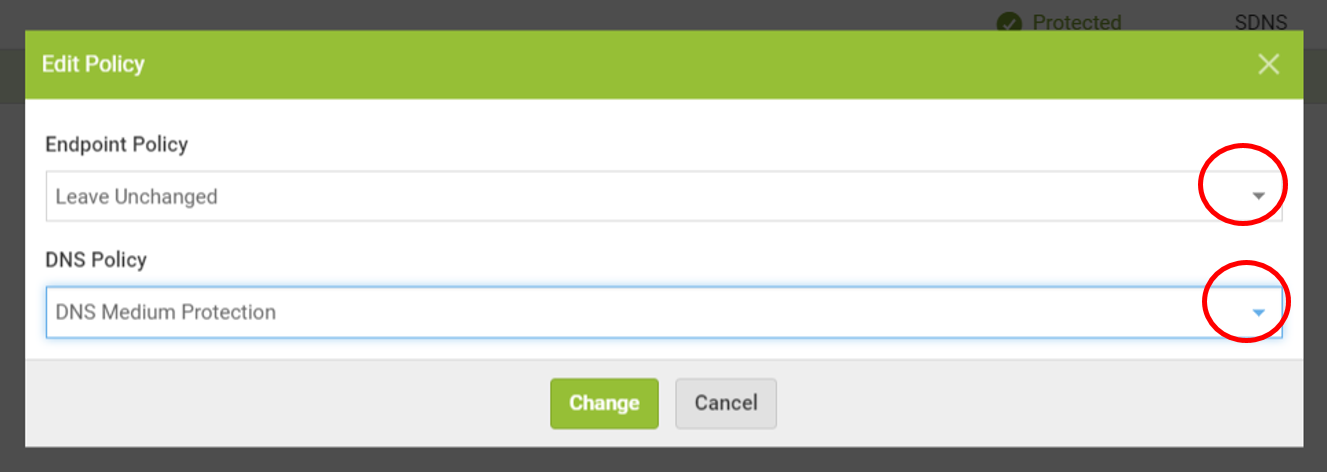
2. DNS Protection Granular Policy Management
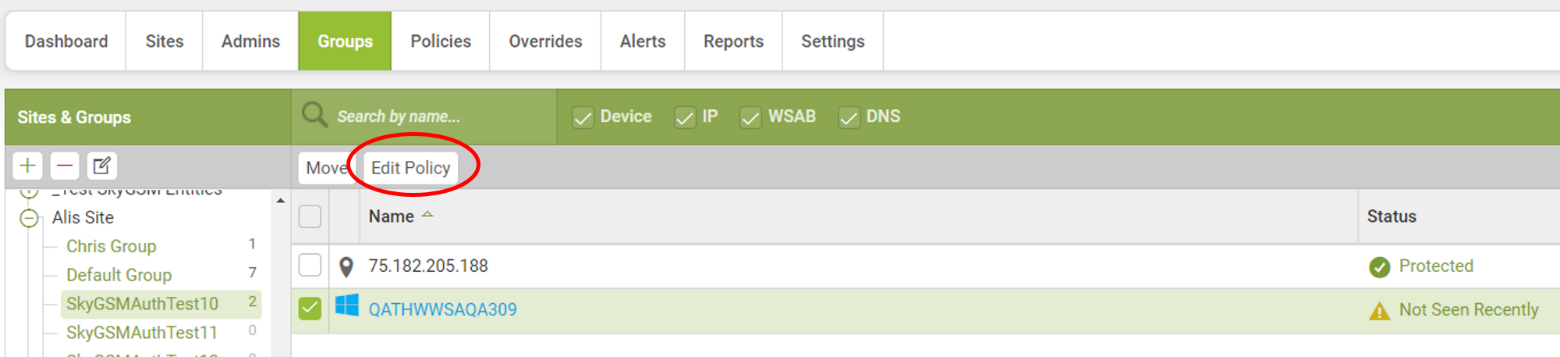
From here you can choose which Policy you would like to apply to that Group, Device or IP.
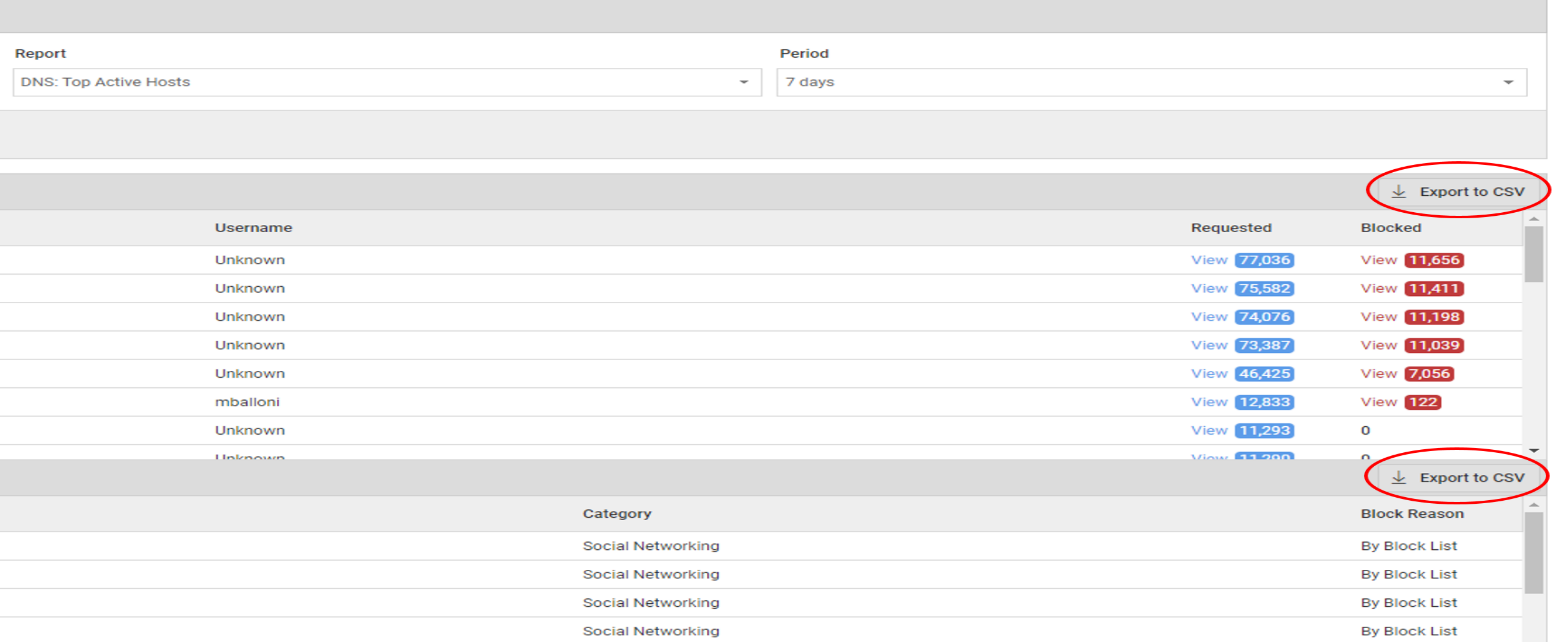
3. DNS Protection Export and email to CSV the Top Active Hosts Report
To use this new feature simply run the Top Active Hosts report as normal and you will see a new Option appear called Export to CSV.
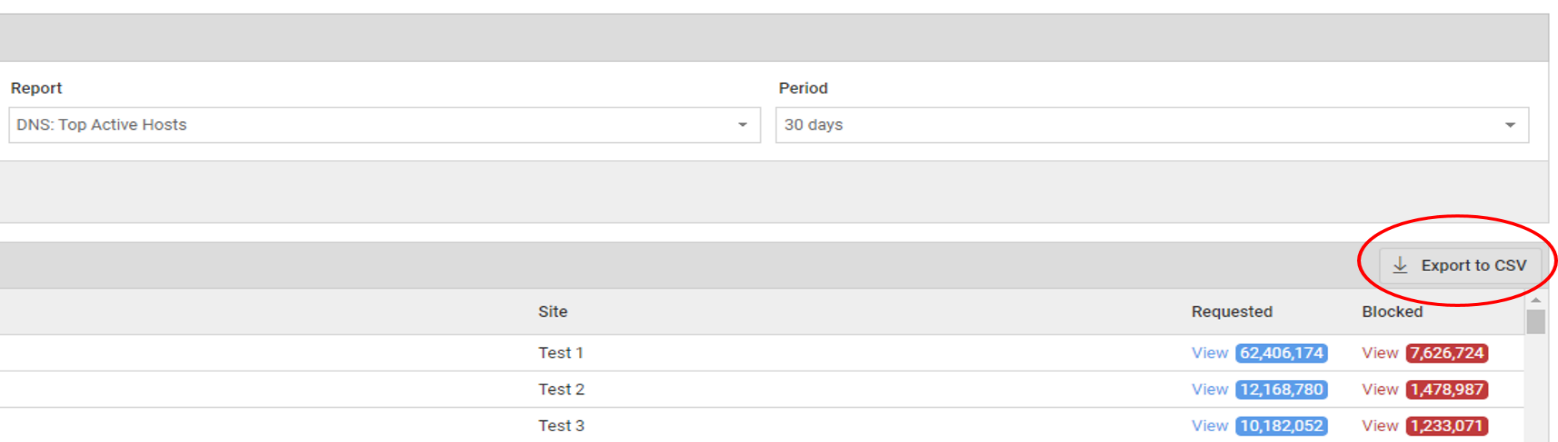
You can also export the drilldown data for the Blocked URLs as shown in the screenshot below:
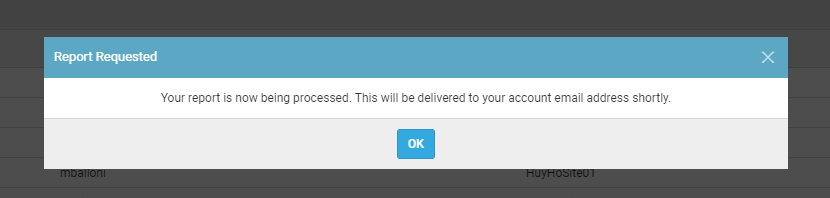
When you click on Export to CSV, you will see the following confirmation message and the report will be emailed to the address of the logged in user.
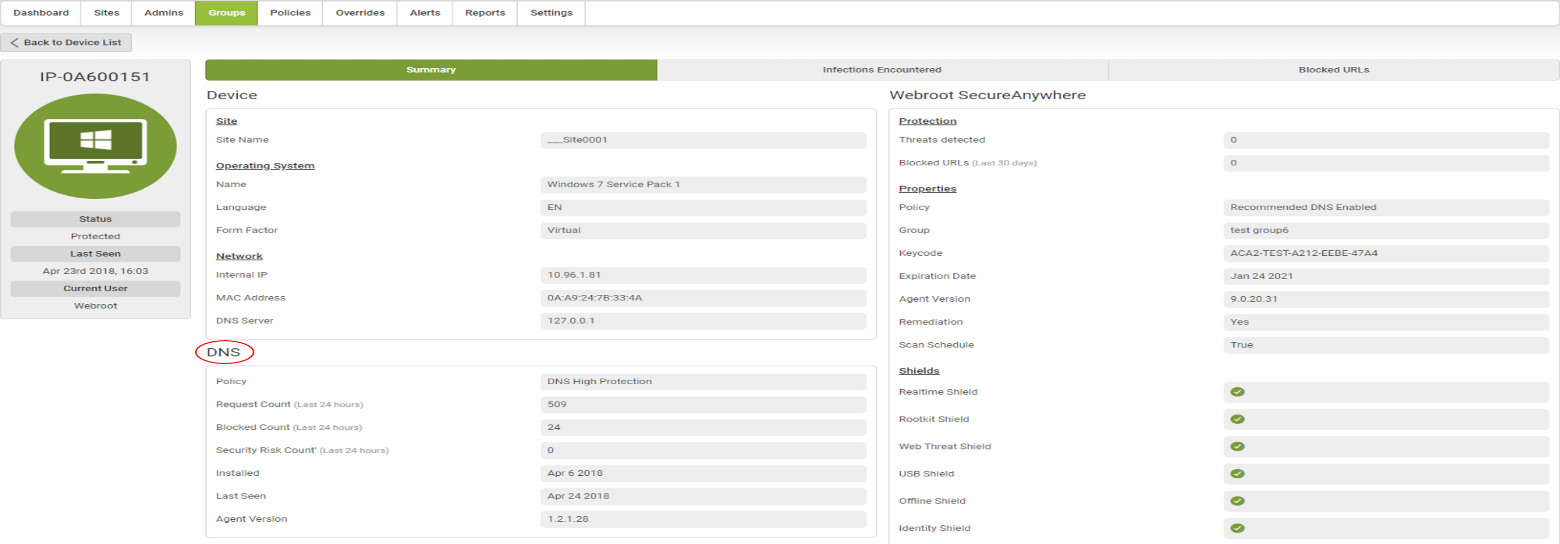
4. DNS Protection Display Device Agent information
From here this will display the following information:
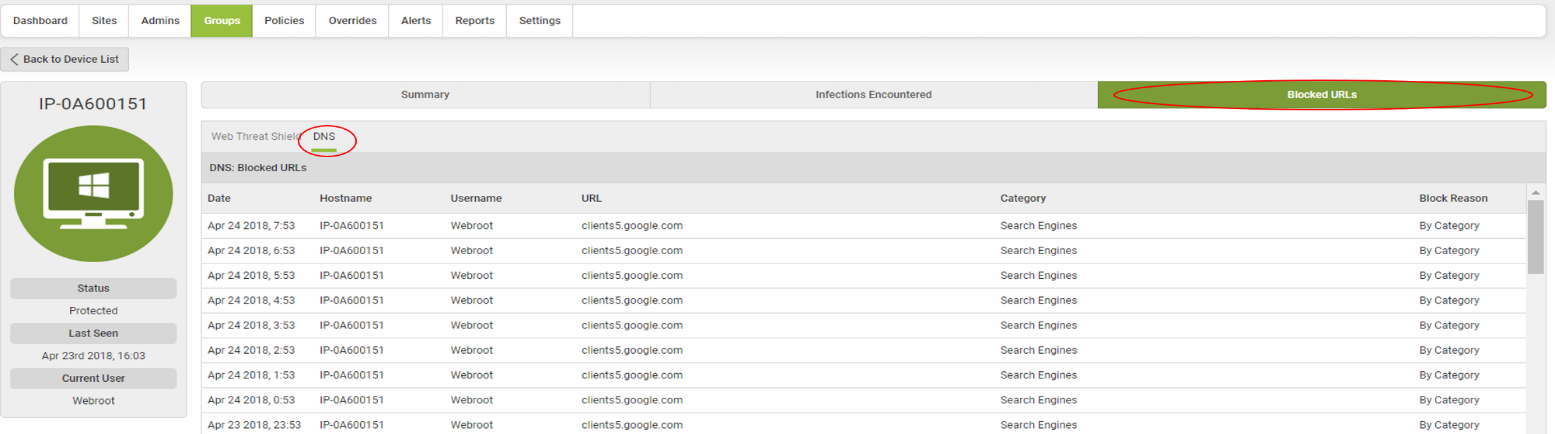
5. DNS Protection Display Blocked URLs in device list
To view this information, navigate to the groups tab where you can find the device/s that you want to view.
When you have found your device/s you can then click on that device where you will see a new tab open with the device information. If you click on the Blocked URLs tab you will now see an option to display the blocked URLs from either Web Threat Shield or DNS. If you click on DNS highlighted below this will display any URLs that have been blocked on that device by the DNS Protection Agent.
6. DNS & SAT subscriptions page for initiating trails and purchasing
The DNS and SAT columns will now appear on the sites page of all GSM consoles. If a Console user has not already enabled DNS, SAT or both on their parent key, when they hover over the columns they will get a pop up notification inviting them to click on the message for information.
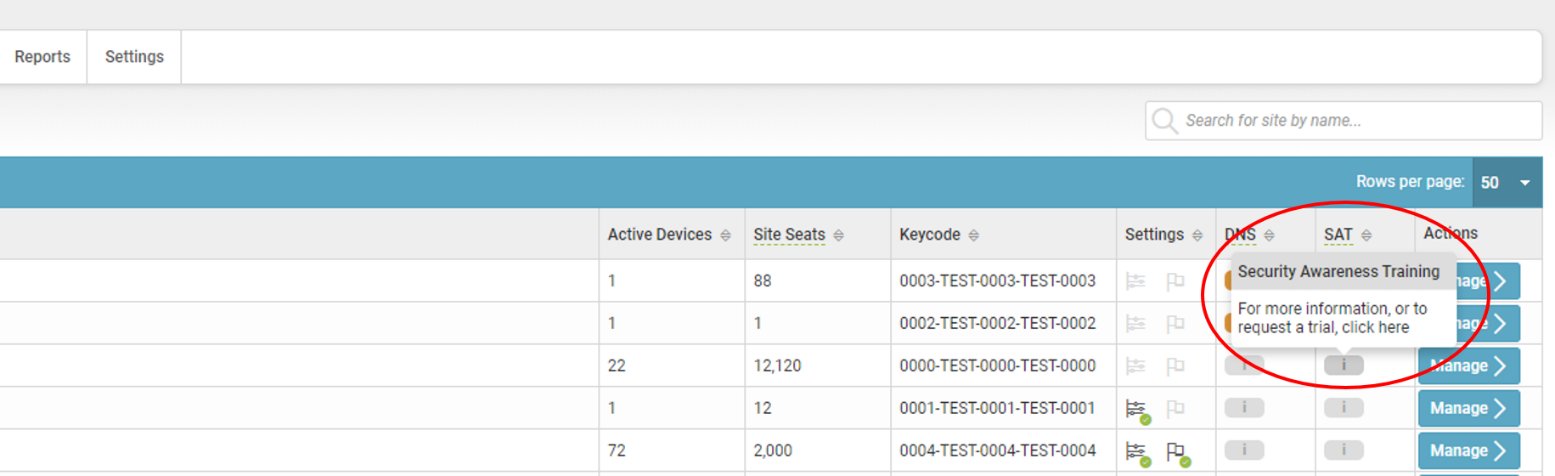
When a user clicks on this link they will be taken to the new subscriptions page where they will be displayed with an option to request a Trial or Upgrade/Renew if they are already running a trial or their licence key is expiring.

If you decide to Trial any of the DNS Protection or Security Awareness Training products by clicking on the Start Free Trial button, you will get the following pop up screen:
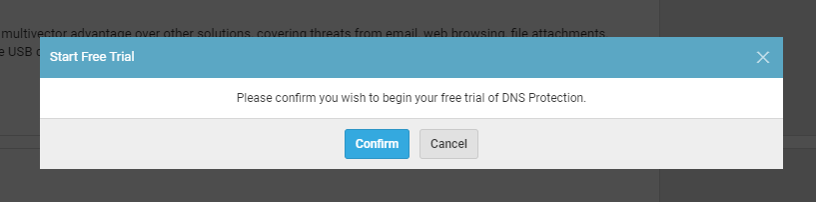
If you click on confirm you will see the following message appear:
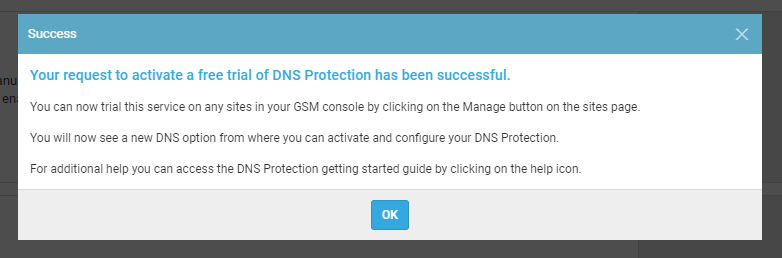
When you click on the Manage Button in the Sites page on any of your active site you will now see a new DNS or SAT Button or both depending on which product/s you have chosen to trial.
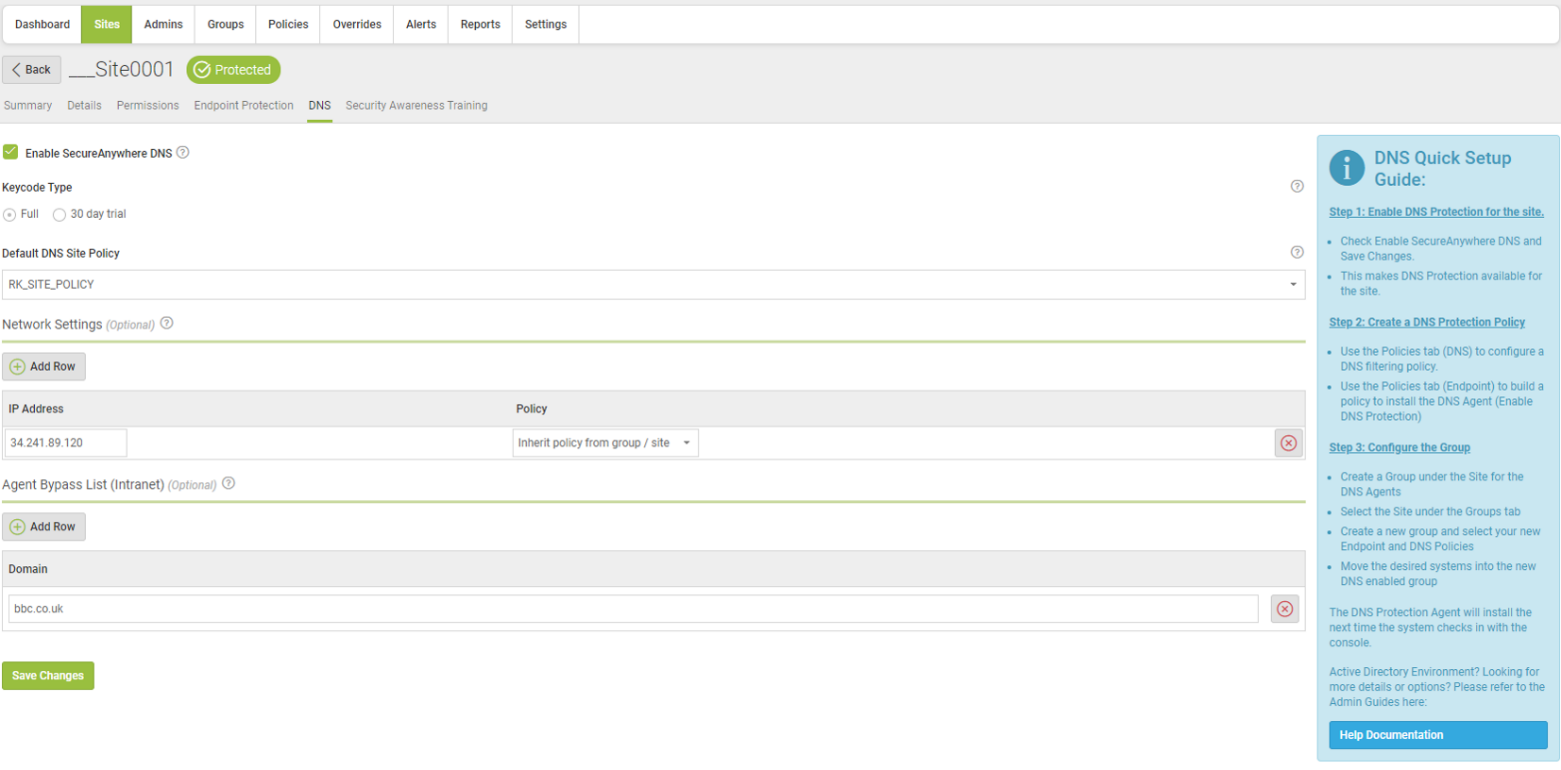
If you have chosen to trial DNS Protection and have clicked on the new DNS tab, you will see the following screen where you can then configure your DNS settings for your Devices and IP’s.
If you have chosen to trial Security Awareness training and have clicked on the new SAT tab, you will see the following screen where you can then configure your Security Awareness training settings by logging into the Security Awareness Training Console.
If you decide after your trial period that you would like to Upgrade your trial of either DNS Protection or Security Awareness Training, you can do this at any time during or after your trial by clicking on either the DNS or SAT column in your sites page, or by clicking on the Settings tab and then on the Subscriptions page.

You can then click on Upgrade/Renew and this will open another Window and display your purchase options.
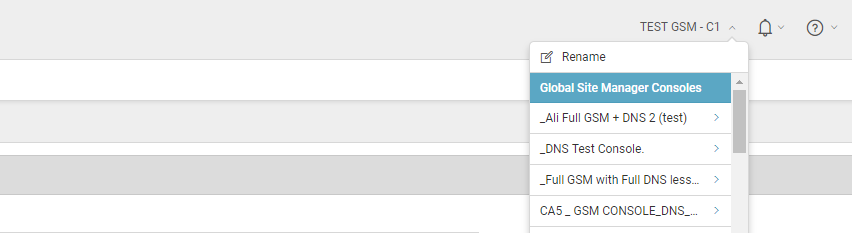
7. GSM – Quick Console switcher
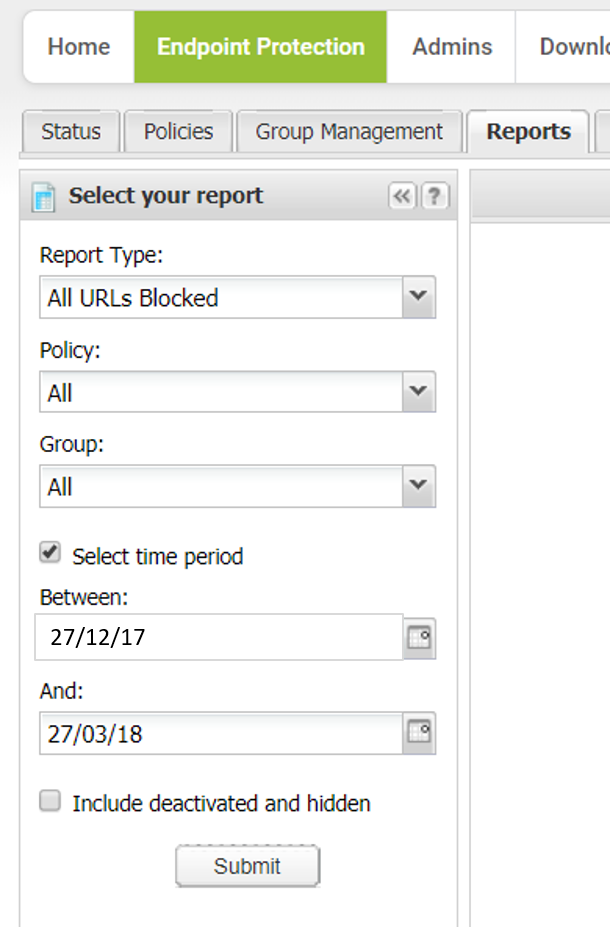
8. EP Business - Run Blocked URL report for a period up to 90 days
Management Console Update 35.0 - March 6th 2018
OVERVIEW
On March 6, 2018 we updated the Global Site Manager console with a fresh new look as well as new functionality.
Release highlights:
• New login and selection screen pages
• New look and feel across the console
• The ability to create and manage groups under the Groups tab, which has replaced the Devices tab
• The Global Settings tab has been replaced by individual Policies, Overrides, and Alerts tabs for quicker, easier access to essential management controls
• Enhanced display for mobile devices and tablets
• The Change and Rename console buttons can now be found by clicking the dropdown near the console display name in the upper right corner
• All documentation previously under the Help tab can now be found under the question mark icon, in addition to the option to raise a new ticket with support.
WHAT TO EXPECT
There is no action required on your part. The console will automatically update starting the morning of March 6, 2018.
DETAILS
1. New Login and console selection screen pages
The look and feel of the login page has been updated.
Previous Login Page

New Login Page

The language selection dropdown is now located at the bottom of the screen, rather than in the upper right corner of the screen.
New Create Account page

If you only have one console, you will be taken directly to the Sites tab of your console.

If you have more than one console, you will be taken to the console selection screen.
Previous Console Selection Screen

New Console Selection Screen

2. New look and feel
All screens and tabs in the Global Site Manager console have a slightly different look and feel from previous versions. Below are some examples from the sites and manage sites pages.
Previous Sites Page

New Sites Page

Previous Manage Sites Page

New Manage Sites Page

Tab Panels
All tab panel styling has been changed to plain text, with the selected item underlined:

Forms
Form layouts have been changed from horizontal (label on left, input on right), to vertical (label on top, input underneath) – except for singular checkboxes, which appear inline (checkbox left, label right).

3. Group Management in Global Site Manager
The ability to create and manage groups for your endpoint devices is now available in the Global Site Manager console. This functionality was previously available only by drilling down into the endpoint console for each site.
You can now manage all of your groups and the devices within those groups by clicking on the new Groups tab that has replaced the Devices tab.
If you have previously created groups from the endpoint console, these will all now appear under the Groups tab in your Globa Site Manager console.

You can then add, delete, edit and assign/move devices to a group. To view all of the devices in a group, select the group you want to view and the devices will appear on the screen. You can also search for a specific device or filter by status.

4. Global Settings Improvements
The Global Settings tab has been replaced by a separate tab for each function that previously resided under this tab. You will now find individual tabs for policies, overrides and alerts in the main menu bar for easier, one-click access.
Previous Global Settings Tab:

New Policies, Overrides and Alerts tabs:

New Policies Main Toolbar Tab

The policy selections are now available in a dropdown list to improve display on small screens and mobile devices. Also the “Save Draft Changes” and “Promote Draft Changes to Live” options have been removed. Any changes made and saved will be automatically promoted to live and sent to any devices using that policy.
Previous Save Draft Changes and Promote Draft Changes to Live Screen:

New Save Policy Changes Screen:

5. Enhanced Mobile, Small Screen and Tablet Display
This Global Site Manager release includes enhanced display for mobile devices and tablets. For mobile and small screen resolutions, the navigation bar disappears and a “hamburger” menu appears in the top right (circled in red).

Clicking on this icon slides the navigation in from the left, while presenting the option to close with an “X” icon (circled in Red).

Any navigation items exceeding the nav bar width are now automatically lifted from the bar and dropped into a new “More” dropdown option (circled in Red).

6. Change and Rename Console
The name of the console currently logged into was previously represented in the navigation bar along with separate buttons to change and/or rename the current console.
Previous Console Name, Rename and Change Screen:

The console name remains in the upper right corner, but the change and rename options are now in a dropdown menu accessed by clicking the console name.
New Console Name, Rename and Change Screen:

Mobile and Tablet Display
When in the mobile-friendly view, the console name and dropdown options will disappear from the header. Instead, they will be displayed at the top of the left fold-out menu.

DNS Protection Console Update 3.10.0 - November 20th 2017
New Domain Bypass functionality for DNS-P customers now available within GSM
When using the agent, all valid external (A) record DNS requests will be answered by the DNS Protection servers. This becomes a problem when an answer is expected from an internal DNS server. Admins can now bypass known internal domains for specific sites/customers using the exact FQDN or using wildcards so that access to internal drives, sharepoint, etc. is not blocked for their users.
PRODUCT UPDATE BULLETIN GSM CONSOLE 32.0 - July 25th 2017
OVERVIEW
The Global Site Manager console is designed to make managing multiple sites easier. At the end of July, we’ll be adding even more functionality for that purpose, including:
- Personalizing block pages for the Web Threat Shield
- Enhanced device management details
- Mac® policy management
WHAT TO EXPECT
Console updates will happen globally. No action is required on your part, and we do not anticipate any end user impact.
Based on customer feedback, we will be enabling policy management for Mac endpoints in two stages. The first step will enable configuration changes in the GSM console, while the second will update endpoints to respond to the new policies. This approach will allow administrators to make policy decisions based on available options and communicate policy updates to their customers in advance of the changes. The timing of this second step will be based on customer feedback, and we will notify you a week prior to the update.
DETAILS
Custom Block Pages
When a user navigates to a page that has been identified by Web Threat Shield as malicious, the browser blocks the page and displays a “block page” explaining why. This release will allow admins to personalize this block page with their logo and contact information via the GSM console. The figure below shows the difference between a standard block page, and a personalized one.
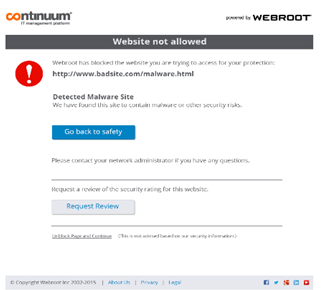
To personalize the block page, navigate to Global Settings Web Overrides Block Page Settings
On the resulting page, you can upload a new logo and edit the contact information below the block message. The content editor will allow basic formatting.
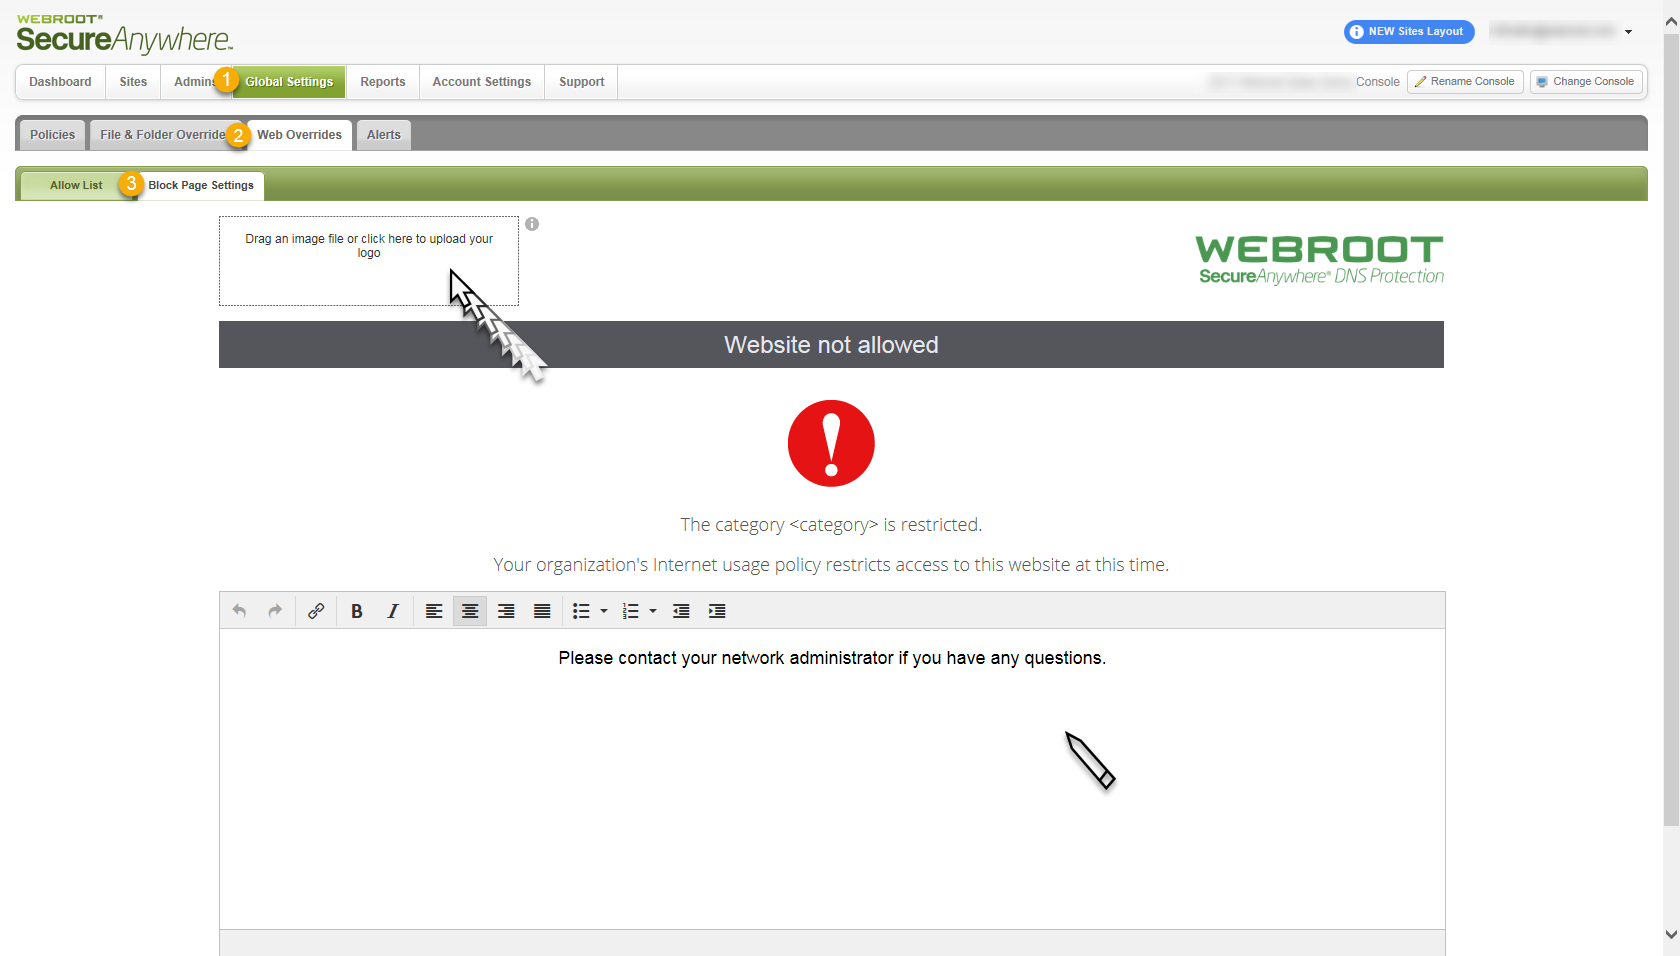
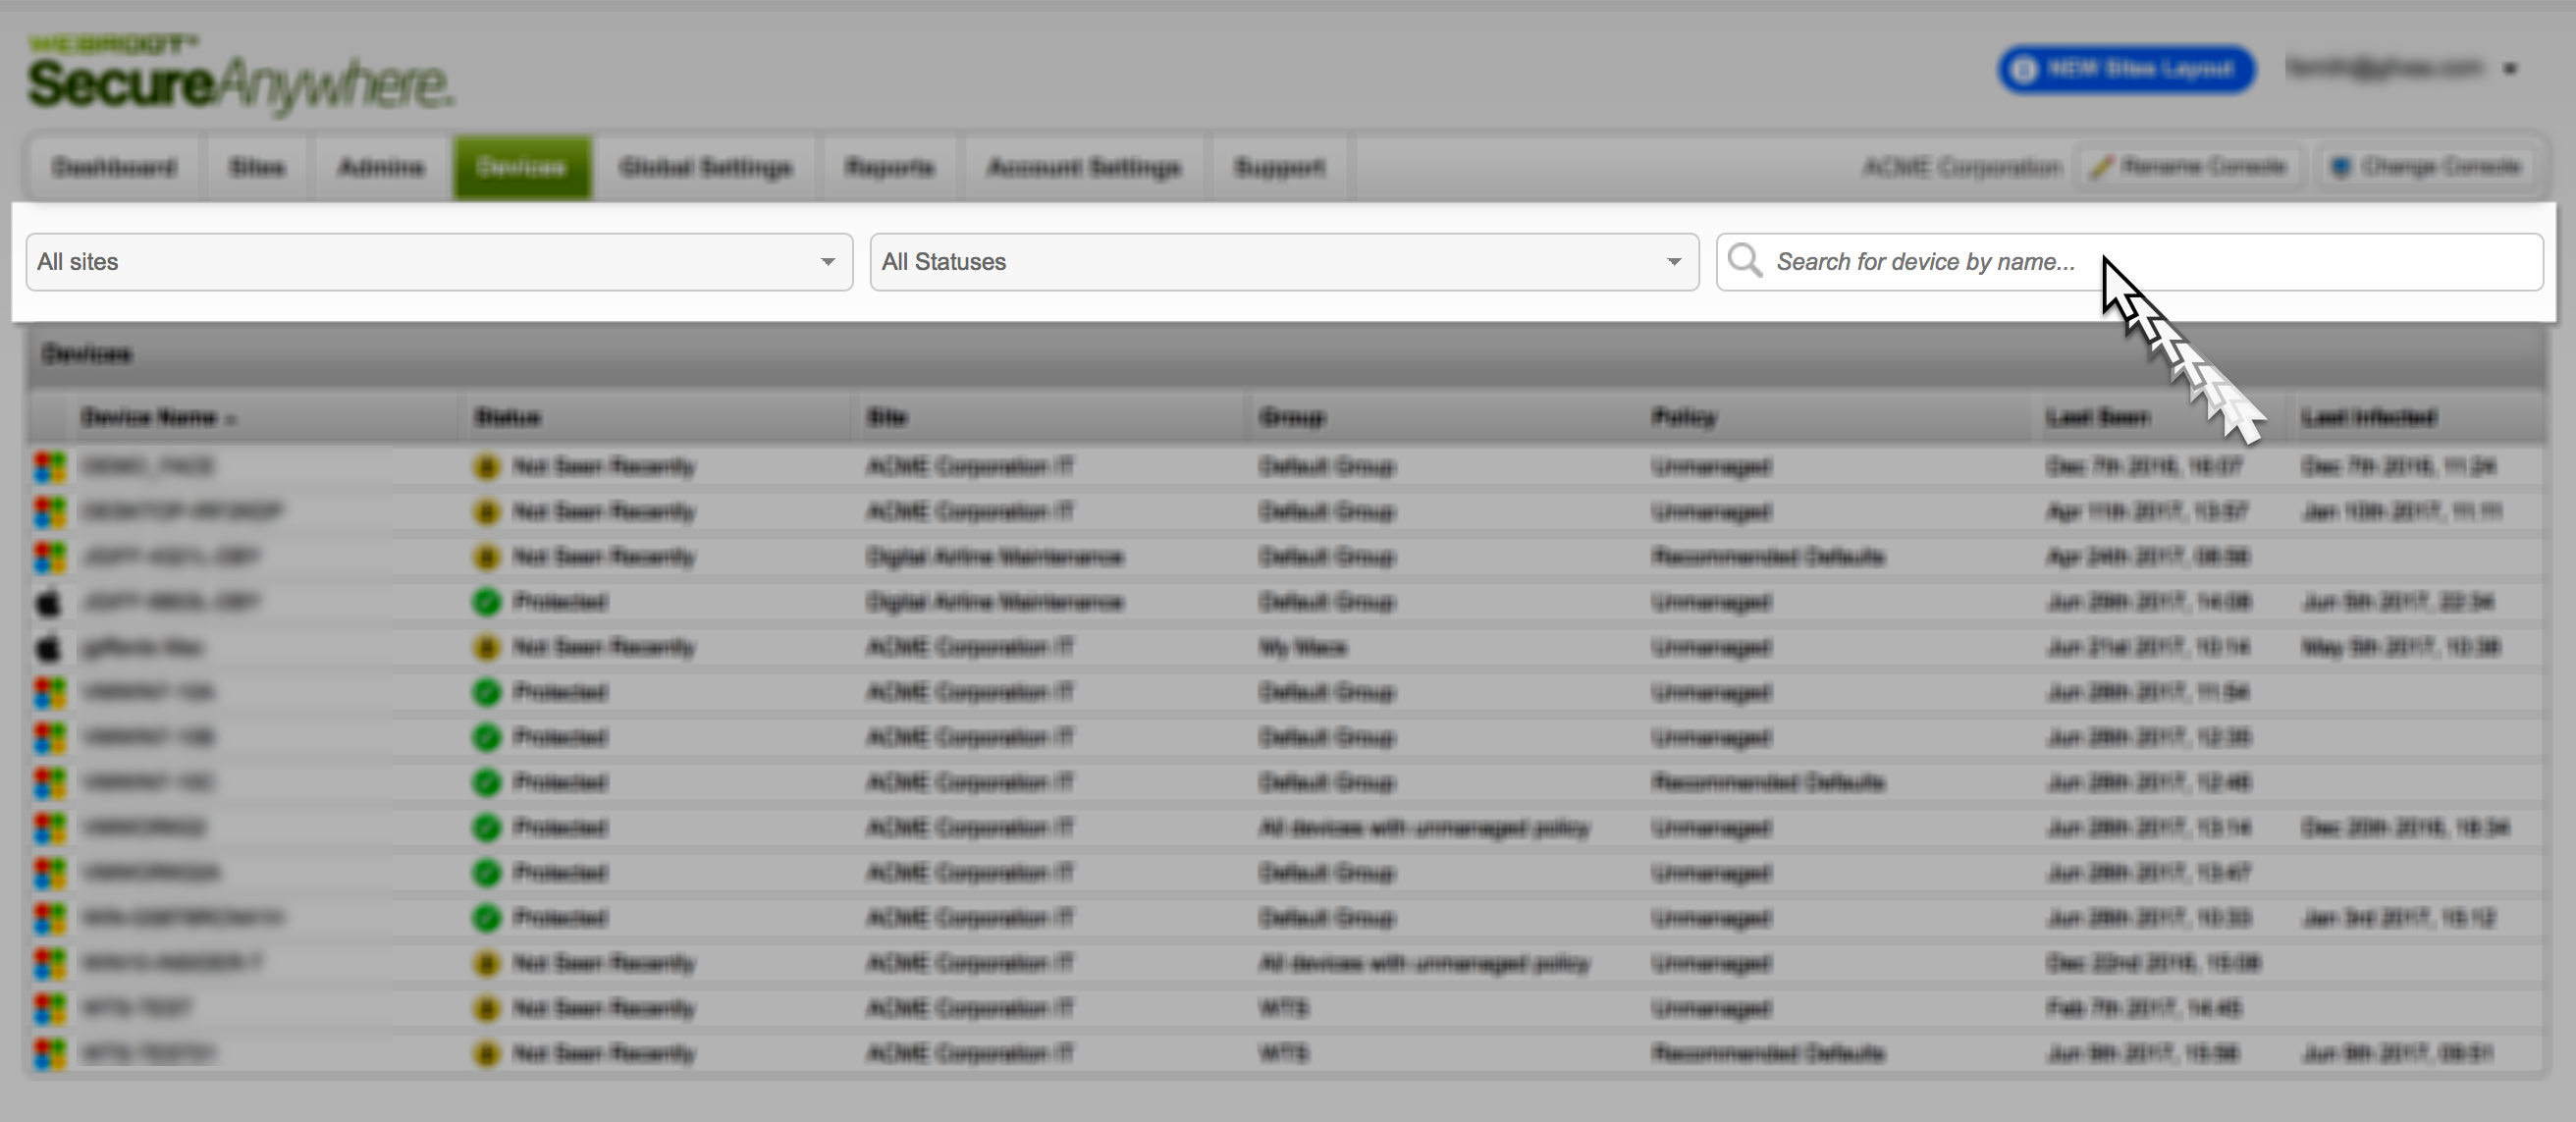
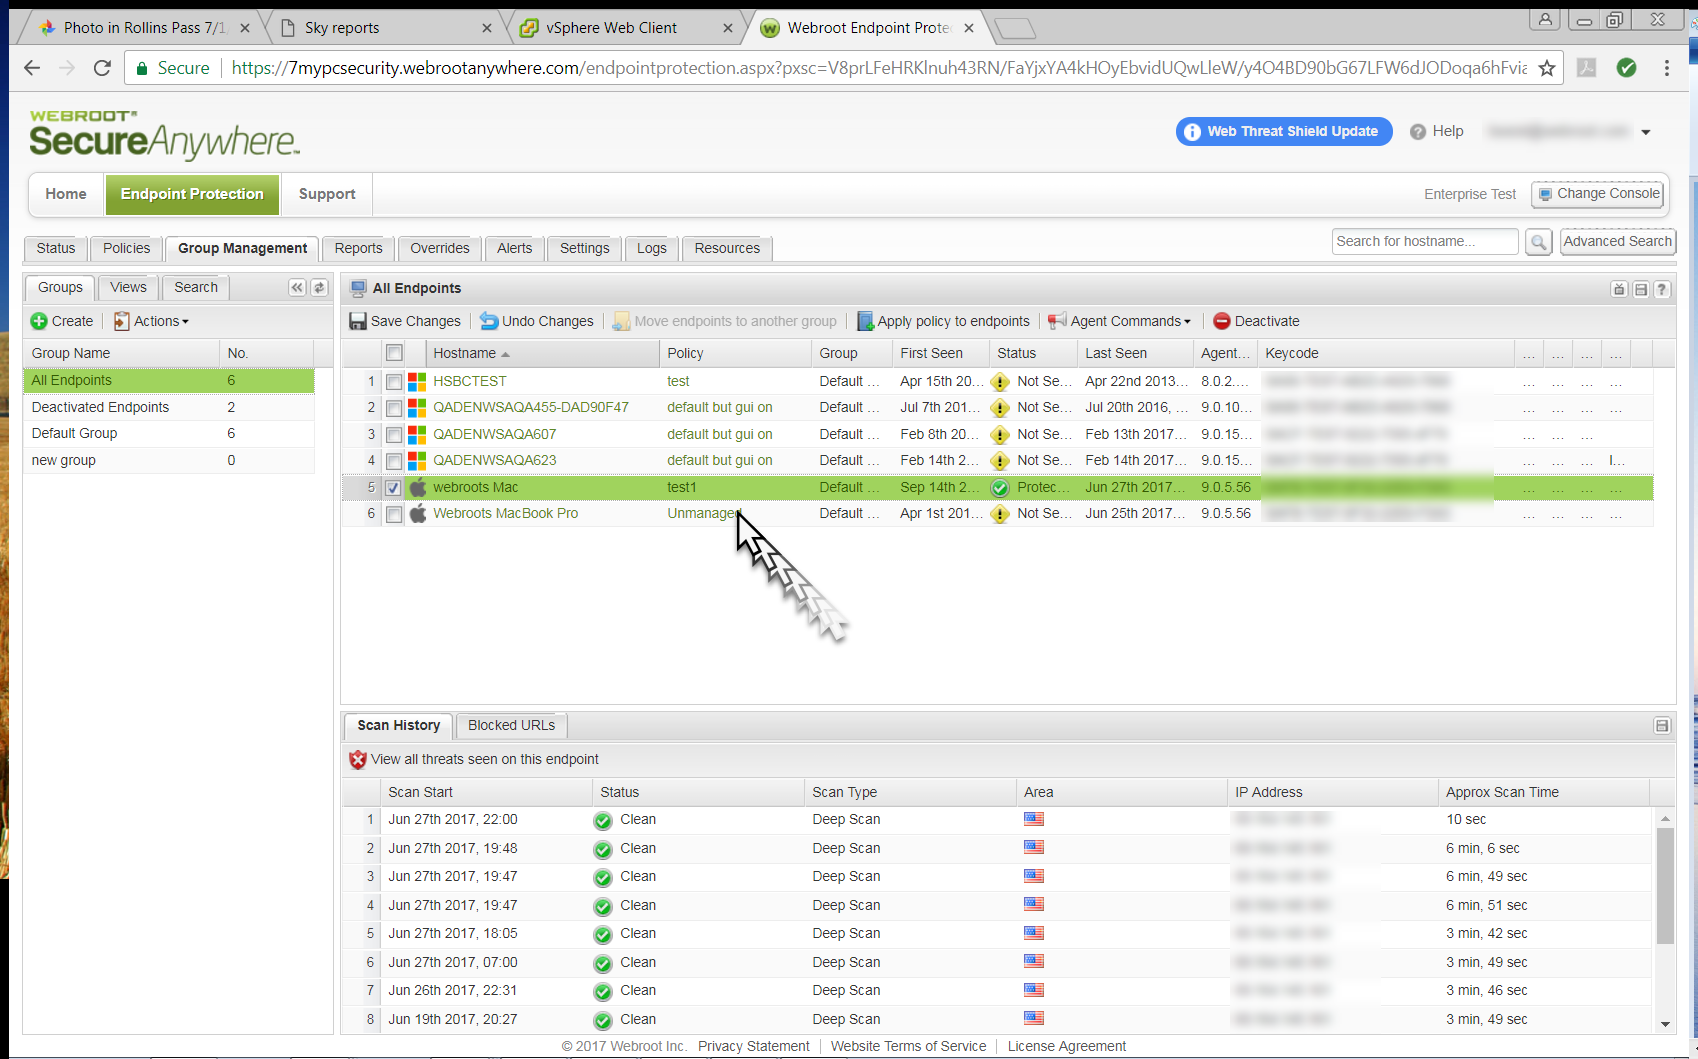
Device Management
The new Device Management functionality gives admins an overview of all devices across all sites, and can be easily filtered by Site or Status. You can now send a clean up command to each device, restore infected files from the quarantine and whitelist files from the GSM console. To access this new functionality, simply go to the new Devices tab in the GSM.

Based on customer feedback, we have added a table which provides a quick overview of device status, making it easy to see which devices have not reported in within the last 7 days. Additionally, admins can use wild card searches to find specific device hostnames.
By clicking an individual device, admins can view additional device-specific details, such as summary information, infections encountered, and URLs that have been blocked by Web Threat Shield and DNS Protection, if enabled.

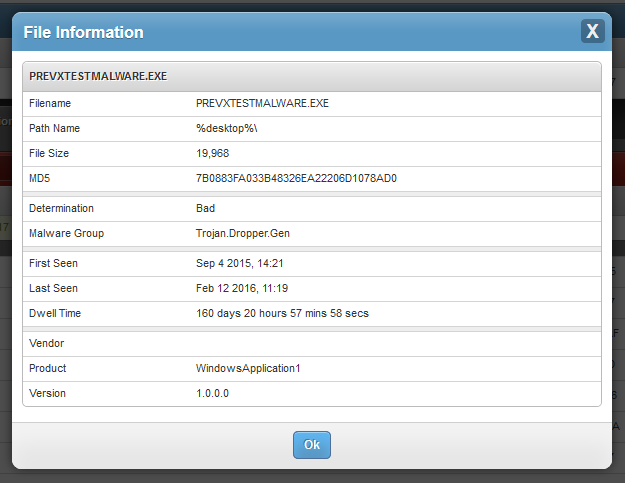
The Infections Encountered tab provides high-level information, including file name, path information, the malware family to which the infection belongs, and the date and time it was last active on the device.
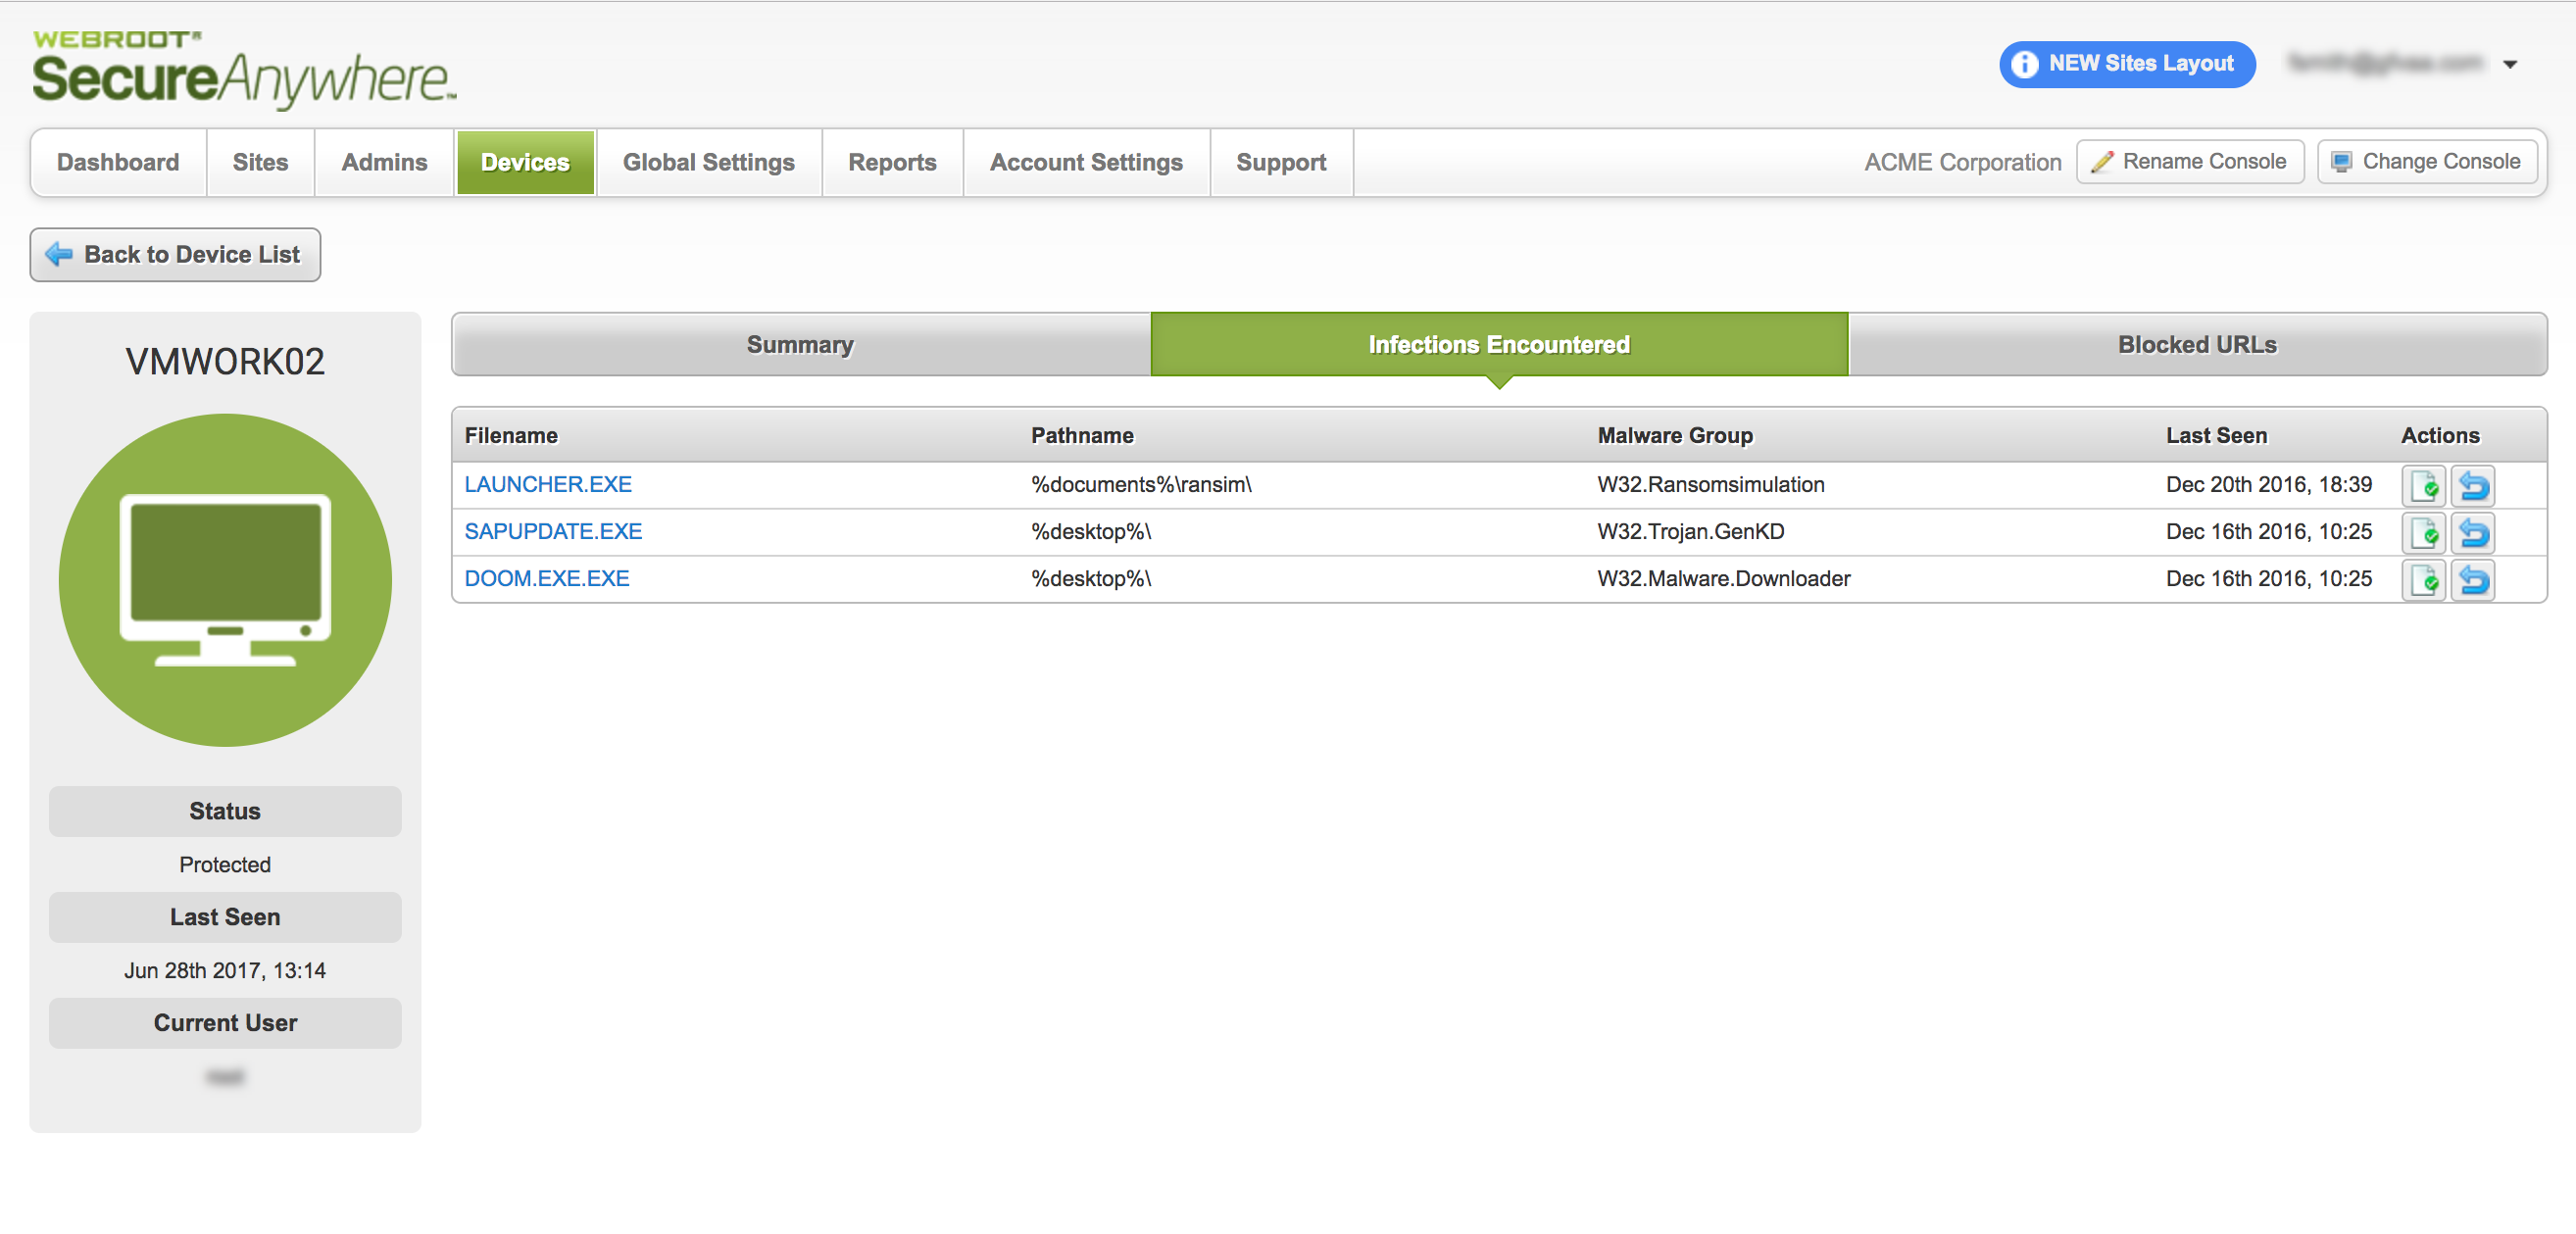
You can see additional information about an infection, such as dwell time, by clicking its name.

Managing Mac Policy
Once Mac policy management is enabled, admins will notice changes in two key areas:
- Policies
- Group Management

Once you have configured Mac policies, you must assign Mac endpoints to the new policy via the Group Management Tab. By default, Macs will be assigned to an “Unmanaged” policy.
For more specific directions on configuring Policies, please see our Help article on the topic.
https://docs.webroot.com/us/en/business/wsab_endpointprotection_adminguide/wsab_endpointprotection_adminguide.htm#ManagingPolicies/ImplementingPolicies.htm%3FTocPath%3DManaging%2520Policies%7C_____1
PRODUCT UPDATE BULLETIN 31.0 - June 14th 2017
OVERVIEW
At the beginning of June, we will be enhancing our Global Override capabilities to include Web Overrides in the Global Site Manager (GSM) and Standard Endpoint Protection consoles. This will allow administrators to override the default blocking behavior in our Web Threat Shield protection by adding specific websites to an Allow list.
WHAT TO EXPECT
This change will take place in early June 2017. No action is required of you, and no outages are anticipated. The only changes your end users will see will be a direct result of configuration changes made by your using this new capability.
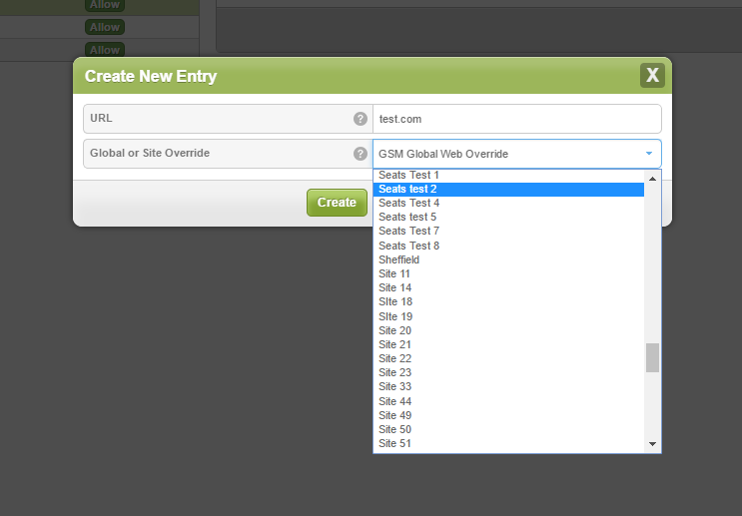
New Web Override Capabilities for Web Threat Shield
To access the new functionality from the GSM console, navigate to Global Settings > Web Overrides, then click the Add button on the Web Overrides page.
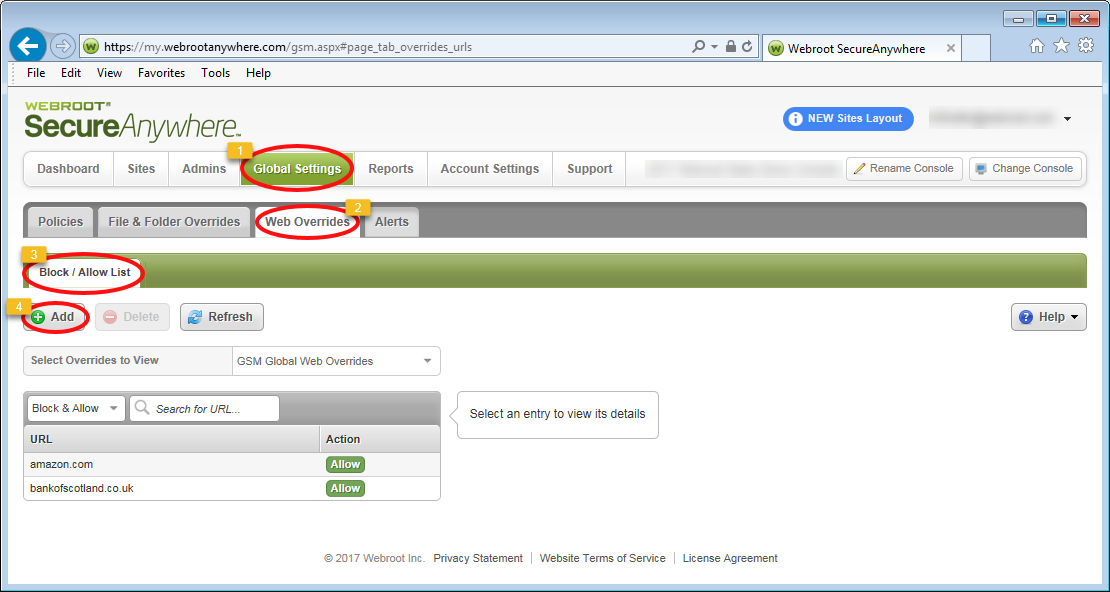
On the subsequent Add page, complete the form
- Add the domain for the URL you wish to allow. No need to include the http://, https://, or www prefixes.
- Select whether you want this to be a global web override for all sites, or for an individual site.
- Click Create.
This action will override Web Threat Shield’s default blocking behavior.
To access the new functionality from the Standard Endpoint Protection console, you will follow similar steps. Choose the site for which you would like to create a web override, then navigate to Overrides > Web Overrides. From the Web Overrides page, click Create.
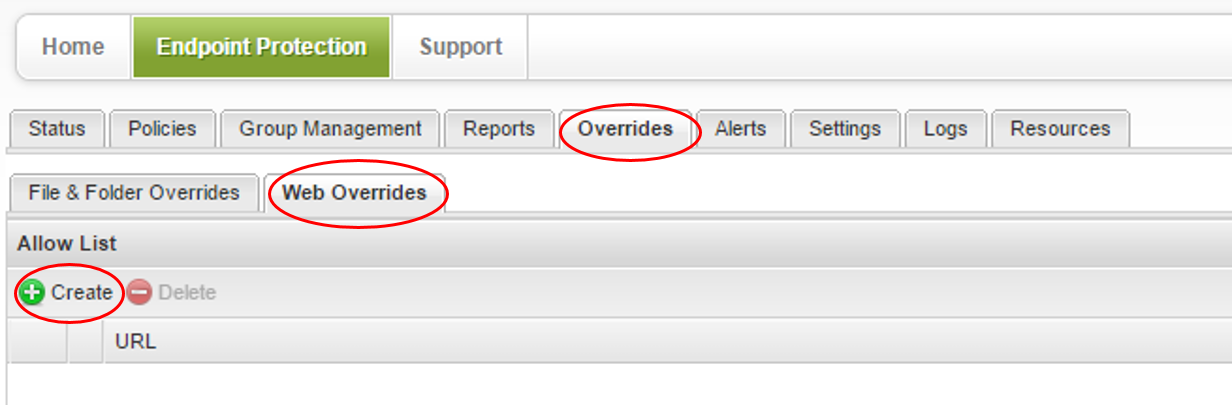
On the subsequent Create page, complete the form:
- Add the domain for the URL you wish to allow. No need to include the http:// or https:// prefixes.
- Click Save.
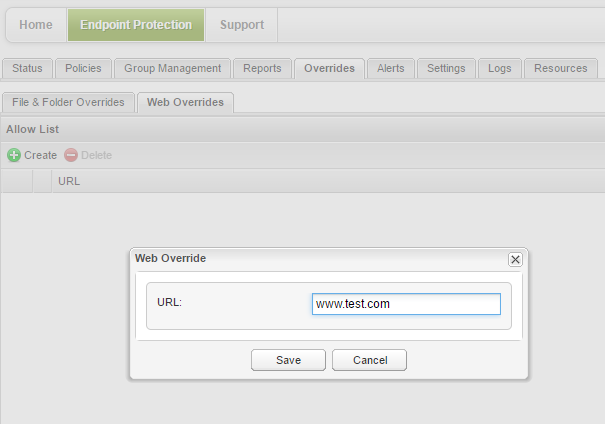
This new web override will now apply ONLY to this particular site. To create a global web override for all sites under management, please use the steps described above for the GSM console.
Admins can also create web overrides from the Group management and Reports page by selecting the Blocked URLs tab or report.
PRODUCT UPDATE BULLETIN GSM CONSOLE BUILD 30.0 - May 15,th 2017
OVERVIEW
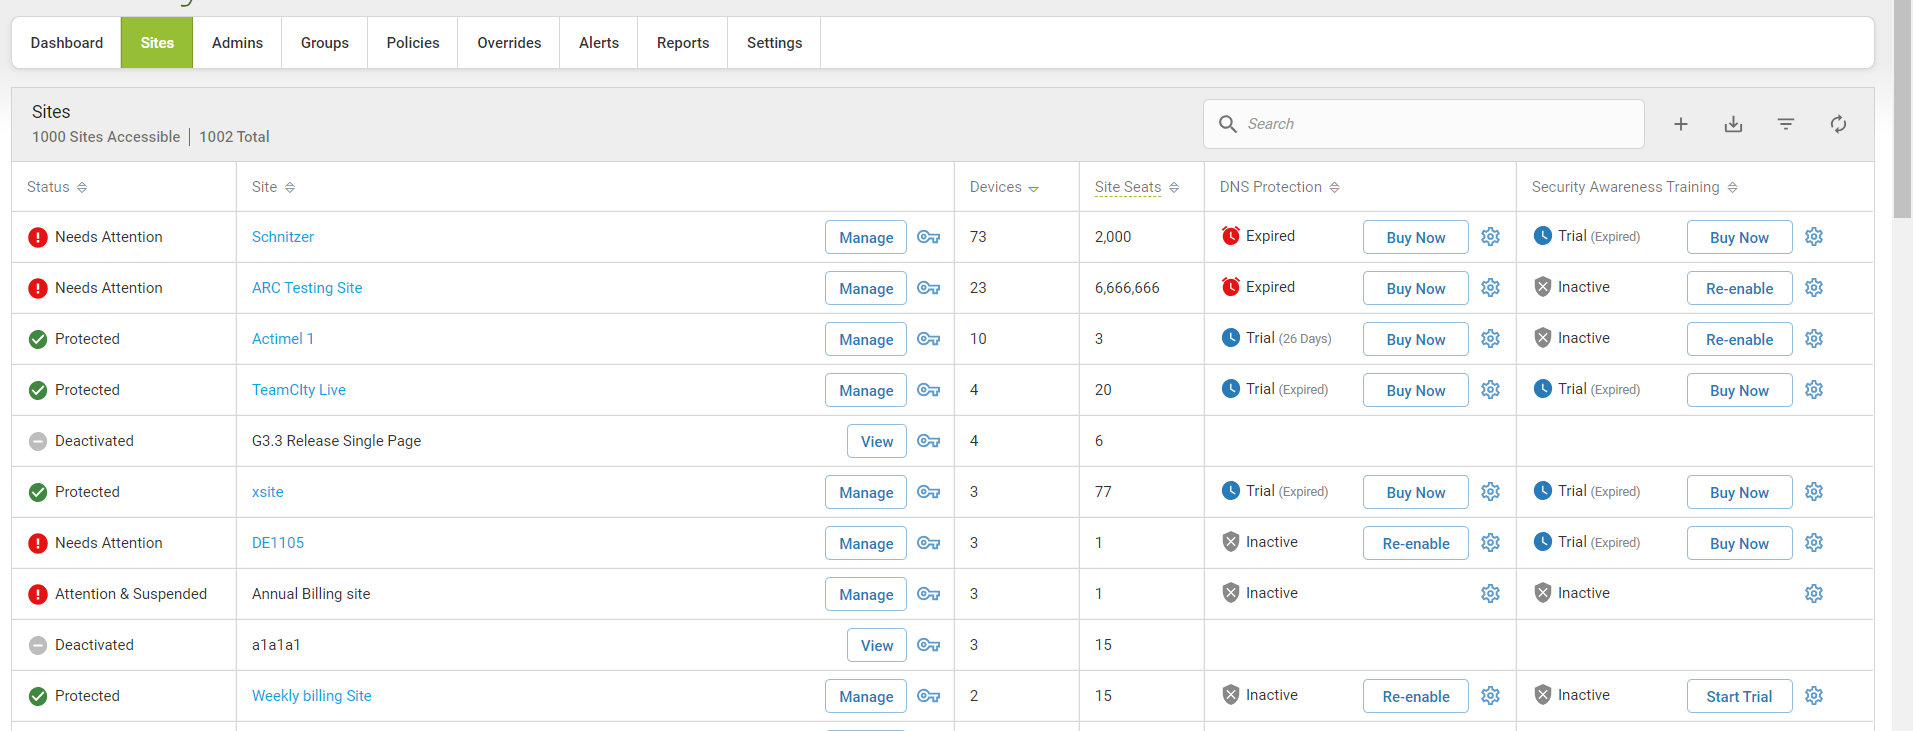
We will be releasing a small-scale redesign of the Global Site Manager console (GSM) to improve user experience, based on feedback from our current administrators. The new Sites page has been available to try since the end of March, and will become the standard layout starting May 15th. The new layout is designed to surface key management information on a single, intuitive dashboard, rather than requiring you to drill down to find the details.
We’ve also added two new columns, Group and Policy, to the Agent Version Spread report. Details are at the end of this bulletin.
WHAT TO EXPECT
New Sites Pages
The current Sites page in the GSM looks like this.
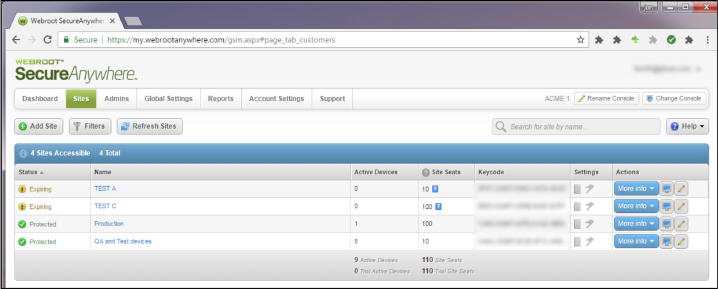
On May 15th, the option in the Actions column will change to this.
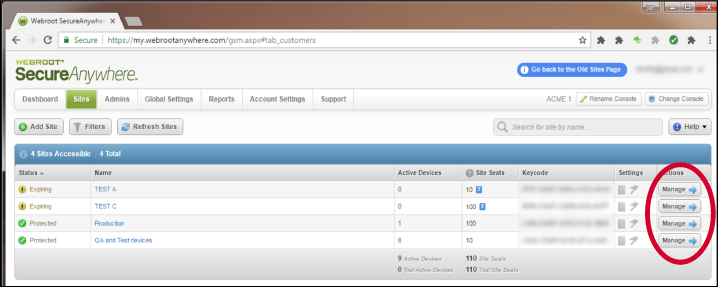
When you click Manage, the new interface will look like this.
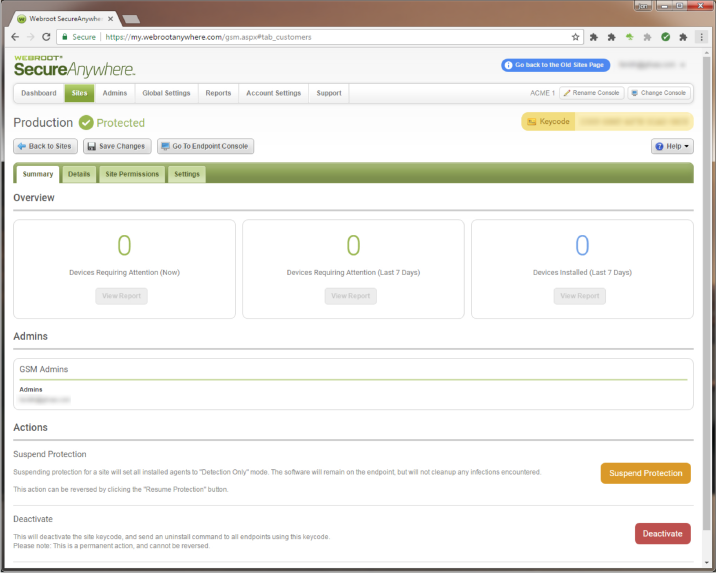
This is very different from how it looks today.

The blue button in the upper right corner will also be updated on May 15th. Rather than allowing administrators to toggle between the current Sites layout and the redesign, it will take them to a new Manage Site tutorial.

The guided Managed Sites tutorial highlights key changes and new features. It will be available in all supported languages.
New Group and Policy Columns
We have added two new columns, Group and Policy, to the table below the site-level Agent Version Spread report (shown below).

PRODUCT UPDATE BULLETIN GSM CONSOLE BUILD 3.4.0 - April 3,rd 2017
OVERVIEW
In our next release, we will be providing a variety of updates across our platform. As a no-cost upgrade, we will be updating the GSM Console with an enhanced Manage Sites Button, which will allow Console Admins easier management of their sites in one screen, including an optional User Walkthrough of the new functionality. The ability to Create a Site Tag when adding a new site and various defect fixes are also included in this console release.
We will additionally be releasing important updates to PC Agents that improve the handling of endpoints installed in Amazon WorkSpaces® environments as well as adding code to improve white listing.
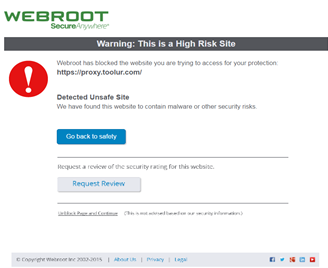
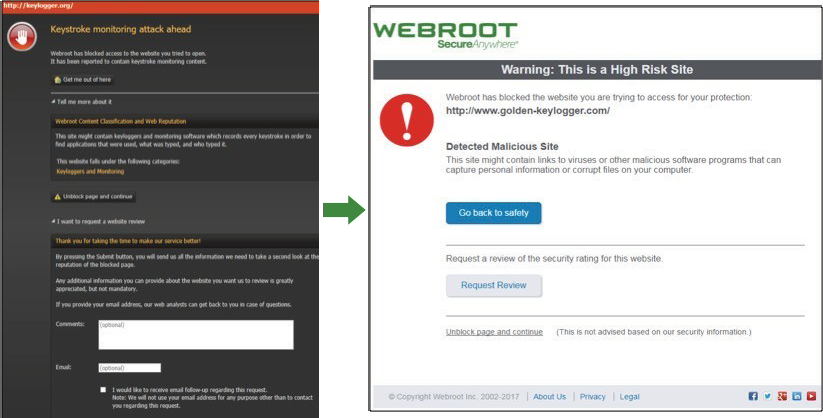
Finally, the Block Page for Web Threat Shield will be updated with a sleek new look. A screenshot of the new look can be found below.
The design update to the Block Page for Web Threat Shield will be a visible change. All end users who navigate to a blocked URL will see the new design. Please inform your customers and end users of this highly-visible change.
Updates to the GSM Console and the Web Threat Shield Block Page will be released on the first week of April. However, we will be releasing updates to the PC Agent over the course of several weeks.
Global Site Manager
This GSM console release includes new functionality:
-
Enhanced Sites Manage Button, which will allow Console Admins easier management of their sites in one screen
-
Ability to Create a Site Tag when adding a new site
Site Manage Button with opt-in/opt-out
This new functionality will allow an admin to easily manage their sites in one screen. Because this is a change in existing behavior, GSM users will be given the option to try out the new functionality, or use the existing user interface for a period of time before the new option is made permanent.
Creating a Site Tag in New Site Creation Screen>
With the recent addition of the sites filter capability, you can now easily create Tags for filtering when adding a new site to your GSM console. This will easily allow you to filter on specific Tags you create, such as top 10, country, etc. This is an optional field in the Details section when you click the Add Site tab.
Administrators who have DNS Protection enabled on their account will additionally notice design updates in the DNS Protection areas of their console. For more information on the updates to DNS Protection, please contact your Account Manager.
Web Threat Shield: New Block Page
We’ll also be updating the Block Page for Web Threat Shield with a sleek new design.
In addition to the new design, we will be paving the way for an upcoming enhancement to customize Block Pages with your logo and contact information.
Agent Update
Our Agent update is specific to the PC environment and will include code development to improve white listing capabilities of the agent.
We will also be improving the way endpoints installed on Amazon WorkSpaces environments are handled. Specifically, we will introduce changes to the endpoint identification system so that Amazon WorkSpaces instances are correctly identified as virtual machines (VMs).
-
If you have agents that are installed to Amazon WorkSpaces instances, and if the initial installation of the Webroot SecureAnywhere agent used the “-clone” switch, you may notice duplicate entries for each endpoint. If you observe duplicates, please open a ticket with Support, and these duplications will be fixed.
-
If the initial installation of the Webroot SecureAnywhere agent did not use the “-clone” switch, then your console view will be updated to reflect the correct number of endpoints installed to Amazon WorkSpaces instances.
-
If you do not have Webroot SecureAnywhere Business Endpoint Protection installed to an Amazon WorkSpaces environment, you should not notice any changes.
PRODUCT UPDATE BULLETIN 29.0 - January 5th 2017
OVERVIEW
This release provides brand new on-demand, on-screen reporting functionality within the Global Site Manager (GSM) console to allow super and limited admins to create and view reports instantly on-screen. There are 26 on-demand reports to choose from, and they can be tailored to display information from all sites or individual sites. These reports are designed to give admins fast and easy access to any key queries they may have on any deployment.
This new functionality will not affect any existing scheduled reports that you may have set up previously. All existing reports will continue to run exactly as before.
GLOBAL SITE MANAGER CONSOLE
- NEW – On-Demand, On Screen Reporting
Choose from 26 on-demand reports to query any or all deployments at a Global or Site level.
With this new functionality, you will now have two options in the Reports tab of the GSM console: Scheduled and On-Demand. On-Demand reporting is available for all of the sites to which the admin has access, and they can select specific sites as needed by using the drop-down list. Admins may choose from 26 separate on-demand reports to run. Once you’ve selected the sites and report type, click Submit to run the report and it will display instantly on your screen.
Note: On-demand reports cannot be saved. If you want to run regular reports, please use the Scheduled reports option.
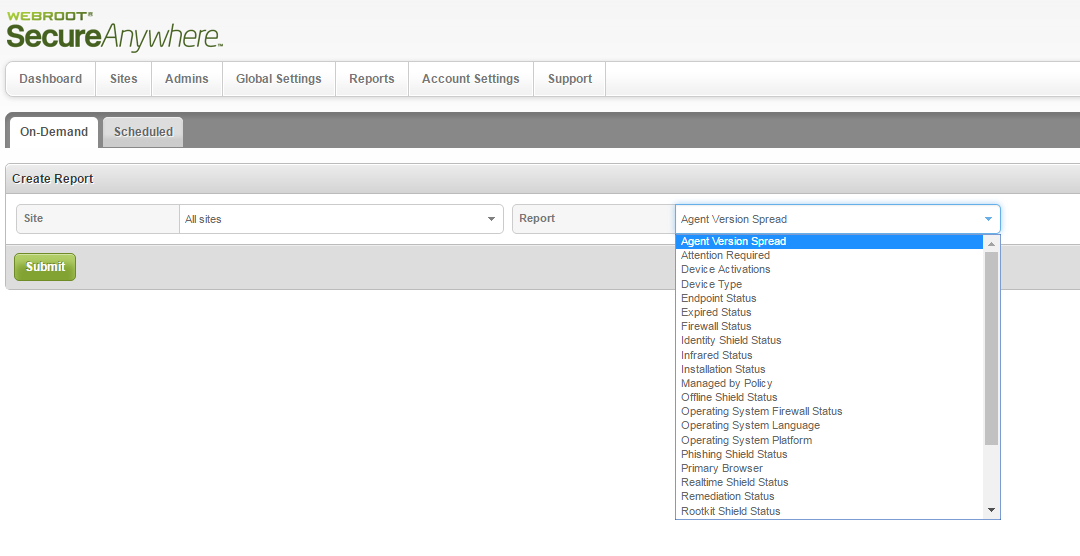 Fig 1. Reports tab with new On-Demand option.
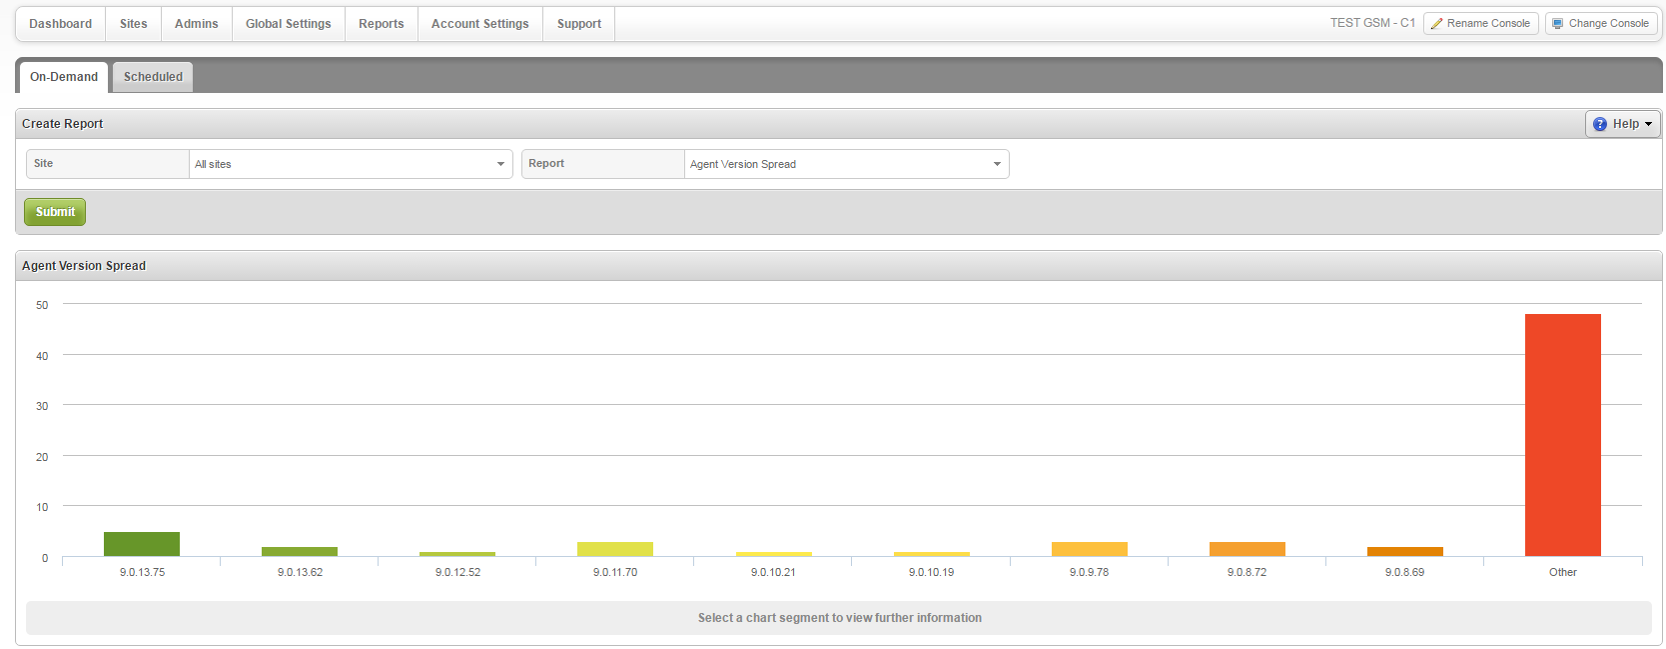 Fig 2. Example of an Agent Version Spread on-demand report.
From the on-screen report, you can click on any of the data points displayed to get a more detailed drilldown of the information.
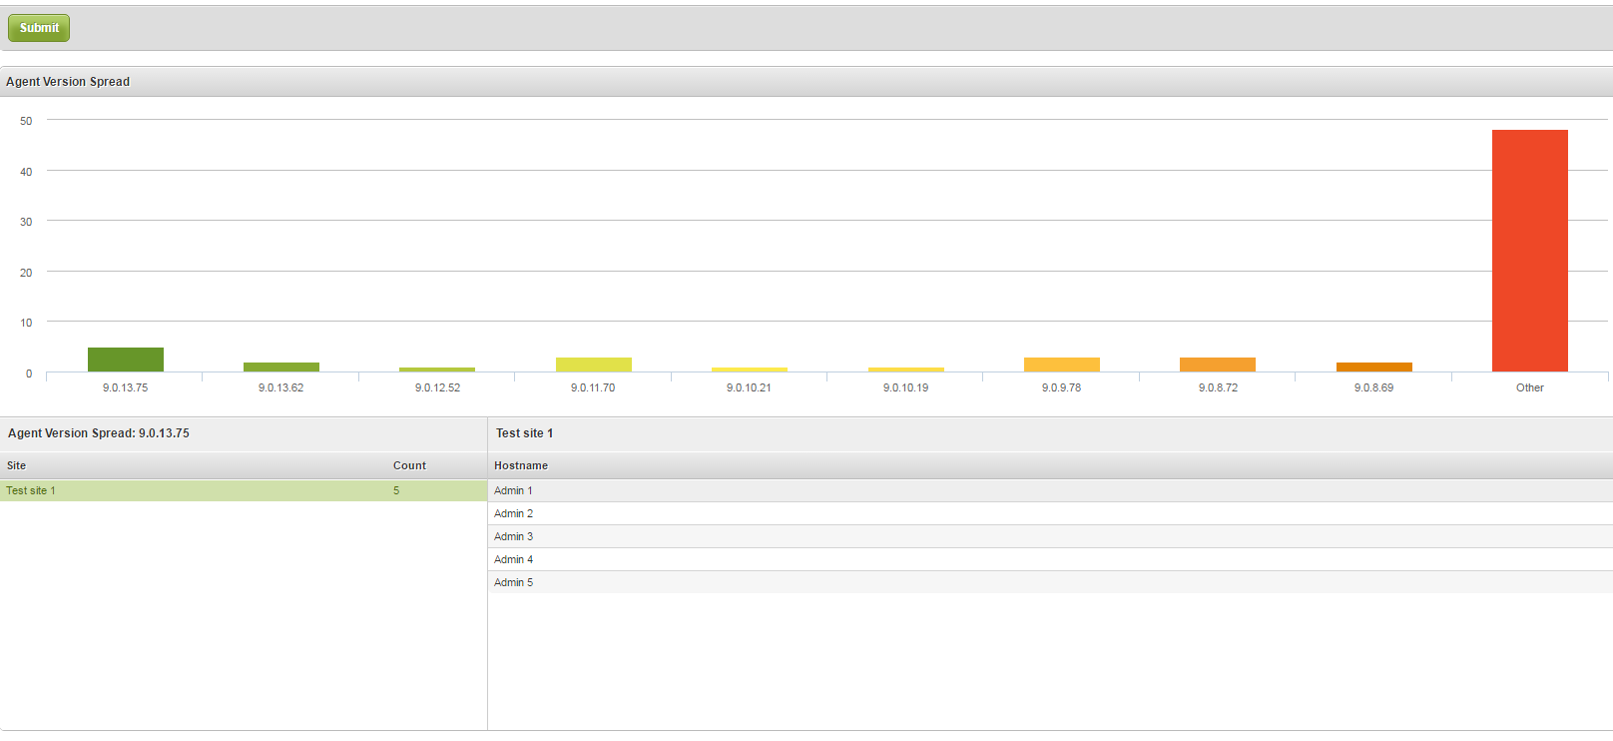 Fig 3. On Demand drilldown.
Previously, limited admins did not have access to reports within the GSM console. With this new release, however, they will have the ability to run and view on-demand reports for the sites they access.
 Fig 4. Limited admins view.
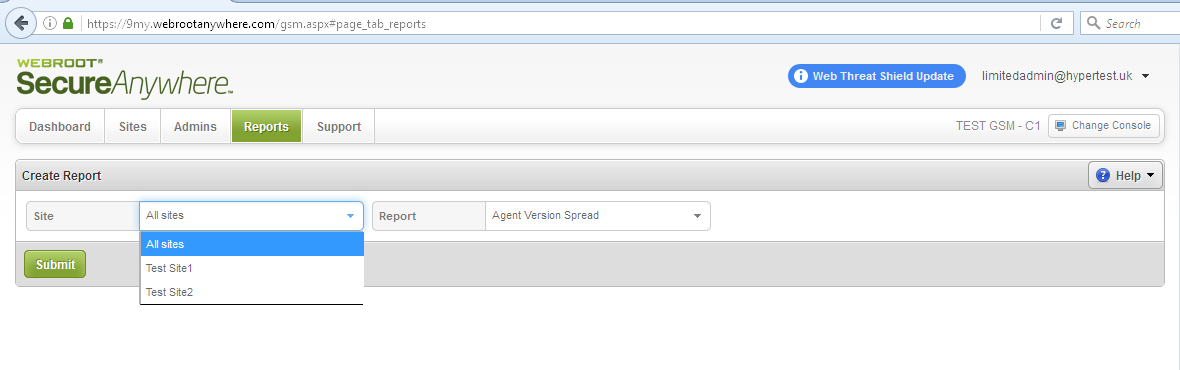 Fig 5. Limited admins site choice.
PRODUCT UPDATE BULLETIN 27.0 - November 7th 2016
OVERVIEW
Webroot is delighted to announce the release of several new features for the Global Site Manager console. These new features include Site Filters to enable admins to more easily manage multiple sites, CSV Format Reports for reporting that suits your business requirements, a new API tab for Webroot Unity API users to manage their secure client credentials, updated Help functionality with direct links to Webroot Help videos, and speed and interface enhancements for improved user experience on mobile devices.
-
NEW – GSM Site Filters – more easily manage multiple sites.
- NEW – Reports in .CSV format – create reports to suit your business requirements.
- NEW – Unity API tab – create secure Webroot Unity API credentials.
- NEW – Updated HELP – get the information you need with updated functionality and links to useful Help videos.
- NEW – Improved Mobile Management – enjoy better speed and enhanced UI when accessing the GSM via mobile device.
- NEW – General Console Enhancements – get increased performance and ease of use.
- GSM Site Filters
The GSM Site Filter now allows you to choose a set of filter criteria, then displays only Sites within the console that match your selections.
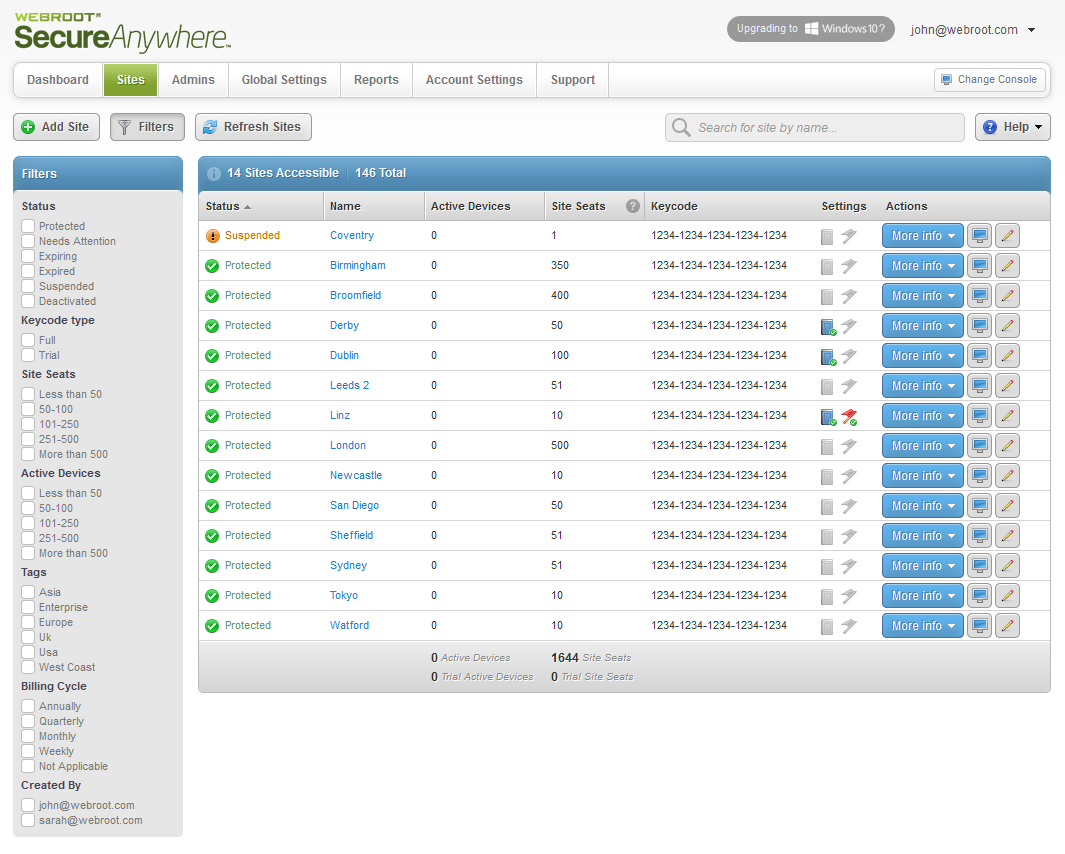 Fig 1. New GSM Site Filters Button
- New Filter button
Lists filter options on the left side of the window, including Status, Keycode Type, Site Seats, Active Devices, Tags, Billing Cycle and Created By. -
Clear and Clear All Filters
Clear individual filters or all applied filters. -
Tags
Displays any Tags that an Administrator has created under the Tags List, allowing them to filter using their own custom Tags.
- New Filter button
- Reports available in .CSV format
All reports are now available for download in .CSV format, as well as the existing PDF functionality.
When creating a new report, you can now select to it formatted as a .CSV or .PDF using the File Format drop-down list. Existing reports can also be formatted from the same drop-down.
 Fig 2. .CSV Reports.
- API tab for Unity customers
We’ve added a new API Access function within the Account Settings tab. This will allow Unity API users to manage administrator(s) client access credentials. Unity API users can also access Unity API documentation and click through to the Webroot developer.com forum page via the Help button.
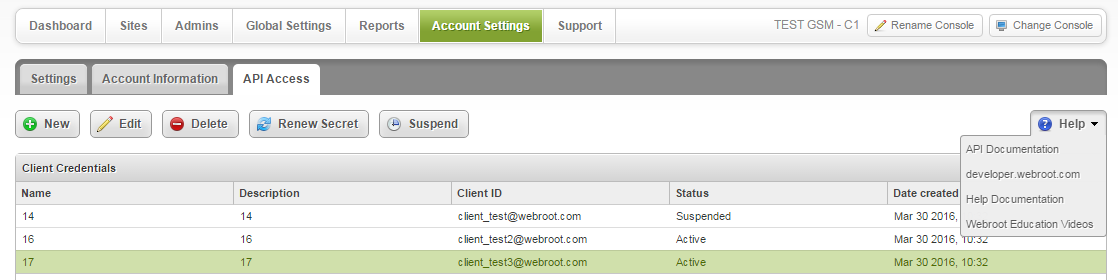 Fig 3. New API Access tab.
- Updated Help functionality
We’ve moved the Help button to a new, more visible position on the right side of the window. Depending on where you are in the console, clicking the Help button will now automatically open the relevant Help page.
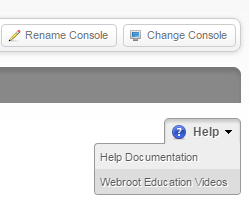 Fig 4. New help button position with added functionality.
We have also added a new Help option to take you to our Webroot Education Videos on the Webroot YouTube channel.
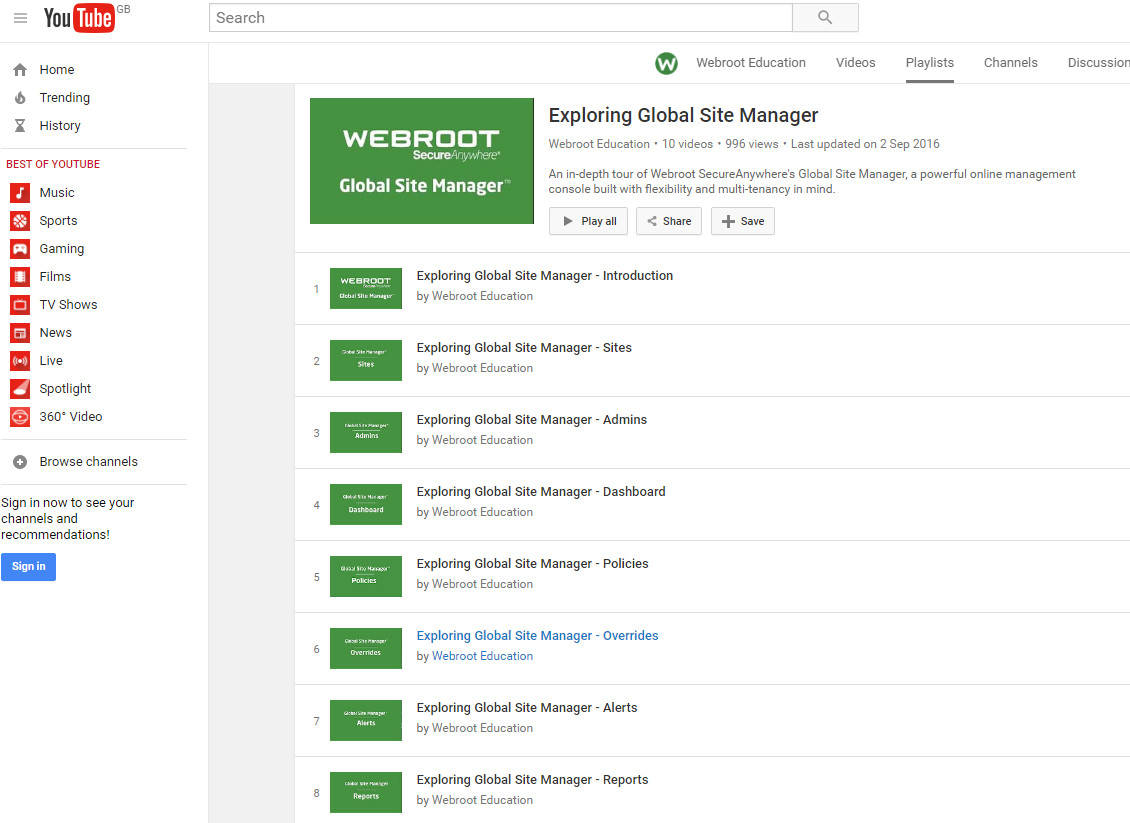 Fig 5. Webroot education videos.
- Improved Mobile Experience
Admins will now have an updated user interface when accessing the GSM console via tablet and other mobile devices, and will be able to perform various actions with greater speed.
Over twenty pages have been updated with the new UI, including:
- » Login
- » Registration
- » Change Password / Security Code
- » Trustpass entry
- » Console selection screen
- » UBER homepage (tiles)
- » Manage / View / Edit Admins
- » Manage / View / Edit Keycodes
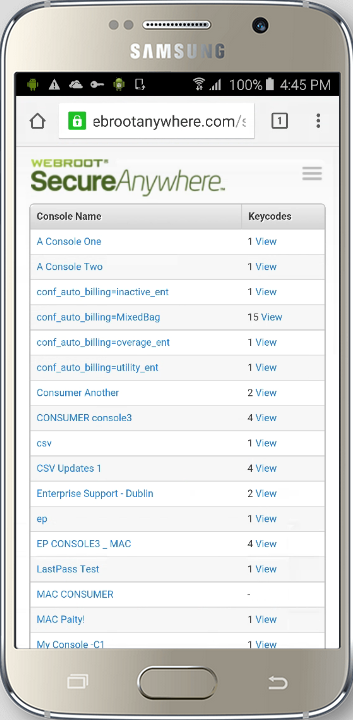 Fig 6.Mobile and Tablet new Site selection screen from a Samsung Device.
- General Console Enhancements
We have also implemented a variety of general console enhancements with this release, including:
- » Improved JavaScript performance from the user Web Browser.
- » Updates to the Product Tour to include new functionality.
- » Prompting an Administrator to name consoles which are marked as Unnamed Consoles for easier site management.
- » Updated quarterly billing options for users to easily select their correct billing schedule.
- » Improved editing for User Details and Permissions. These now may be done by clicking the Edit Details or Edit Permissions buttons rather than having to Edit each detail individually.
-
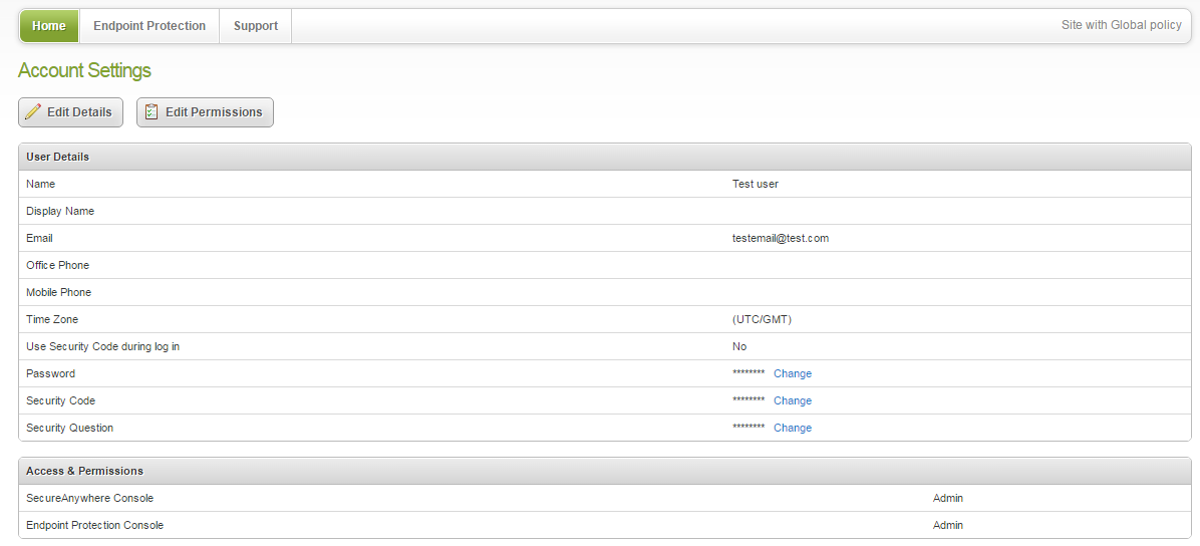 Fig 7. User details and permissions editing options.
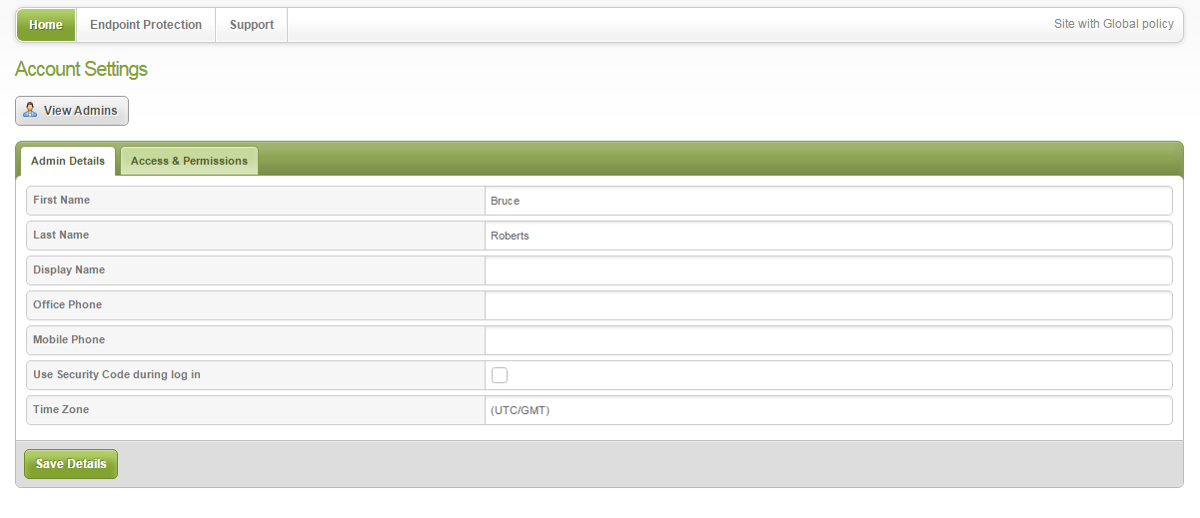 Fig 8. Edit details screen.
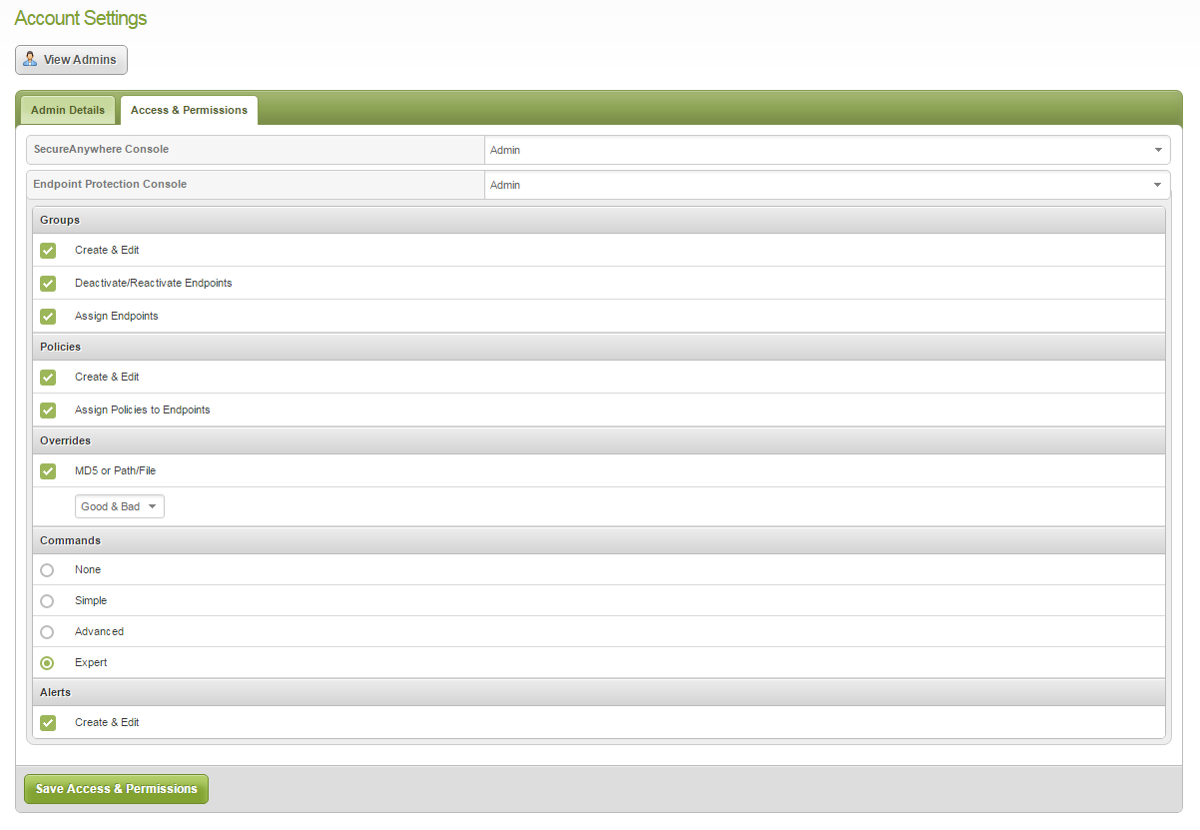 Fig 9. Edit Permissions screen.
PRODUCT UPDATE BULLETIN 26.0 - June 2nd 2016
As part of our continuing commitment to make the Global Site Manager management console provide you with the actionable and relevant information you need, we are releasing the following incremental updates to the GSM ‘Dashboard’ and ‘Sites’ tab sections. These improvements will particularly benefit multi-administered deployments where a large number of sites are managed from within the GSM console.
-
NEW – Clearer messaging within the ‘Sites’ tab
- NEW – GSM ‘Dashboard’ improvements
- Clearer messaging within the ‘Sites’ tab
We have improved and re-designed the ‘Sites’ tab to make it more effective at operating a large number of sites. The ‘Sites’ tab has been improved as follows.
- » Previously the number of sites displayed was determined by those the user had access to.
-
» Toggling the show/not show ‘Deactivated’ sites check box did not correctly change the total displayed (it only displayed the amount of activated sites causing confusion for customers).
-
» This has now been changed and a new information message has also been added.
 Fig 1. Only the ‘Activated’ sites total displayed if ‘Show Deactivated’ sites box was not checked.
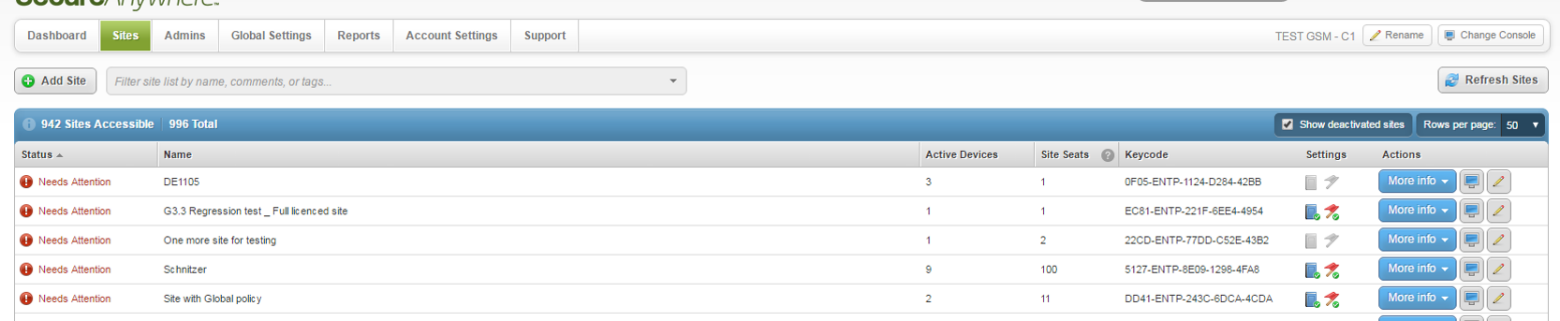 Fig 2. ‘Activated’ and’ Deactivated’ sites total displayed if Show Deactivated sites box is checked.
 Fig 3. New Messaging text to avoid confusion.
- GSM Dashboard improvements
A number of important incremental changes have been made to the GSM ‘Dashboard’ tab to improve the speed and appearance of the information that is displayed.
Rendering: The GSM console features a pre-loading function, which detects when low network usage is present and begins to preload content which the admin is likely to need. Further improvements have been made to this logic so that pages are now rendered into the browser “Just-in-Time” as the user navigates to them - therefore consuming less browser memory. The overall amount of rendering has also been reduced.
Animation: All animations used within the GSM console (fades, slides, etc.) are now performed using Cascading Style Sheets (CSS) transitions to give a smoother appearance and better performance, especially on mobile devices. Performance reducing animations have been removed so elements now appear immediately, contributing to speed improvements.
Consistency: Numerous elements within the GSM console have been re-written to give a uniform appearance across all pages.
Less “Activity Blocking” Situations: There are certain situations when using the GSM console that activity will be blocked or disabled until certain actions have been saved or completed. Some of these situations have now been removed so you are able to continue using the web application with the save logic being handled in the background.
Example of issue: If previously you wanted to add or edit a chart on your Dashboard once you requested that action you would be blocked from doing anything else on your console until the request completed. Now, this request runs in the background and console access is maintained while the edit task is performing.
 Fig 4. Example of the add/edit chart blocking that used to occur while performing that request.
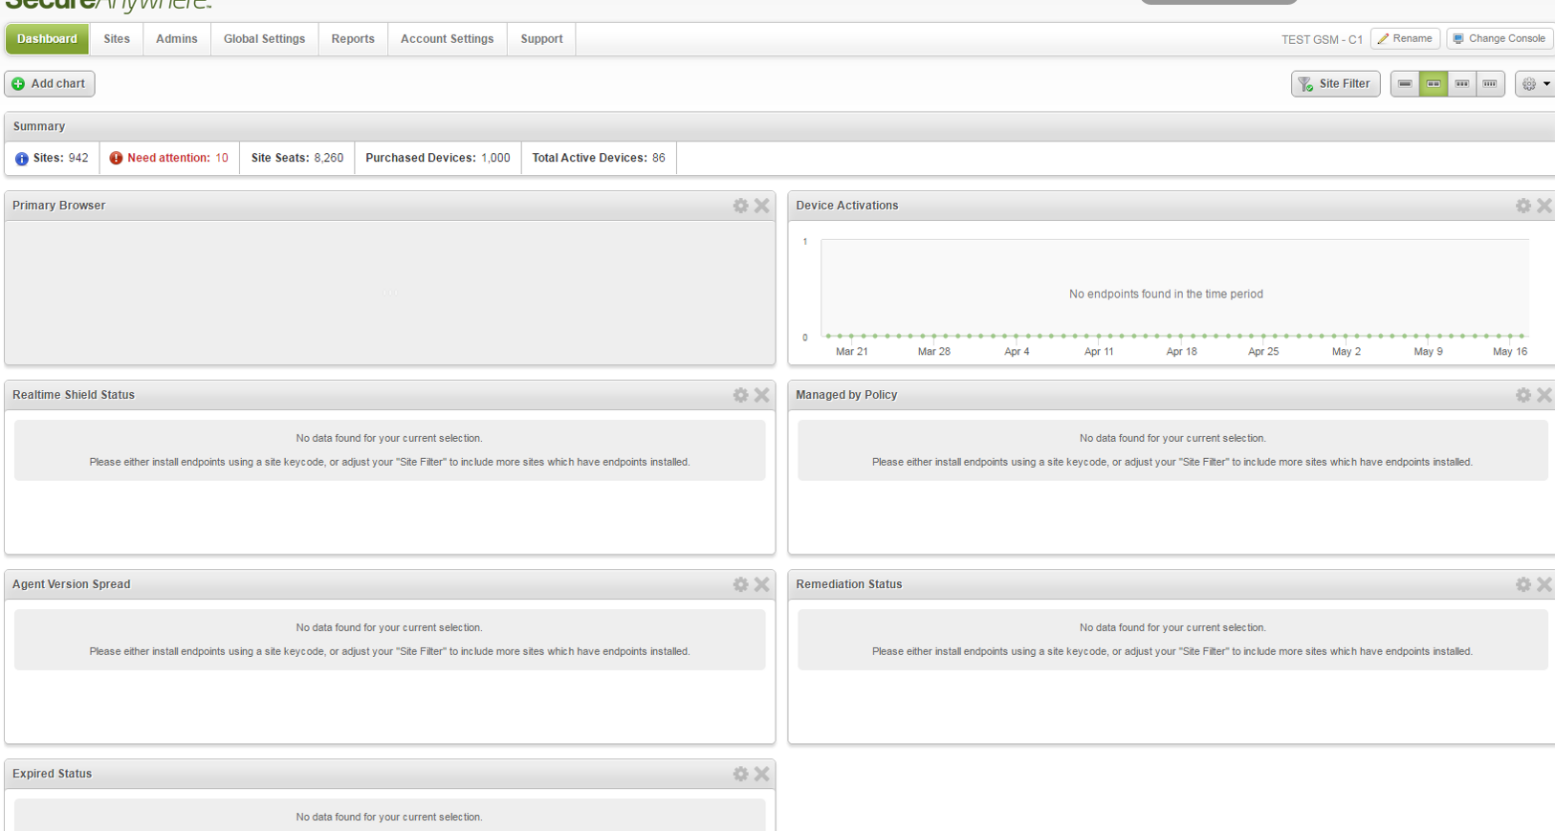 Fig 5. New add/edit chart non-blocking whilst performing the request in background.
PRODUCT UPDATE BULLETIN 25.0 - March 30th 2016
OVERVIEW
Customers with a large number of sites to manage now have a new paging logic within the ‘Sites’ page. This allows you to select how many site rows you wish to see displayed and considerably improves the Global Site Manager console’s performance for those of you with site number rising into the hundreds. A new, page specific ‘?Help’ button, has now been added to allow instant access to the relevant Help section for the page you are using in the console. This page specific contextual help will make it far easier and quicker to access specific help information.
- NEW - Sites Paging Capability.
- NEW - Dedicated Help Button.
- Sites Paging Capability
A new section has been incorporated into the existing “Sites” page, as per the diagram below, made-up of four parts:
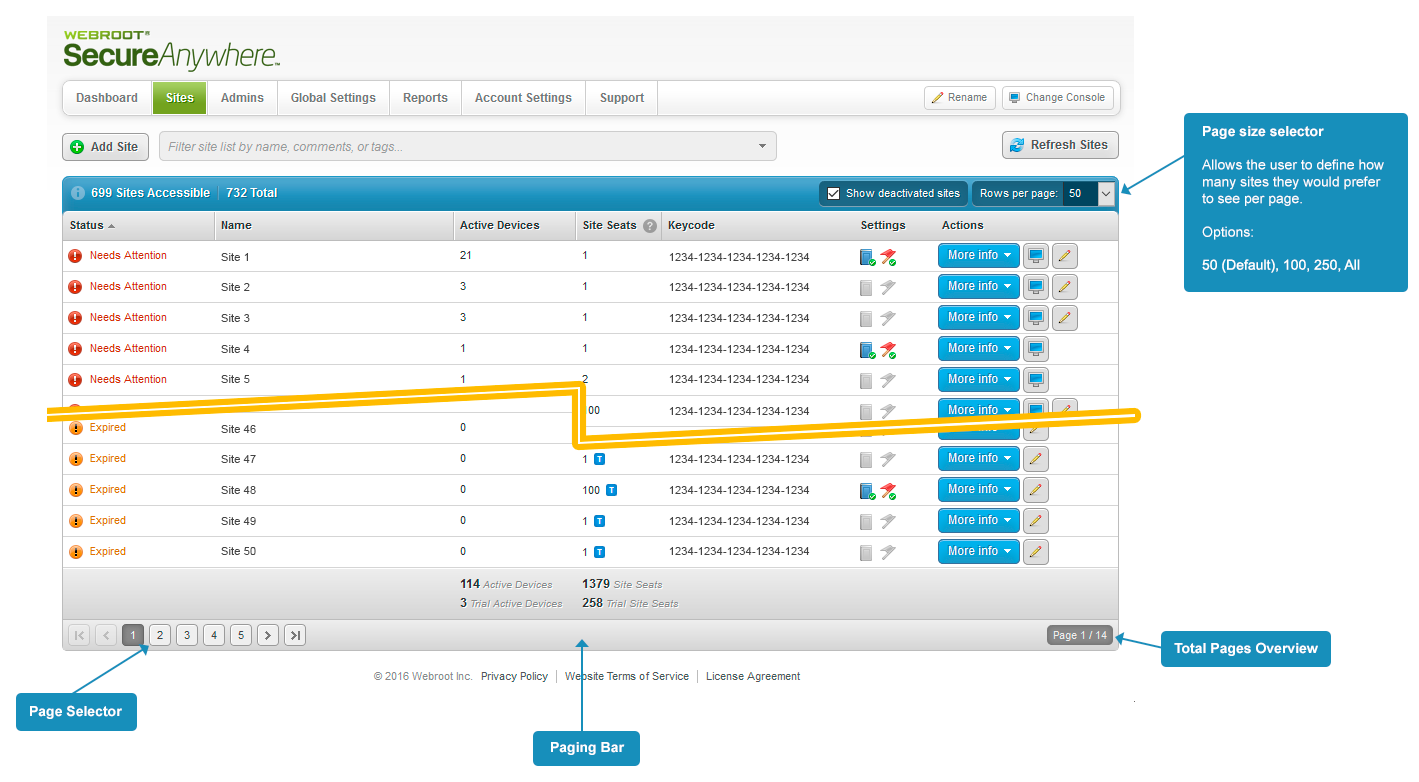 Fig 1. Sites Paging.
- Page Size Selector – This allows a customer to select between 50, 100, 500, and “All” Rows to be displayed on the screen at once.
- Paging Bar – This appears at the bottom of the sites list if the selected number of rows per page is exceeded.
- Page Selector – This allows customers to navigate between the numerous pages, with standard options such as “First Page”, “Previous Page”, “Next Page”, “Last Page”, etc.
- Total Pages Overview – This simply displays how many pages there are in total, along with which page is currently being displayed.
Site Paging – Retaining State
While using the Sites Paging all normal functions are still available, and their state will be retained whilst paging through the results – such as searching, sorting, and showing/hiding deactivated sites.
Site Paging – Preference Saving
The chosen preference of how many rows to display will also be stored locally in the browser, except when selecting the ‘All’ option. The preference is specific to each console, enabling you to have different rows per page settings between different consoles.
- Dedicated Help Button
dedicated ‘?Help’ button has been added which allows you to easily access the relevant Help section for the page you are viewing in your console, which will make getting relevant Help a lot faster.
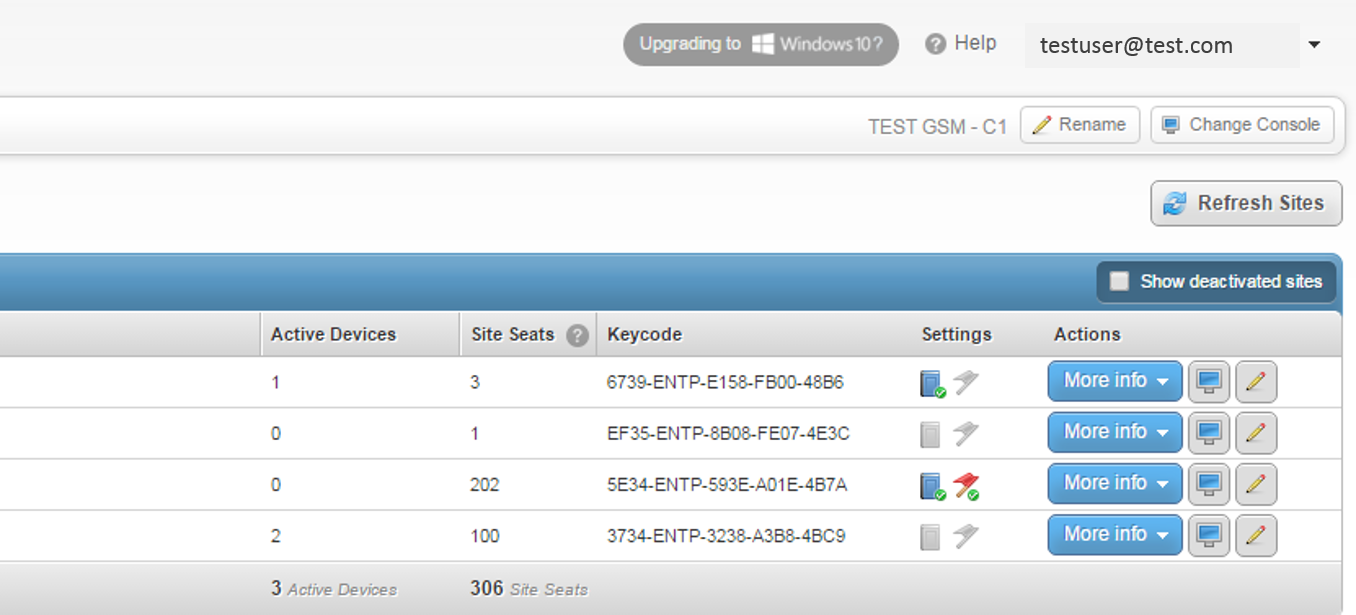 Fig 2. Dedicated Help Button.
PRODUCT UPDATE BULLETIN 24.0 - March 1st 2016
OVERVIEW
This release makes it much faster and easier for an administrator to view devices needing attention and devices that have an encountered a threat by removing the need to navigate to the individual site level. The Global Site Manager (GSM) console now displays which devices currently require attention, have recently encountered infections, and a view of the threats encountered on each device at the console's global sites level.
In addition to exposing this information at a high level within the GSM console we have also made the capabilities to initiate a device clean-up, whitelist, or restore from quarantine a file which has been encountered on any device. This release also contains improvements to the billing user interface and other minor enhancements requests.
GLOBAL SITE MANAGER CONSOLE:
- NEW – Exposure of device and file information without the need to navigate down to individual site level.
- NEW – Ability to initiate device clean up, restore from quarantine or whitelisting without the need to navigate down to individual site level.
- NEW – mprovements to the billing user interface and minor console enhancements.
Sites Page
From the Sites Tab click the “More Info” button alongside each site, and a “Summary Bar” will now appear with two new sections titled “Devices needing attention” and “Devices encountering a threat (last 24 hours).”
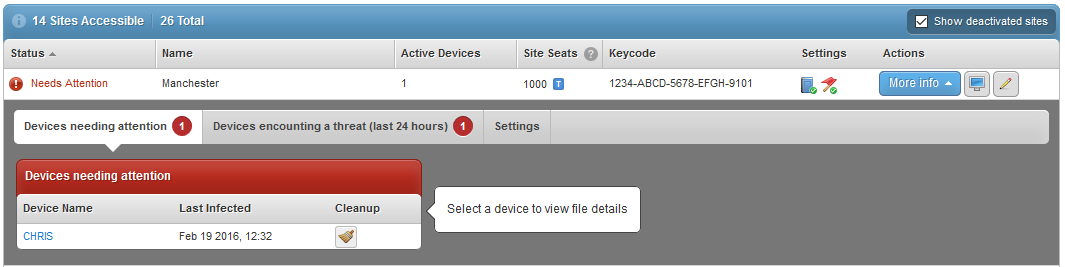
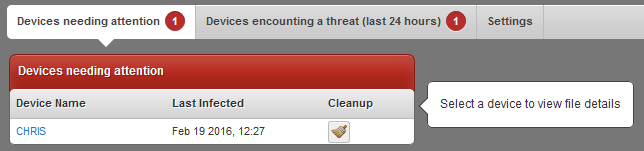
When clicking the “More Info” button by each site, you will automatically default into the “Devices needing attention” view that immediately requests and displays all devices currently requiring attention due to encountering a malicious file on their most recent scan.
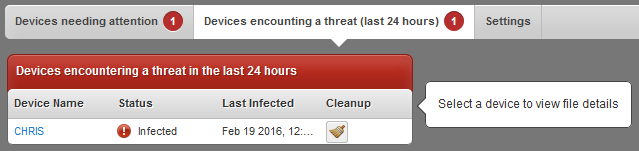
Clicking “Devices encountering a threat (last 24 hours)” within the new summary bar will immediately request and display all of the devices which encountered a malicious file within the last 24 hours.
Within each row there is also a “Cleanup” option. Clicking on this button will initiate the cleanup command on the selected device, which will force the device to immediately perform a cleanup scan and quarantine any detected threats.
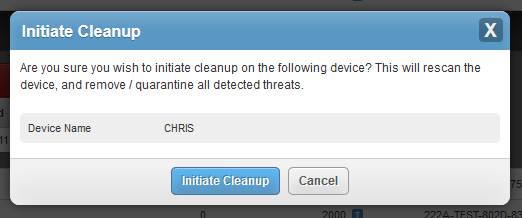
Note: Cleanup commands can only be initiated by administrators with site “Admin” permissions.
Clicking on any device within “Devices needing attention” or “Devices encountering a threat” will immediately request and display all malicious files encountered on the selected device. This view displays basic information about each file - such as the filename, pathname, malware group, and when it was last seen on this device.

Within each row, you now have three further options:

Option 1 – Further File Information
Clicking on the blue link below “Filename” will display further detail about the selected file - such as its MD5, file size, and the malware group it belongs to.
Option 2 – Whitelist
Clicking on the Whitelist
 button under the “Actions” column will add this file to the GSM whitelist. This whitelisted file can then be used by any of your other Sites that have the “Global Overrides” option enabled within their settings. Creating a whitelist entry will override the current “Bad” determination associated with the file – marking it as “Good” – meaning all devices encountering this file will allow it to run instead of blocking it.
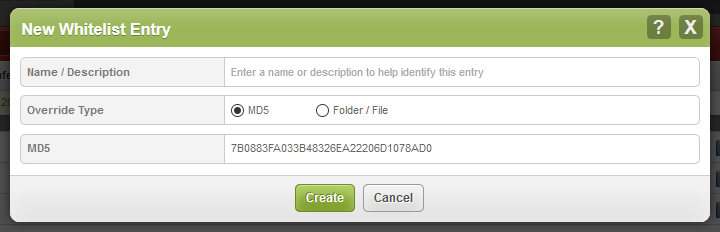
Note: Whitelist entries can only be created by GSM “Super Admins” with the associated “Admin” permission for the site and all Whitelist entries are disabled for all Mac files.
Option 3 – Restore from Quarantine
Clicking on the ‘Restore’
 button under the “Action” column will allow a command to be sent to the selected endpoint to restore this file from quarantine. This is particularly useful if an endpoint has incorrectly blocked and quarantined a file. It will place the file back in its original location, plus the device will no longer block the file from running.
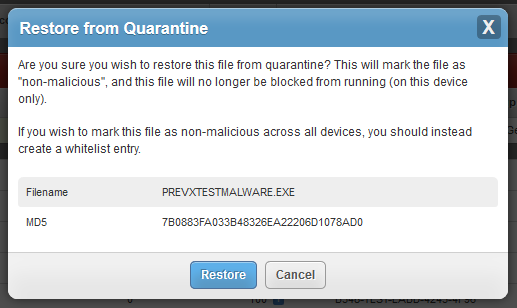
This only affects a selected machine, so if a file has been quarantined on many machines it would be better to whitelist the file, and then ensure the affected site has “Global Overrides” enabled. This would ensure the file is allowed to run on all site machines and not be automatically quarantined.
Note: Restore from quarantine functionality is not available for Mac files.
PRODUCT UPDATE BULLETIN - Support System 2.1 - November 17th 2015
A critical element of any security solution is how rapidly you are able to access and get hold of a Support person if an issue arises. Because of this Webroot SecureAnywhere Business - Endpoint Protection already has web-based and telephone Support included at no extra cost.
However, with this latest release we are delighted to announce our new Customer Support Ticketing System. This system incorporates your feedback on the existing system and is designed to benefit all Webroot Customers by delivering greatly improved engagement with Webroot Support. Through a new integrated Ticket Management section within the console administrators are now able to easily monitor and track the history of each Support ticket’s progress until it’s closed.
The new ticketing support system incorporates the following enhancements:
-
NEW – Integrated Support Access – Customer support access is now integrated within your account login making it simpler and easier to directly access the Customer Support area from either the site level or the Global Site Manager (GSM) console.
- NEW – Ticketing Based Support – Historically Webroot support was conversation based (fine for straightforward Support issues) but in more complex multi-site or customer deployments the granularity and accountability of a ticketing based system is needed.
- NEW – Ticket Management Console – To accompany the new ticket based support system we have introduced a new ticket console from which it is much easier to manage any of your Support tickets or escalation requests.
Ticketing System Overview:
What follows is an overview of the new fully integrated ticket based support system that is now included as standard within Webroot SecureAnywhere Business – Endpoint Protection.
- INTEGRATED CONSOLE ACCESS
Customer Support access is now integrated within your account login. Clicking the Support tab on the toolbar will launch the new Ticket Management console.
 Fig 1. Accessing Support through the Global Site Manager console.
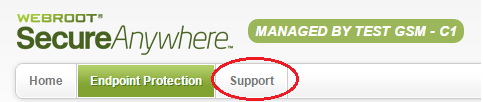 Fig 2. Accessing Support through the Endpoint (Site) console.
- TICKET MANAGEMENT CONSOLE From the new Ticket Management console you can raise new Support requests and manage all your Open outstanding and Closed tickets. Links to Ticket Management help documentation are also included as part of the new console.
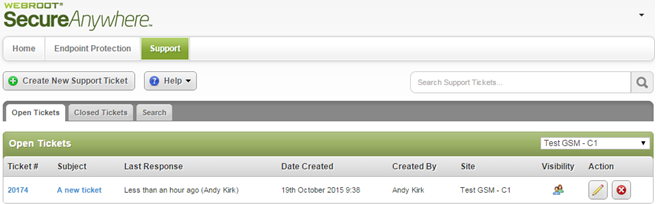 Fig 3. NEW - Ticket Management Console.
Key Features:- 2.1 Raising new support requests
- 2.2 Managing existing tickets
- 2.1 RAISING NEW SUPPORT TICKET REQUESTS
‘Create New Support Ticket’ will allow you to add details to a new support request.
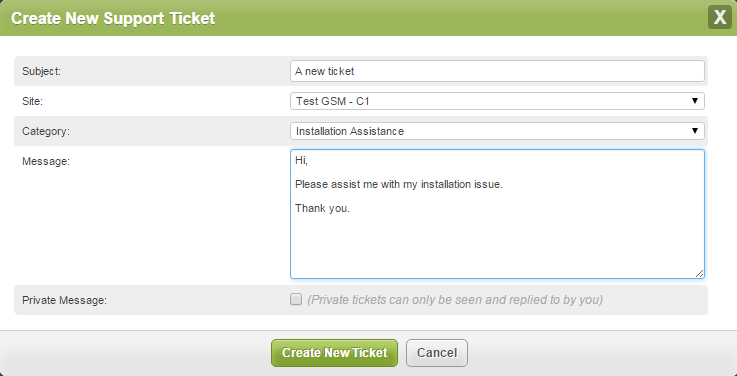 Fig 4. Create a New Support Ticket.
A new Ticket is raised as follows:Subject The message subject Site Select the Site from the dropdown list that this query relates to. You may also select a ‘Non-Site-Specific’ query if the Support query is not site specific. All non-site-specific queries are automatically assigned to your ‘Parent’ Site to help you find them in the future. Category A drop down list of categories, for example ‘Sales Inquiry’. You may also select ‘Other – Not Listed Here’ if there is not a suitable category. Message A description of the issue this ticket relates to. Private Message Tick this if you do not wish your ticket to be visible to other users who have access to the site that this ticket was raised against.
- 2.2 Managing Existing Tickets
Tickets are split into two categories – ‘Open Tickets’ and ‘Closed Tickets’. While a ticket remains open it will appear under the ‘Open Tickets’ tab. When Closed, either by the user or a Support Agent, the ticket will then appear within the ‘Closed Tickets’ tab. If you have management access to more than one Site then the list of displayed tickets can be filtered by Site by using the dropdown selector located in the header - area circled below. The Open Tickets or Closed Tickets tabs will then only show the tickets associated with the Site you selected in the dropdown filter. The default display is the Site or GSM used to access the Ticket Management section of the console. To see a list of ‘all tickets for all sites’, simply select ‘All Sites’ from the dropdown filter menu.
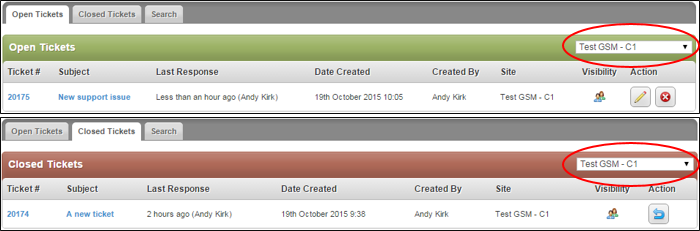 Fig 5. Managing Open and Closed Tickets.
Ticket # The unique number that identifies this ticket Subject The subject entered when the ticket was created Last Response The time of the last response on this ticket. Date Created The date and time of ticket creation Created By The name of the user who raised the ticket Site The site this ticket was raised against (only applicable if you have access to more than 1 Site) Visibility Public - Visible to all users who have access to this Site.
Private - Not visible to other users who have access to this Site.Actions Edit the ticket. You may also click on the ticket number or subject.
Mark the ticket as closed.
Reopen a closed ticket.
- Editing Tickets
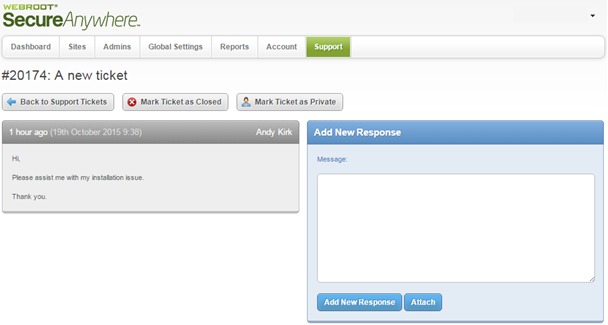 Fig 6. Edit ticket.
Back to Support Tickets Return to the Ticket Management console screen Mark Ticket as Closed Close this ticket when no further assistance is needed. It will move to the closed tickets section of the Ticket Management screen. Closed tickets can be reopened by editing them. Mark Ticket as Private / Public Toggle the tickets visibility. Add New Response Add new information to this ticket by typing in the box. Attach Choose an image or log file to attach to this query. File types permitted are:
.jpeg; txt; .png; .bmp; .gif; .pcap; .pml; .log. (Maximum file size is 20Mb)- 3.1 Ticket Responses
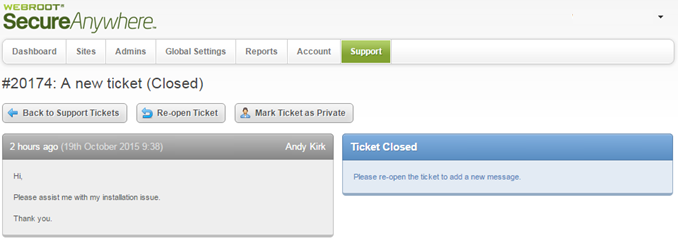 Fig 7. A Closed Ticket may be reopened to add further Information, or Request further assistance.
Tickets with new responses are highlighted in the Ticket Management console and the ‘New’ icon appears next to them along with an updated ‘Last Response’ date. Edit the ticket by clicking on the ticket number, subject or edit icon to see the ticket responses.
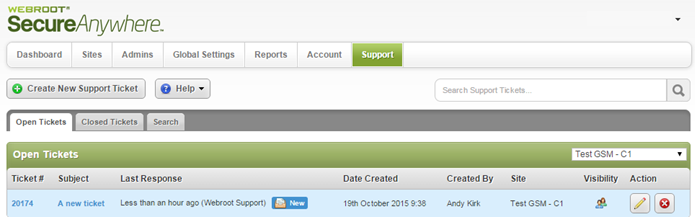 Fig 8. A Ticket with a New response.
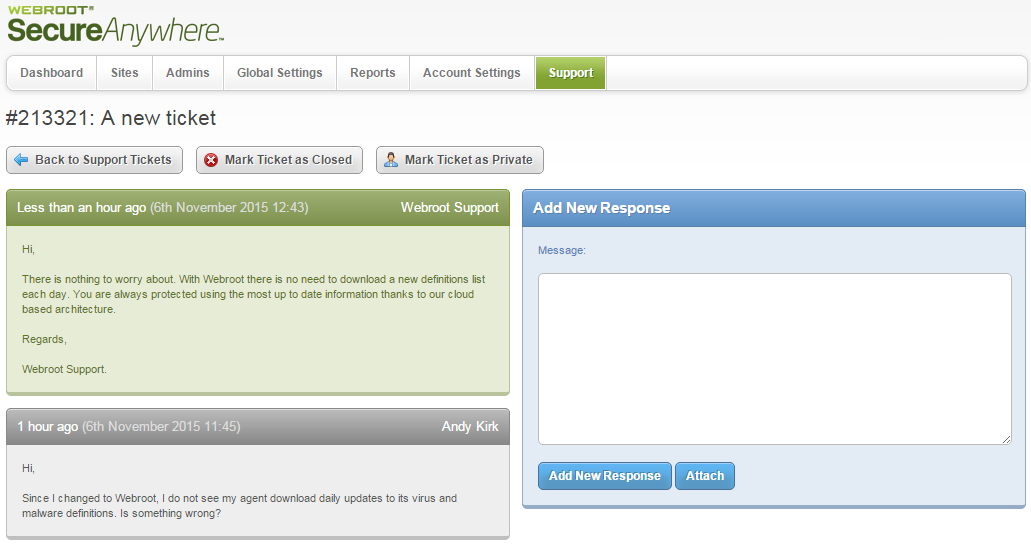 Fig 9. Detail of all Responses on a Ticket.
- 3.2 Ticket Search
Using the search box you can enter a search term to be matched in the subject, ticket number or ticket body. Tickets which match the entered search term are displayed under the ‘Search’ tab.

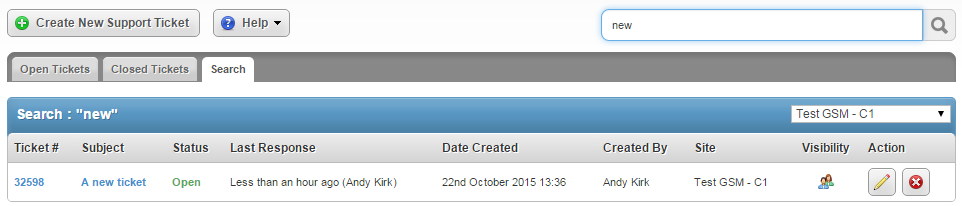 Fig 10. Search Box and Results.
- 3.1 Ticket Responses
- TICKET INTERACTION VIA EMAIL
You may also interact with tickets via email. Whenever a ticket is raised or a reply added you will be sent an email to the address you have registered your account to. Using your preferred email client you may reply inline to the email to add further information. You can also create new tickets via email.
- 4.1 NEW TICKET RAISED
When you raise a new ticket (or a ticket is raised by a Webroot Support Agent on your behalf) you will receive a new email confirming the action.
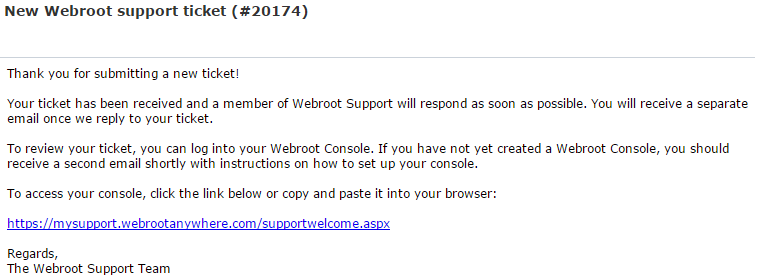 Fig 11. New ticket raised confirmation.
Tickets can be also be raised from your email client.
To raise a new ticket simply send your email query to wrcstickets@webrootanywhere.com.
All email interactions will also be visible in the Ticket Management console.
- 4.2 NEW REPLY ON A TICKET
When a new response is received on a ticket you will receive an email containing the reply:
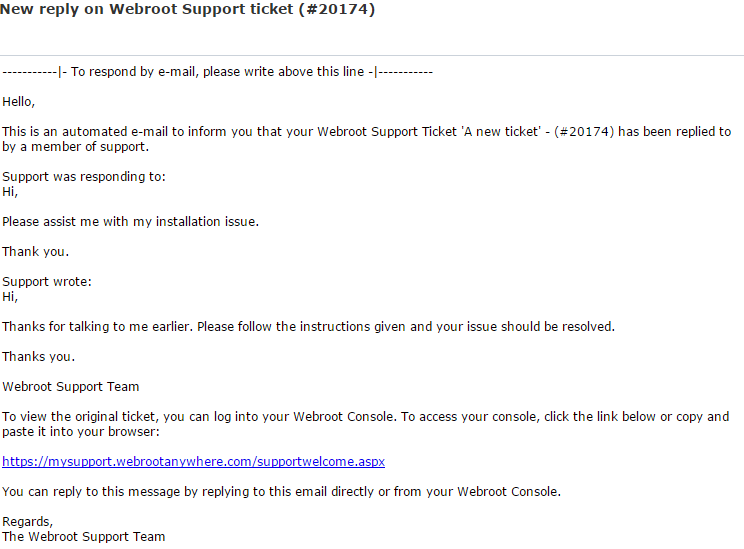 Fig 12. Replying inline from your email client to a ticket.
To respond inline via email simply click reply in your email client and type a reply above the line indicated. Your response will automatically be recorded against the ticket and be visible in your Ticket Management console, and by the Webroot Support agent. You will also receive an email when tickets’ are closed or reopened.
- 4.1 NEW TICKET RAISED
- ASSIGNING A SITE TO ANY TICKETS RAISED DIRECTLY VIA EMAIL OR, RAISED BY AN AGENT ON YOUR BEHALF
When a ticket is raised on behalf of a Customer by a Webroot Support agent, or raised via email, it will not have a Site set to which the query relates, and you will be required to add it to a Site. When the Ticket Management console is loaded, tickets without associated Sites will be shown as below:
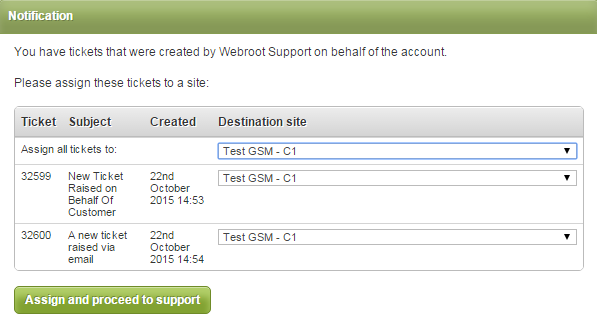 Fig 13. Tickets with no Assigned Site.
You can assign all tickets to the same site using the master control, or assign individual tickets to different sites. The tickets will then appear under the relevant site in the site filer selector.
-
When replying ‘ in line’ to a ticket via email the prior conversation items present in the email will not be attached to the ticket. Only the most immediate response added above the line will be included each time a response is added.
-
Not all email clients are supported for this functionality and some email clients may include the full content of the email for each response.
-
If no Subject is included for tickets raised by email - the first 50 characters of the email body will be included.
-
If no Subject and no email body text is present in a ticket raised by email - the ticket will not be successfully raised.
-
Tickets which are raised, or responded to, in a language other than English will automatically be translated into English for Webroot Support. The response from Webroot Support is also automatically translated from English back into the original language.
PRODUCT UPDATE BULLETIN 22.1 - November 9th 2015
OVERVIEW
This Data Filter release responds to the requests we have received to be able to filter out ‘irrelevant’ endpoint data from the console and reports. This new functionality is available for both Global Site Manager (GSM) and Endpoint Protection Site management consoles. It will let Administrators filter endpoints to more precisely reflect the actual endpoints under management and deployed within their management console and for more accurate reporting on their deployment(s).
It’s important to note that with these new data filter settings endpoint data is not deleted, but simply hidden from the console and reporting datasets. Selecting a different time period, or selecting to show all data, will always show all of the endpoint information relevant to your selection. Administrators are also able to set-up a master setting within the GSM console that is inherited by all Sites managed under that GSM, or they may set filtering rules individually by Site. Both the GSM Dashboard and Scheduled Reports will then show endpoints which have been seen in the time period option selected. The new master setting is located under the Account Settings tab and allows Admins to hide endpoints from their data sets that have not been seen for 1, 2, 3, 6 or 12 months.
Key features:
UPDATE - Audit log now captures all change to Data Filter settings
NEW - Deactivated endpoints will no longer show in the GSM Dashboard or Scheduled Reports
NEW - New label for added context for recipients on your report distribution list.
UPDATE - Limited administrator permissions update
Global Site Manager
- DATA FILTERING
All changes made to the ‘Data Filter’ settings are audited and logged.
 Fig 1. Global Site Manager Data Filter Setting.
Site/Console The Site the change was applied to, or the GSM console parent setting that was changed. Setting The selected option (1 month, 2 months, 3 months, 6 months, 12 months or show all). User The user who made the change. Date Date and time the change was made.
Additionally, any deactivated endpoints will now no longer be shown in the GSM Dashboards or within Scheduled Reports.
- SITE LEVEL DATA FILTER
By using the Data Filter setting located in the ‘Sites > More Info’ dropdown, the data filter setting for each individual site can be set. You can then choose the same time period options available under the master setting with the additional option to force this site to follow the master setting. This will be the default option.
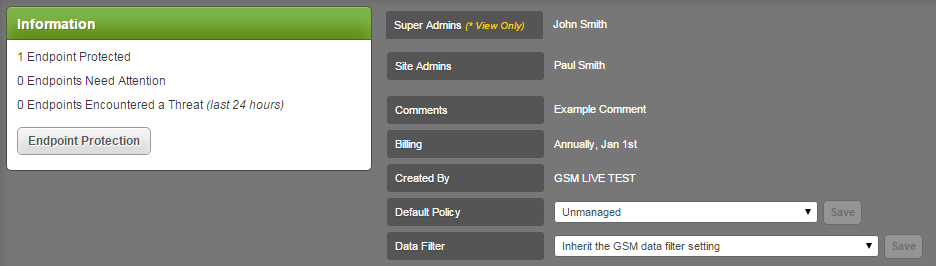 Fig 2. Data Filter Site - More Info dropdown.
This master setting option is also available when creating or editing a site:
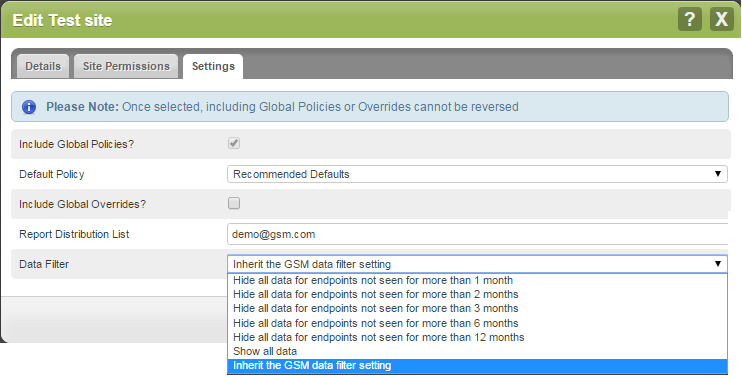 Fig 3. Editing a Site.
Admin Permissions:
Note that the GSM ‘limited’ admin permissions have been updated to grant access to the settings tab when editing a site. From here you may change the default site policy, data filter setting and report distribution list.
Endpoint Protection Site Management Console
- DATA FILTERING
The data filtering option is also included within the Endpoint Protection Site management console to allow admins to remove endpoints that have not been seen for a set period of time, so the most accurate data views are available for the Site.
Admins will now be able to select to hide all endpoints from their data sets which have not been seen for periods of 1 month, 2 months, 3 months, 6 months, 12 months, or inherit GSM data filter setting (if your Endpoint Protection Site console is managed under a GSM).
You may also choose to show all data.
 Fig 1. Site Settings.
The updated filtered data set will be applied to all areas of your Endpoint Protection management console wherever endpoints are listed, or totals counted—for example, under the Status and Group Management tabs.
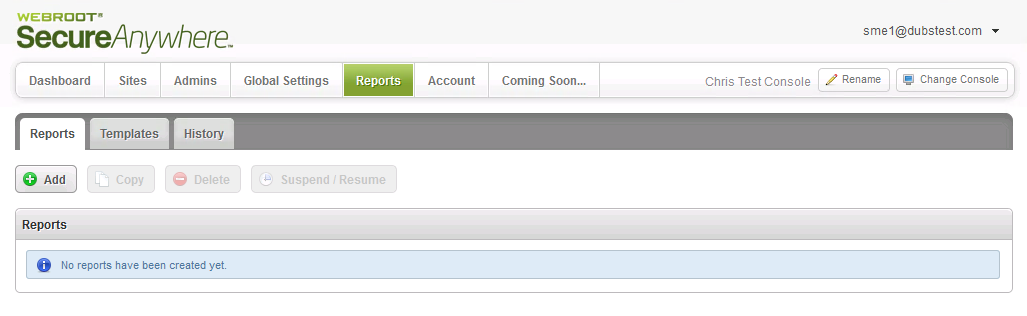
- REPORTS
Just as deactivated endpoints had previously been available to include in reports, you can now choose to include deactivated and hidden endpoints in reports by checking the box when selecting the report type. This allows you to include all known endpoints in your deployment, or just the currently ‘active’ endpoints in your reports without adjusting your data filter settings.
 Fig 2. Site Reports.
- DATA FILTER LOG
All changes made to the Data Filter settings are captured in the Data Filter Log.
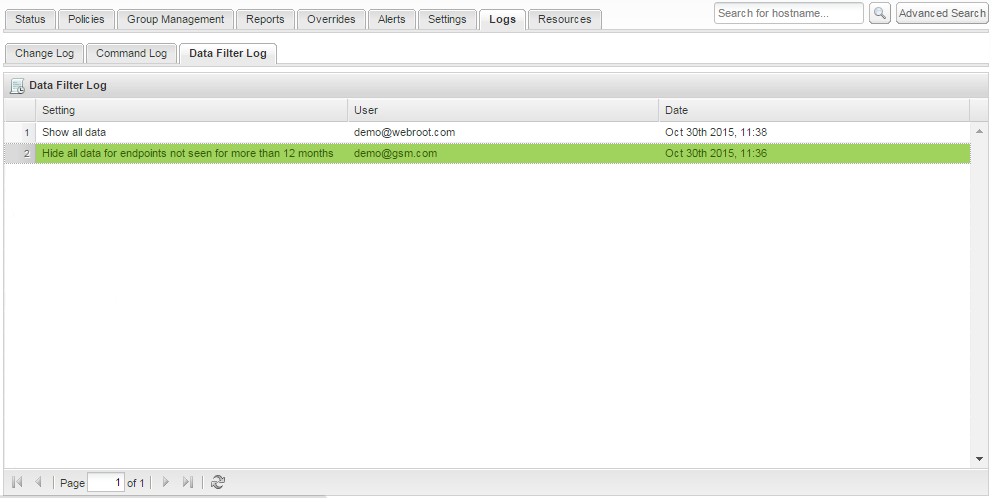 Fig 3. Data Filter log
Site/Console The Site the change was applied to, or the GSM console parent setting that was changed. Setting The selected option (1 month, 2 months, 3 months, 6 months, 12 months or show all). User The user who made the change. Date Date and time the change was made.
PRODUCT UPDATE BULLETIN 22.0 - October 14th 2015
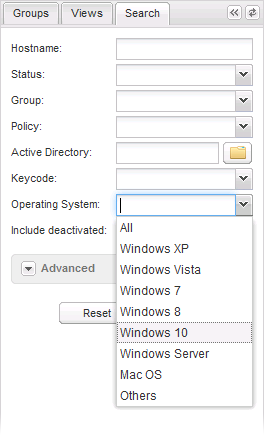
Scheduled Reporting functionality comes to the GSM management console and now provides the rich and detailed reporting so key to understanding the true health and performance of multiple locations and sites(s). With these new highly granular reporting tools at Administrators’ disposal, they can now report more of the information needed and provide a clearer understanding of the endpoints under management. Also as part of this release, Windows 10 becomes a searchable OS.
- NEW – Scheduled Reporting – Scheduled, customized, granular endpoint reporting may now be run at recurring time periods, or ad-hoc, with the content tailored to the recipient(s) requirements. Internally this means you’ll have greater visibility over your deployment(s) and that both you and your (internal and external) customers will never miss the information important to them.
- NEW – Windows 10 OS is now a searchable OS within Group Management, giving better visibility of any Windows 10 endpoints deployed.
1.1 Create Report Templates
Scheduled Reporting uses a customized template approach. You can start with the Default Report templates provided that are easily copied and modified, or create your own Templates. Either way, you can easily add or remove reporting pages, and select the data and time period(s) you wish to include in your report(s).
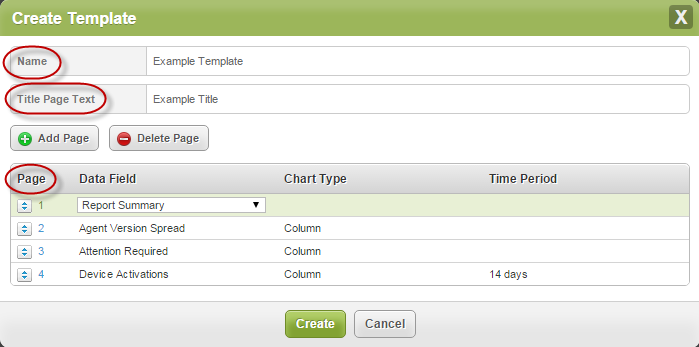
| Name | Lets you name the template for easy differentiation from other templates, e.g. “LA Managed by Policy Template.” |
| Title Page Text | Lets you customize the text that will appear on the cover of the PDF Report, e.g. “Policy and Status – LA Sites.” |
| Page | The Create Template area is where the Administrator defines how many pages should be included, which data fields should appear on each page, and the page ordering. Each row “Page” table allows you to select which data field should appear, which chart type should be used to display the data, and the applicable time period that should be used. The Administrator may also add or delete as many pages as they wish using the ‘Add’ and ‘Delete Page’ buttons and re-order the pages as necessary by dragging the rows up and down. |
The Create a Template data point report options are listed here:
| Data (Point) Field | Chart Types Available | Time Period(s) |
|---|---|---|
| Agent Version Spread | Bar, Column, Pie | |
| Attention Required | Bar, Column, Pie | |
| Device Activations | Area, Area Spline, Bar, Column, Line, Spline | 24h, 1 day, 2 days, 3 days, 7 days, 14 days, 30 days, 60 days, 90 days |
| Device Type | Bar, Column, Pie | |
| Endpoint Status | Bar, Column, Pie | |
| Expired Status | Bar, Column, Pie | |
| Firewall Status | Bar, Column, Pie | |
| Identity Shield Status | Bar, Column, Pie | |
| Infrared Status | Bar, Column, Pie | |
| Installation Status | Bar, Column, Pie | |
| Managed by Policy | Bar, Column, Pie | |
| Offline Shield Status | Bar, Column, Pie | |
| Operating System Firewall Status | Bar, Column, Pie | |
| Operating System Language | Bar, Column, Pie | |
| Operating System Platform | Bar, Column, Pie | |
| Phishing Shield Status | Bar, Column, Pie | |
| Primary Browser | Bar, Column, Pie | |
| Reak-Time Shield Status | Bar, Column, Pie | |
| Remediation Status | Bar, Column, Pie | |
| Report Summary | Bar, Column, Pie | See below |
| Rootkit Shield Status | Bar, Column, Pie | |
| Scheduled Scans Status | Bar, Column, Pie | |
| Silent Mode | Bar, Column, Pie | |
| Threat Detection History | Area, Area Spline, Bar, Column, Line, Spline | 24h, 1 day, 2 days, 3 days, 7 days, 14 days, 30 days, 60 days, 90 days |
| USB Shield Status | Bar, Column, Pie | |
| Virtual Machine | Bar, Column, Pie | |
| Web Threat Shield Status | Bar, Column, Pie |
Report Summary listed above is able to provide a number of overall counts that effectively summarize site and deployment information. These summaries include:
-
Number of active devices
- Number of available seats
- Endpoints currently needing attention
- Endpoints which encountered threats (Last ‘n’ days)
- Total Threats seen (Last ‘n’ days)
- Number of Endpoints Seen (Last ‘n’ days)
- Number of Endpoints Not Seen (Last ‘n’ days)
- Number of Endpoints Seen (All Time)
For reporting that collates data from multiple sites into one report, the report summary will also include:
-
Total Number of Sites
- Active sites
- Trial Sites
- Suspended sites
- Deactivated sites
- Expired sites
- Sites expiring in the next 14 days
- Sites with endpoints needing attention
1.2 Create Reports
After creating the template, the Create Report area provides an intuitive way of building, scheduling, distributing, and localizing your report(s) as it breaks the tasks down into logical steps and uses drop down selection of the reporting criteria.
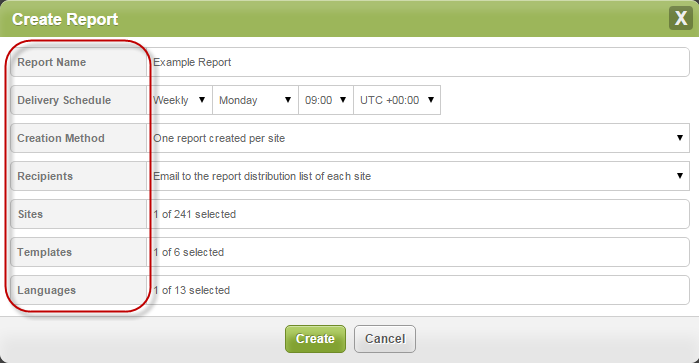
| Report Name | Lets the Administrator create a name to identify and differentiate each report, e.g. “Weekly Summary Report.” |
| Delivery Schedule | Creates a schedule at which to run the report so it is able to be distributed in a timely fashion. The run report schedule options are:
Please note: The time selected for the schedule is in UTC, and will not necessarily reflect the report owner’s time zone.
|
| Creation Method | Creates reports to deliver the information to targeted recipients either as an aggregate of selected sites from your deployment, or on an individual site basis. The options are:
|
| Recipients | Setup a list of regular site recipients, or add specific email addresses to deliver reports to. The options are:
Please Note: “Report Distribution List” is a new field which can be modified by selecting to “edit site” against each site on the sites page. All existing sites have been pre-populated with the emails of all admins already present on that site.
|
| Sites | The sites to be included in the report. |
| Templates | The data template(s) to be included in the report. |
| Languages | The languages for the reports to be created in. Any default text, such as graph axes and chart titles will be provided in the selected language. If multiple languages are selected, then one report per language will be created. The options are:
|
Note: With customizable data, scheduling, recipients, and languages, the new Scheduled Reporting capabilities within the management console gives Administrators the flexibility needed to keep all stakeholders fully informed.
1.3 Editing Existing Reports
Editing an existing report is a fast way to save time and effort when creating a new report or adjusting an existing one.
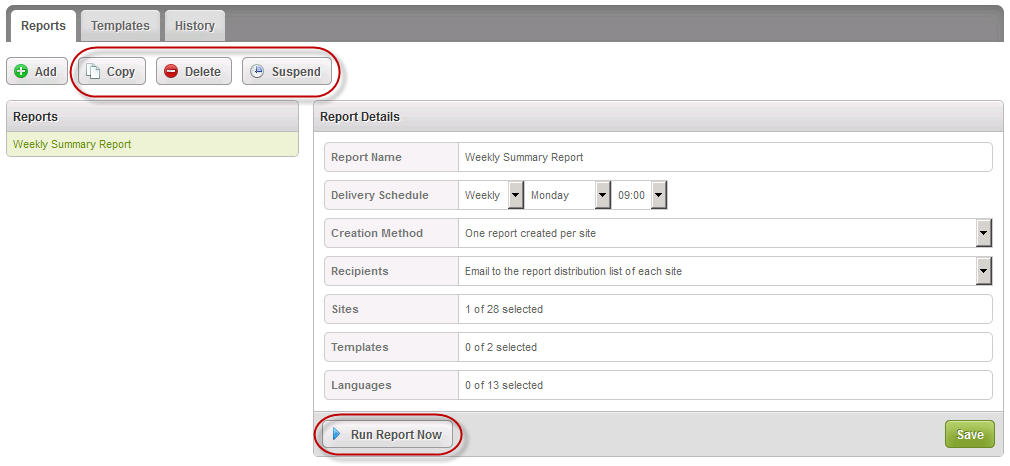
| Copy | Copying a report is a quick way to create a new report from a similar existing report. Simply select the report to be copied, select “Copy”, and rename the new report. This will cause the new report name to immediately appear in your report list. |
| Delete | The delete option is available for all reports, and will delete this ‘Weekly Summary Report’ completely. |
| Suspend/Resume | The suspend option prevents a report from executing on its set schedule without the need to delete it. The schedule may then be resumed at any time. The resume option then becomes available when you select any suspended report from the report list, and will restart the PDF Report creation according to the pre-defined schedule. |
1.4 Run Report Now
At any time you can access a report outside of the set schedule by using the “Run Report Now”. This option provides instant reporting coupled to the ability to apply one-off overrides to the report creation method and its distribution list. Clicking on the ‘Run Report Now’ button will bring up the following reporting criterial:
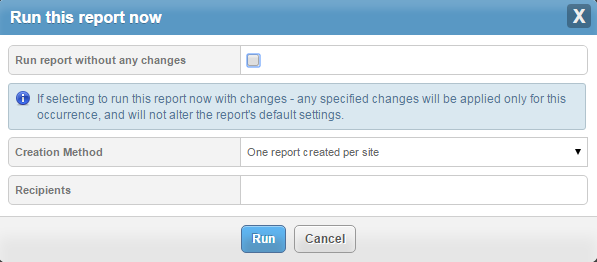
With ‘Run Report Now’ you can change the report to provide aggregate information across sites, or report on individual sites and then also customise the recipients – all without causing any permanent changes to the current scheduling. Alternatively, you can run the report as is, just as it would have been run when scheduled.
1.5 Run Report Now
This makes it easy to access a historical record of all the reports run over the last 90 days, including the when requested date, recipient summary, and ability to download exactly what was sent as part of the schedule.
Requesting a download will allow you to select from the templates, sites and languages which were included in the original report creation criteria so you can see exactly what was sent to the stakeholders on the distribution list.

Note: Reports are available in PDF format only. Reports are available through Report History for download for a period of 90 days. However, any links provided in emails to download these reports are ONLY VALID for 48 hours.
2. Windows 10 OS Searches
Windows 10 becomes a searchable OS in Endpoint Protection > Group Management > Search.
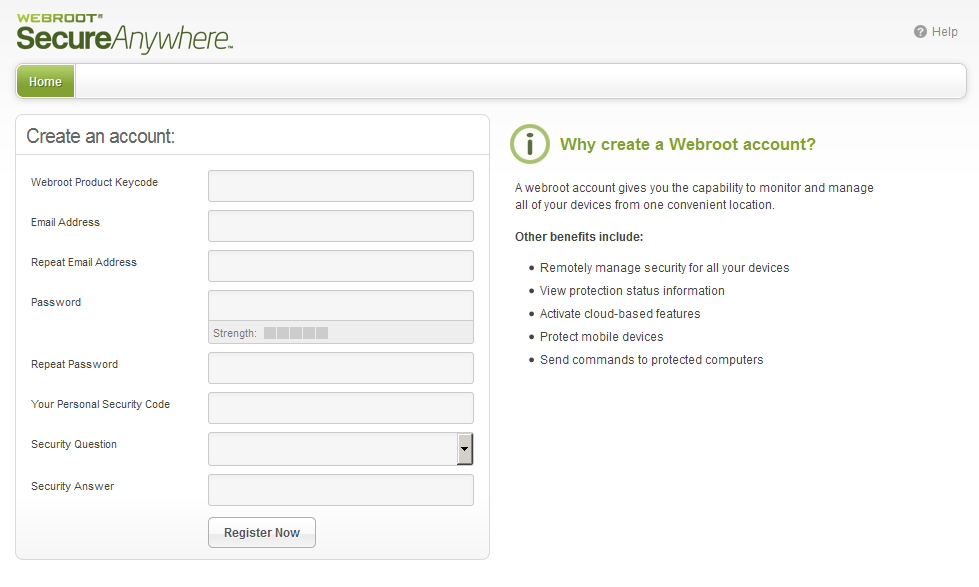
3. Additional Changes
There has been a minor update to the “Create an account” page messaging that now contains details on the benefits of creating an account.
PRODUCT UPDATE BULLETIN 21.0 - July 28th 2015
With this release we see the much requested File and Folder Overrides functionality introduced at both Global Site Manager and the Endpoint Protection management levels with some considerable enhancements to the Overrides user interface to support this new capability.
The following functionality is being released today:
NEW – GSM File and Folder Overrides – This allows Global Whitelisting Overrides to be set at the file and/or folder level, in addition to the whitelisting of MD5’s.
NEW – Endpoint File and Folder Overrides – This allows Whitelisting Overrides to be set at the file and/or folder level, in addition to the whitelisting of MD5’s.
- NEW – GSM File and Folder Overrides – Global whitelist Overrides may now be set on a file or folder level as well as at the MD5 level. This allows much greater flexibility when using overrides and that multiple MD5 Overrides no longer have to be individually whitelisted as you can whitelist a whole directory. To help simplify the whitelisting of files and folders and improve clarity, the Overrides tabs are now split between Whitelist and Blacklist, which will improve management and retain the current familiar look and feel.
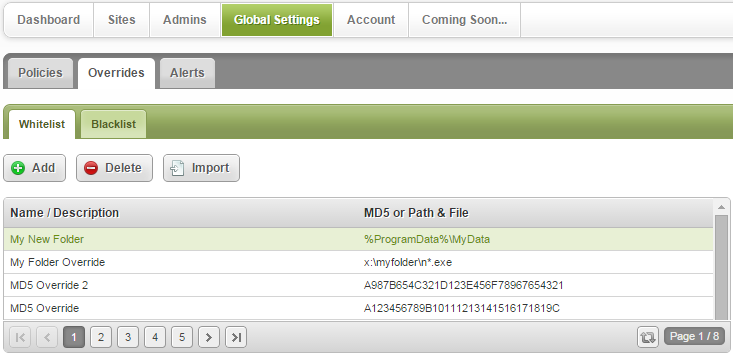 New Tabs in UI as Phase One of UI and Feature Updates.
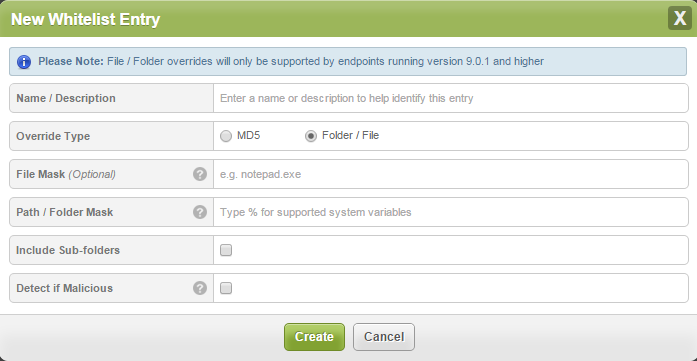 Creating a new File / Folder Whitelist Override.
To create a new File or Folder whitelist override click on the ADD+ button and from the New Whitelist Entry panel select the Folder/File Override. Then…
File Mask: Target a file or group of files by specifying a file mask with optional wildcards, for example:-
>*.exe to target all executable files in the selected folder.
This will default to all files in the selected folder/path if not specified.
Path/Folder Mask: Defines the folder to target with the Override. You can specify an absolute path, for example:-
>‘x:\myfolder\’
or a system variable with optional path, for example:-
>‘%SystemDrive%\myfolder’
Default supported environment variables are displayed when you type ‘%.’ However, you may choose to use any variable you have setup on the target machine with the exception of user variables, which are not supported. You may not use ‘%temp%’ for example, as this refers to a specific users temp directory (‘username/temp/’). Wildcards are not supported.
Include Sub-folders: Select this if you wish to apply the override to all sub folders within a folder.
Detect if Malicious: If this setting is enabled Webroot will continue to protect against any threats originating from the whitelisted file/folder override but this selection does also disable monitoring and journaling to avoid applying monitoring and journaling to a potentially large number of files with an unknown determination. Disabling this setting provides fully trusted whitelisting that allows files to run without any Webroot protection.
IMPORTANT NOTES:-
To use file/folder Overrides you need to ensure all endpoints are running Agent version 9.0.1 or higher as earlier versions ONLY support MD5 overrides.
-
Blacklist override functionality is unchanged.
-
Override import functionality supports MD5 overrides only.
-
- NEW – Endpoint File and Folder Overrides – This allows users of the Standard Endpoint management console to also apply whitelisted file and folder Overrides as well as continue to use MD5 whitelisting.
Overrides are now split into Whitelist and Blacklist tabs to allow easier and more efficient management of the new file/folder Override functions but retain the familiar look and feel of the current Overrides Tabs.
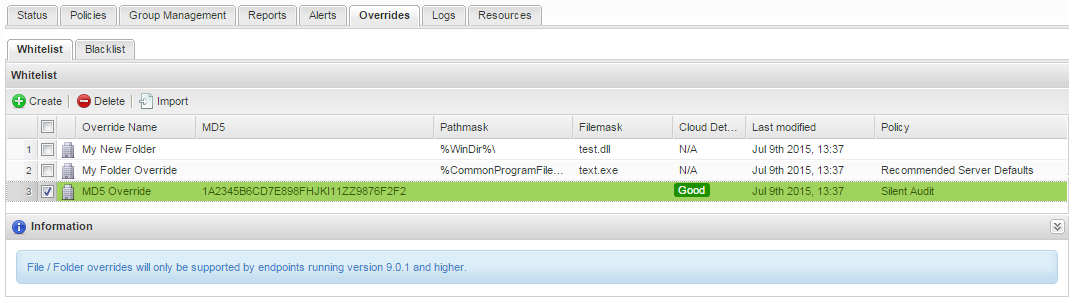 Whitelist Overrides now appear on a separate Whitelist Tab alongside Whitelisted MD5s.
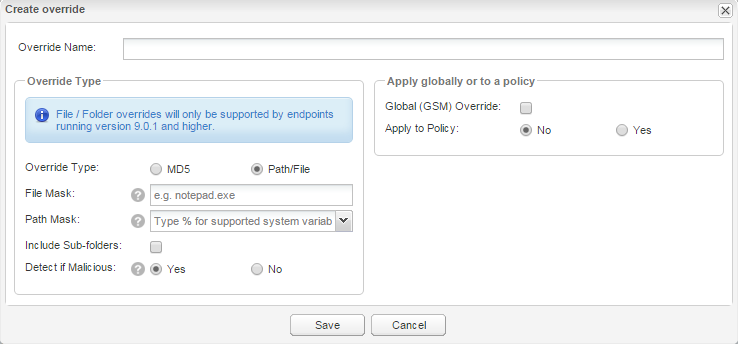 Creating a new File / Folder Whitelist Override.
To create a Whitelisted File/Folder Override click on the +Create button and select the Path/File radio button.
File Mask: Target a file or group of files by specifying a file mask with optional wildcards, for example, *.exe to target all executable files in the selected folder. This will default to all files in the selected folder/path if not specified.
Path / Folder Mask: The folder to target with the override. You can specify an absolute path, for example, ‘x:\myfolder\’ or a system variable with optional path, for example, ‘%SystemDrive%\myfolder’.
Default supported environment variables are displayed in a drop-down list. However, you may choose to use any variable you have setup on the target machine with the exception of user variables which are not supported. You may not use ‘%temp%’ for example, as this refers to a specific users temp directory (‘username/temp/’). Wildcards are not supported.
Include Sub-folders: Select this if you wish to apply the override to all sub folders within this folder.
Detect if Malicious: If this setting is enabled Webroot will continue to protect against any threats originating from the whitelisted file/folder override but this selection does also disable monitoring and journaling to avoid applying monitoring and journaling to a potentially large number of files with an unknown determination. Disabling this setting provides fully trusted whitelisting that allows files to run without any Webroot protection.
IMPORTANT NOTES:-
To use file/folder Overrides you need to ensure all endpoints are running Agent version 9.0.1 or higher as earlier versions ONLY support MD5 overrides.
-
Blacklist override functionality is unchanged.
-
Override import functionality supports MD5 overrides only.
-
GSM Overrides cannot be edited at the Endpoint Protection level.
-
PRODUCT UPDATE BULLETIN 20.5 - June 3rd 2015
Release 20.5 of Webroot SecureAnywhere® Business Endpoint Protection delivers several new enhancements including CSV export of the Endpoints Needing Attention report; Override of Dwell Time pop-up; and the addition of Group Description to emails. These improvements are designed to provide enhanced product functionality. The new increased capabilities are outlined below and are now live.
- NEW – CSV Export
The way data is downloaded via CSV export from Endpoint Protection has changed. The export functionality is accessed as before, but now the user will be emailed a link to download the file to their logged-in email address rather than downloading directly through the browser. This change means that data sets of any size can be exported and made available for access in the future.
CSV Export for endpoints needing attention. CSV export available wherever this icon exists.
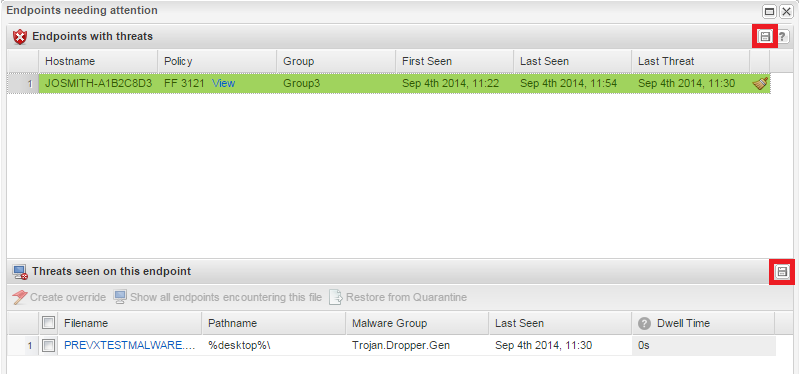 Confirmation will show that the file has been emailed successfully.
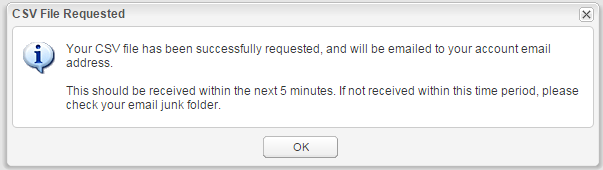 The following email will be sent to the logged-in email address of the user.
- NEW – Override from Dwell Time Pop-up
For added convenience, it is now possible to create an override for a MD5 from the Dwell Time pop-up screen. This works like existing functionality to create overrides from elsewhere in Endpoint Protection, i.e. the Threats Detected pop-up.
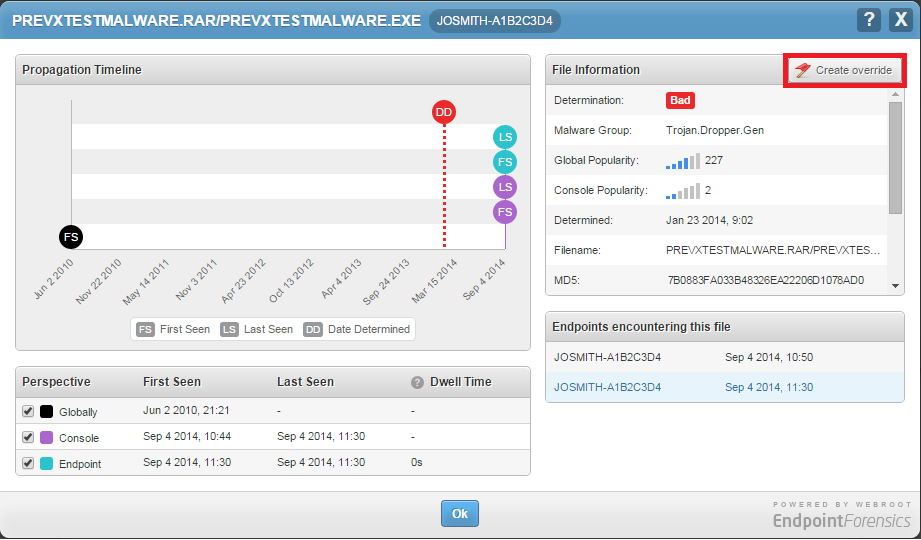
- NEW - Alert Group Description
Group Description may be added to the subject and body of an alert. Select the ‘Group Description’ field when adding variables from the available list.
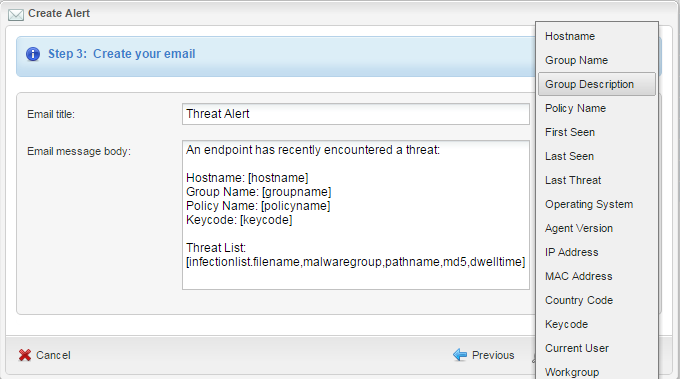
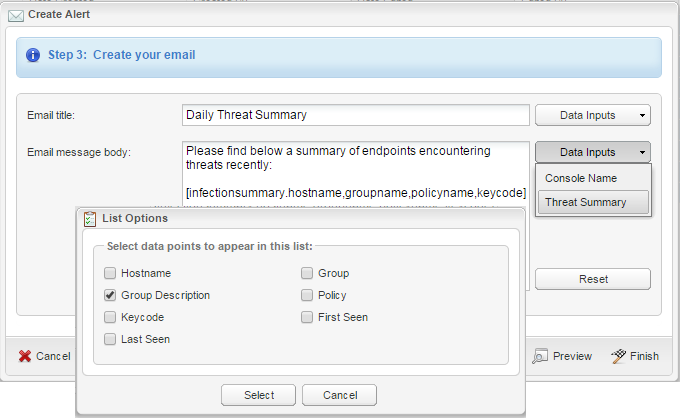
- Fixed intermittent issue with ‘Alert Recipient’ text field missing when creating an alert.
- Updated link to Policy Help video.
- Silent audit description updated to read 'Non-remediating Security Audit with limited protection enabled.'
PRODUCT UPDATE BULLETIN 20.4 - May 7th 2015
This console release delivers more flexibility around logging into the management console for all users and a new telephone login variation introduced for our Hikari Tushin users in Japan.
- NEW – Security Code Override – It is now possible to disable the use of a Security Code during the management console login. This feature is for users wishing to remove this extra security step from the login process. While there are situations where this is relevant we are recommending that administrators continue to use the security code layer of security during login as that maximizes access protection. The option to turn off the Security Code is within User Account Settings under the Admins tab in the GSM console and also within the Endpoint and Mobile Protection “Manage Admins” drop down menu.
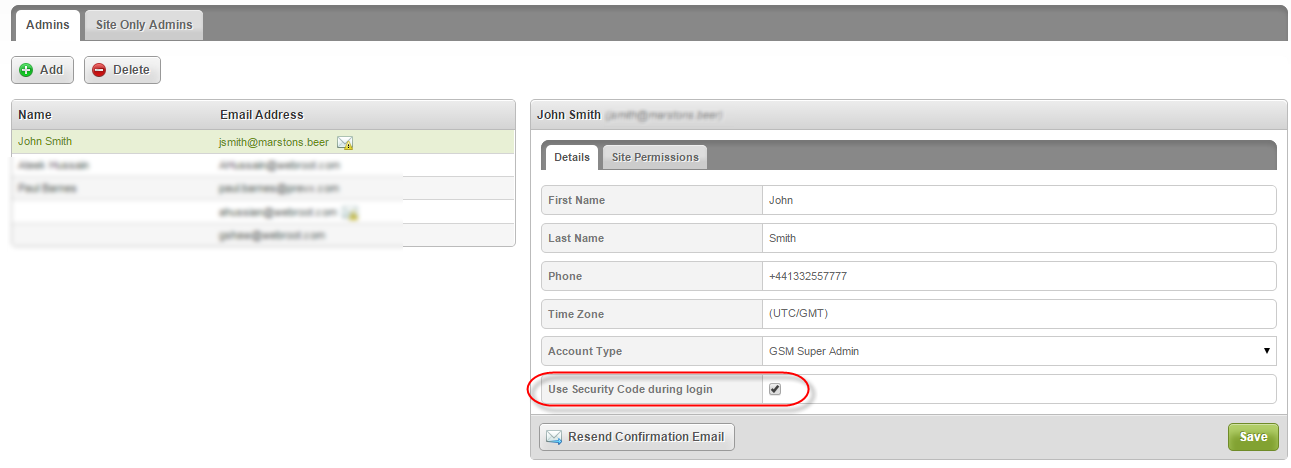 Enabling/Disabling the Security Code for Login within the GSM console.
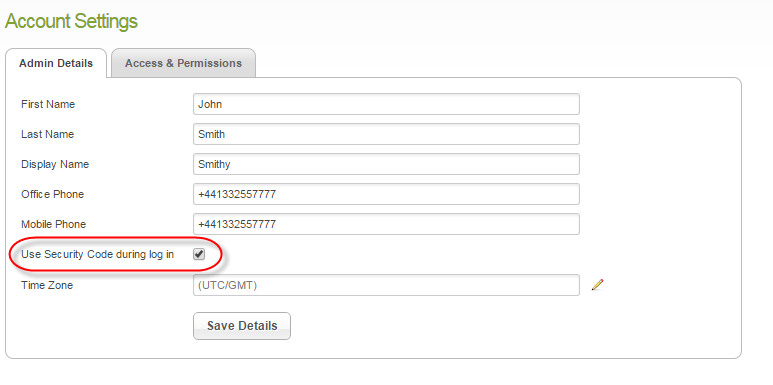 Enabling/Disabling the Security Code for Login within standard Endpoint Protection console.
- NEW – Hikari Tushin Telephone & Password Login – Hikari Tushin users can now login using a phone number and password, but this functionality is only available to Hikari Tushin users. The Hikari Tushin phone login will be visible to all users, but non-Hikari Tushin users must continue to login using their email and password.
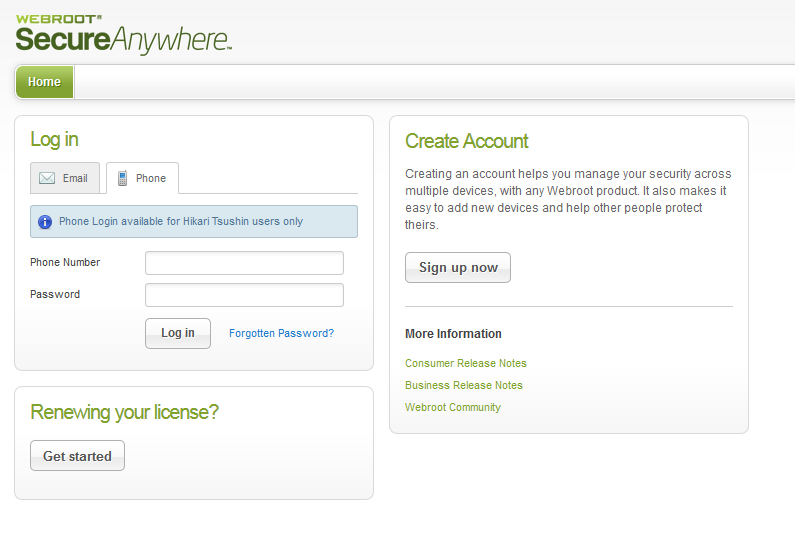 Optional Hikari Tushin Users Telephone Login.
The reset password section has also been updated to allow Hikari Tushin users to reset using their phone number.
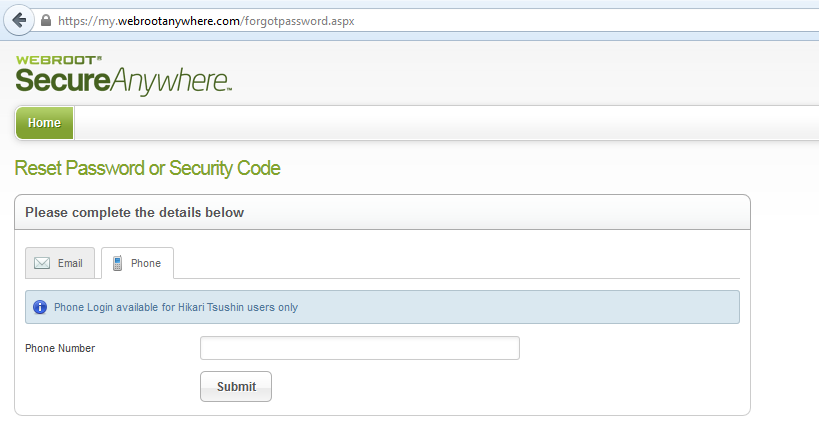 Hikari Tushin Users Telephone Password Reset.
 - Update – GSM Onboarding Emails – The emails will now clearly distinguish in their text between the Trial and Full License key versions to avoid any confusion.
PRODUCT UPDATE BULLETIN 20.3 - April 16th 2015
The latest release of the Global Site Manager (GSM) delivers several new enhancements to the dashboard, including additional data points in the endpoint drill down. These improvements are designed to provide better visibility of endpoint information that will be most useful in managing your endpoint environment. The following capabilities are now available with this release.
- NEW – Global Alert Preview – This preview of global alerts during setup ensures users are given the right information.
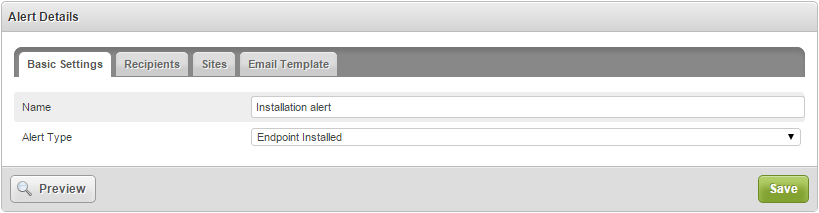
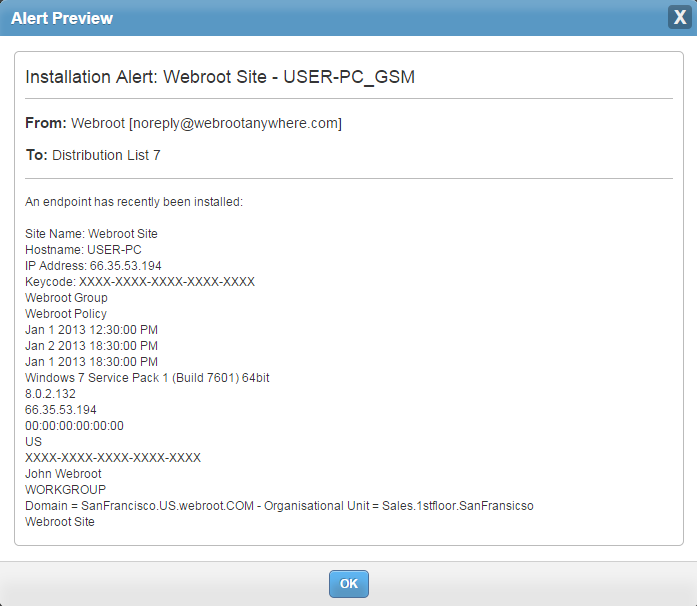
- NEW – Chart and Site Drill Down – Detailed information on the status of your deployment is visible, down to the endpoint level. The chart includes a list of sites and the number of matching endpoints by hostname, with specific details about each endpoint in the drill down.
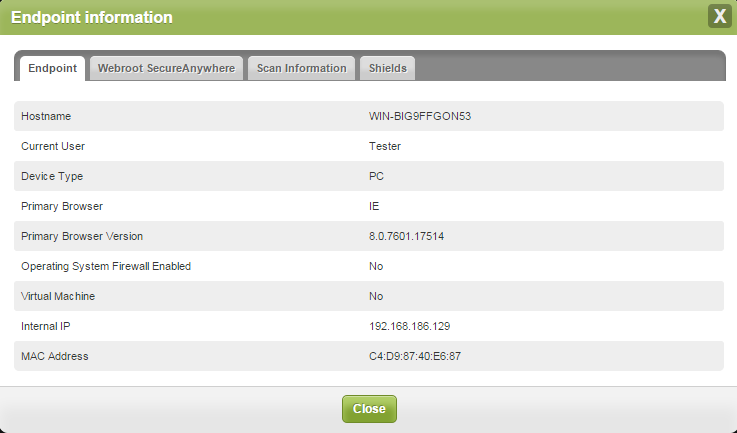
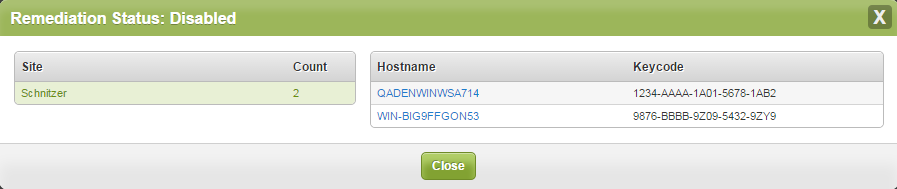
Additional Enhancements
- The Silent Audit policy description is updated to read 'Non-remediating Security Audit with limited protection enabled' to better reflect level of protection.
- The Dashboard is now the default view to provide an immediate overall summary of the health of the deployment.
- All tabs now run from a single page.
- Virtual Machine and Firewall Enabled data points have been added to the endpoint drill down.
- The Agent Version spread chart now lists ‘Other’ where 10 or more unique versions are in use.
- Deactivated sites are now excluded from all charts and drill downs to give a more accurate view of the current deployment.
PRODUCT UPDATE BULLETIN 20.2 - February 4th 2015
Our first release of 2015 sees the introduction of many new dashboard personalization enhancements and capabilities. All of these are designed to make it much easier for you to generate and create better visibility of the endpoint information that will be most useful to you for managing your endpoint environment. The following capabilities are now available with this release.
NEW – Dashboard Add Chart Button – this new functionality allows for the creation and personalization of the Administration Dashboard. It allows the easy creation of new Dashboard charts and managing how they are graphically presented within the console dashboard.
NEW – Dashboard Infection Visibility – allows you to create the Infection Dashboard reporting most appropriate to your management needs.
- NEW – Dashboard Add Chart – allows administrators to personalize the dashboard view by creating, editing, deleting and managing all of their Dashboard charts.
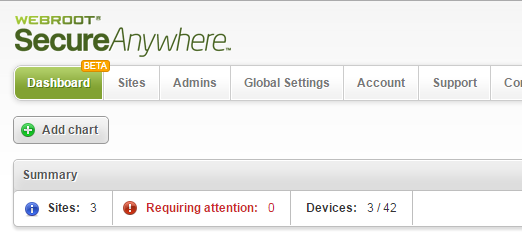 New Add Chart to Dashboard Button.
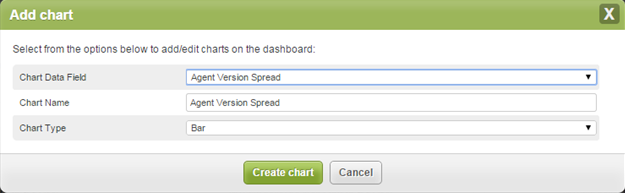 Pop-Up Add A Chart Wizard lets you define the Chart Data Field topic; a unique Chart Name and the Chart (display) Type.
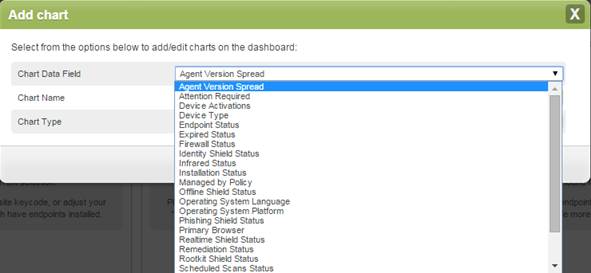 There are over 24 different customizable chart Dashboard options.
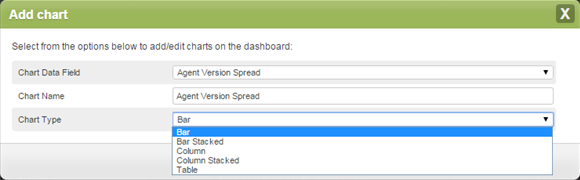 Dashboard Chart Type lets you display any Chart in the most sensible way.
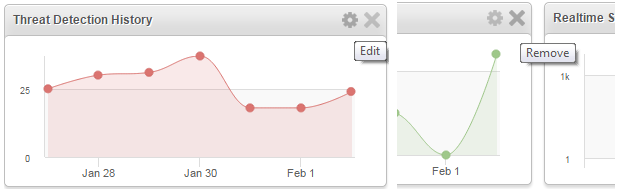 All the Dashboard Charts you create are able to be Edited or Deleted (Remove).
- NEW – Dashboard Infection Visibility – lets the administrator customize and select the infection data and period to display within the Dashboard.
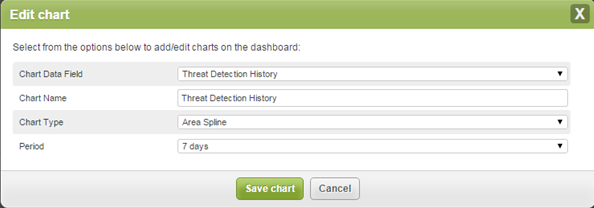 Time period for the “Threats Detection History” and “Device Activations” is now configurable.
PRODUCT FIXES BULLETIN 20.1 - November 27th 2014
Further to the release last week of Global Site Manager console Release 20.0 we have seen some issues with the BETA and are releasing the following updates and patches for the GSM Dashboard immediately.
GSM Global Site Manager Dashboard fixes:
- It was previously possible to filter the sites whilst a previous filter was being saved (filter multiple times continuously), leading to Dashboard charts crashing. The “Site Filter” button is now unavailable until the Dashboard has completed loading, and it is also disabled now when carrying out a current filter call.
- Site filter was re-calling the summary bar data – even through the summary bar is not affected by this. This call has been removed.
- Button mousedown styling (active / pressed state) was not occurring.
- Global error handling plugged in. Previously if the server returned success: true, but an error (no data / error message from the server), this wasn’t being handled.
- Duplicate data in chart drill-down has been removed (Sometimes the same endpoint was listed multiple times).
- Ability to drill down into an endpoint’s site / detailed information has been removed, where the logged in user no longer has access to the endpoint’s site.
- Ability to drill down from a chart when the data point was zero has been disabled.
- Dashboard page was not handling the state where a GSM customer had zero sites (e.g. New GSM customer). User now receives a welcome message with steps to get started.
- Endpoint (more information) drilldown from chart – VM and OS Firewall data points removed (not yet supported by Agent software). All other data points also re-ordered into sensible groupings.
- Buttons to create / edit / delete chart removed from the page code completely, instead of being hidden via CSS (user could possibly get access to these via CSS file not loading correctly, manipulating the page in debug console, etc).
- Site filter popup now has a paragraph explaining its intention.
- General code hardening for dashboard charts cross-browser (margins, line colors, sizing, spacing, changing the size of the charts when using the 1/2/3/4 options, resizing window, etc).
- Standard “Loading Dashboards” message now shown on entry. All controls (site filter, reset, etc) removed / hidden until load complete.
- Threat and Activation charts now set to “Area-Spline” by default.
- Dashboard code files now included inside the generic code combining, minifying and versioning routine to ensure customers never receive cached files on publish.
- Fixes to dashboard charts/tables when changing the selected time period (future release).
- Error messaging shown to user changed to improve clarity.
- If an error occurs when parsing dashboard setup data, option for the user to reset their dashboard configuration presented in the error message.
PRODUCT UPDATE BULLETIN 20.0 - November 20th 2014
As part of our continuing development of the Global Site Manager, console Release 20.0 introduces new GSM Dashboard functionality. Administrators will get immediate value from these new Dashboard capabilities as they allow you to have a far better overview of either multi-customer or multi-site deployments.
On a note of caution - we are aware of certain scenarios in which the dashboard data may not be 100% representative. This occurs because the Dashboard uses our latest agent version data sets to create Dashboard charts and you may have some agents that have not yet been upgraded to a version that provides these new data sets. However, we are very confident that for vast majority of users they will see the correct Dashboard data.
1. NEW – Global Dashboard – Gives Administrators a new configurable Dashboard that provides immediate insight at a Global level of their multi-site (or multi-location) deployments of endpoint protection. This release includes ‘canned’ dashboard charts for the following 7 default data points:
- Threat Detection History – A historic view of all threats encountered over a 7 day period.
- Device Activations – A historic view of new device activations over a 7 day period.
- Realtime Shield Status – Count of devices with their Reatime shield switched on/off.
- Managed by Policy – Count of devices which are managed versus any that are unmanaged.
- Agent version Spread – Count of WSA agent versions installed.
- Remediation Status – Count of devices with remediation (clean up) enabled by default.
- Expired Status – Count of devices that are on an expired keycode.
- The ability to add a new chart (based on the list of over 20 data points) will be part of a future release early next year.
- As this is a partial release please note that with the exception of 'Threat Detection History' and 'Device Activations', only endpoints running agent version 8.0.4.134 onwards will be accurately represented in any Dashboard totals.
- Migrated keycodes may also cause some slight anomalies in counts.
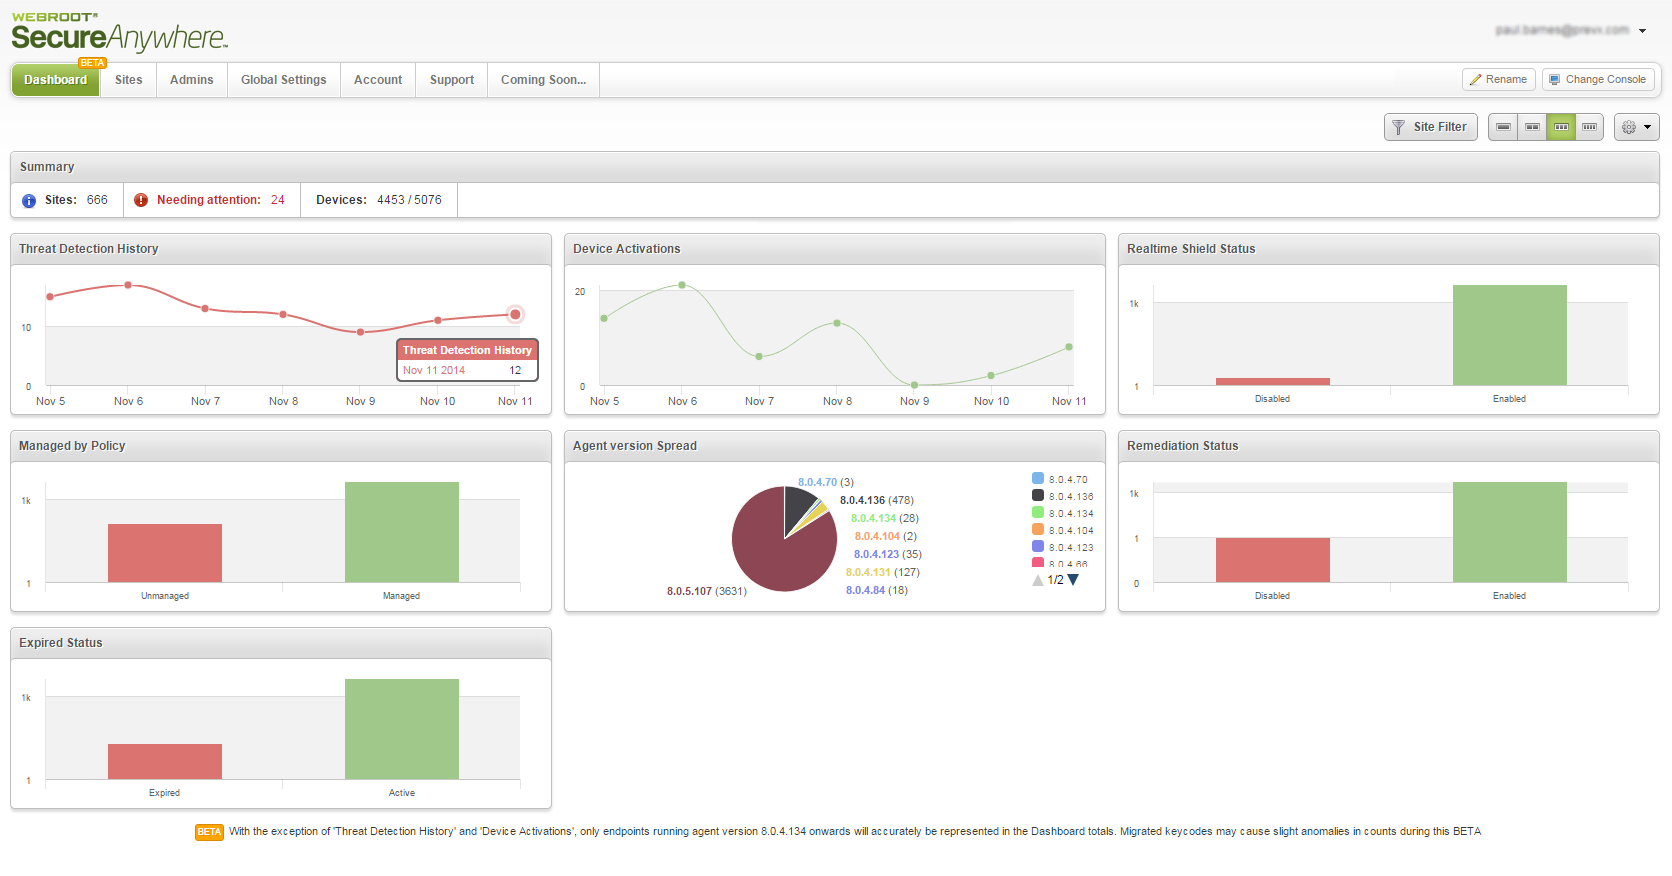
Here are some of the other management console updates that are part of this BETA release.
New Console Tab
Summary Bar
The summary bar gives a quick overview of the deployment with the ability to hover over the Sites reference to get further site information. The ‘Needing attention’ will take the Administrator to the list of sites.

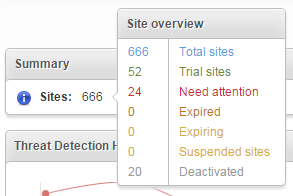
Site Filter
The ability to configure which sites you would like to have be part of the dashboard charts is available using this button:

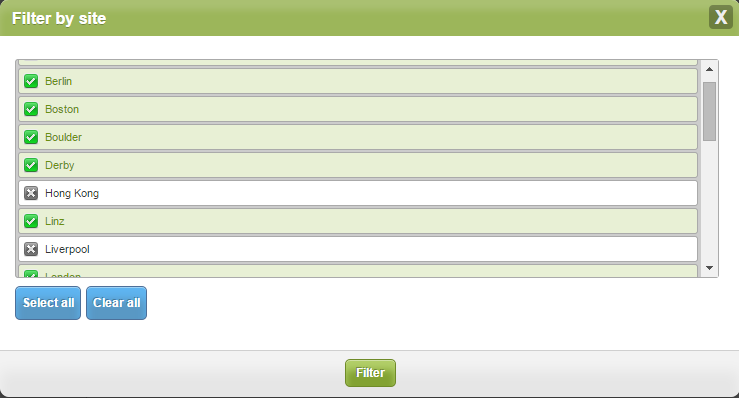
Note:
The ability to configure a single chart to render a selection of sites will be part of a future release.
Configurable Dashboard Layout
All charts can be rearranged according to the customer’s preference with the ability to toggle layout format via the following buttons:
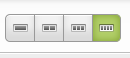
And simply drag and drop charts into your preferred positioning.
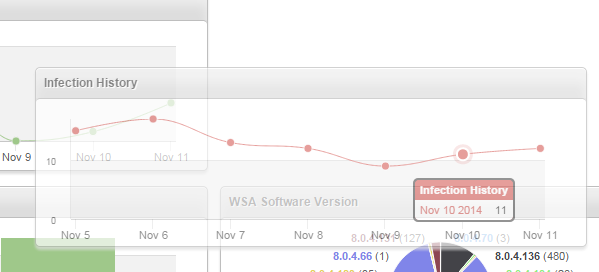
Drill down capabilities
Each chart provides a drill-down to view the Top 50 specific sites/devices relating to the chart, with a further drill down into the specific site, this will be enhanced in the upcoming release with a list of sites being shown first, rather than endpoints.
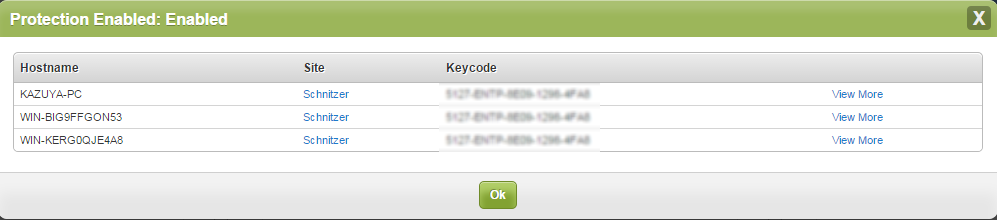
Dashboard reset
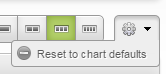
PRODUCT UPDATE BULLETIN 19.2 - September 11th 2014
Release 19.2 introduces a wide range of interrelated new features and capabilities that considerably enhance the management and overall development of Webroot SecureAnywhere® and Global Site Manager (GSM). Many of them are a result of direct requests from our customers.
We are making it very easy for administrators to not only group sites, but also to mark-up sites with similar features so they can then be filtered to create new subsets within groups of sites. We are also making it simpler to sort sites using the headings within the sites section of the UI. We are introducing the concept of suspending and resuming protection, in addition to being able to deactivate a customer or site. And, until now, deleting administrators was complicated - so we have made it straightforward to do so at both the GSM and Site levels. Policy application and control has been improved as well, with the new option to apply policies to groups.
NEW – Site Tagging – GSM administrators often need to group customer sites together based on a shared attribute and then be able to view sites by selecting one of these attributes. By implementing the site “tagging” feature they are now able to do this.
NEW – Site Filtering - Site tagging also allows the administrator to filter their site list using the tag, and any sites that match that tag will be found and returned. This allows an administrator to quickly filter their site list in many different ways and return the sites they wish to view from the entire site list. In addition to filtering the site list by tags, administrators may now also filter using the site name or site comments.
NEW – Site Sorting – A common feature request has been the ability to sort using the site view headings. This is now available.
NEW – Suspend/Resume Protection – There are circumstances where, rather than deactivate a site or customer (which expires the keycode and uninstalls WSA software from all endpoints), administrators need to ability to suspend the service. This new suspend and reactivate capability has now been added.
NEW – Deleting Administrators – Deleting an administrator is now straightforward at both GSM and Site levels.
- NEW – Site Tagging – Global Site Manager administrators have requested the ability to group their sites together based on a shared attribute and then be able to view a subset of those sites by selecting one of those attributes. To accommodate this, we have implemented a new feature known as site “tagging”. This allows an administrator to “tag” a site with any free-form string of information that they want to use.

Simply add ‘tags’ to each site and then view selectively all sites with the same tag.
- NEW – Site Filtering – Administrators can now filter their site list by using tags, names, or comments. This allows the administrator to quickly filter their site list in many different was, but return only the sites with the information they wish to view from the entire list.
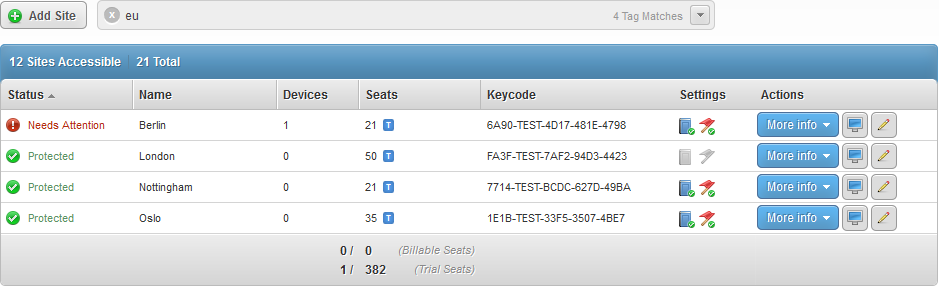
Sites returned by filtering on an EU tag.
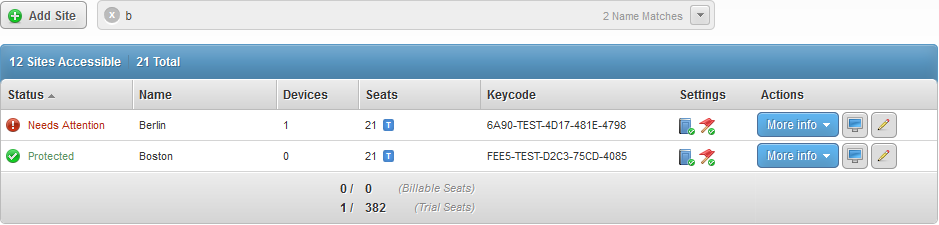
In addition to tags you can also filter by site Name or site Comments.
- NEW – Site Sorting - Another customer feature request has been to have the ability to sort the site list by the various headings. This has now been implemented so administrators are able to sort the site list by “Status,” “Name,” “Number of Devices,” and “Number of Allocated Seats.” This makes it far more convenient to bring the information administrators need to the top of their list.
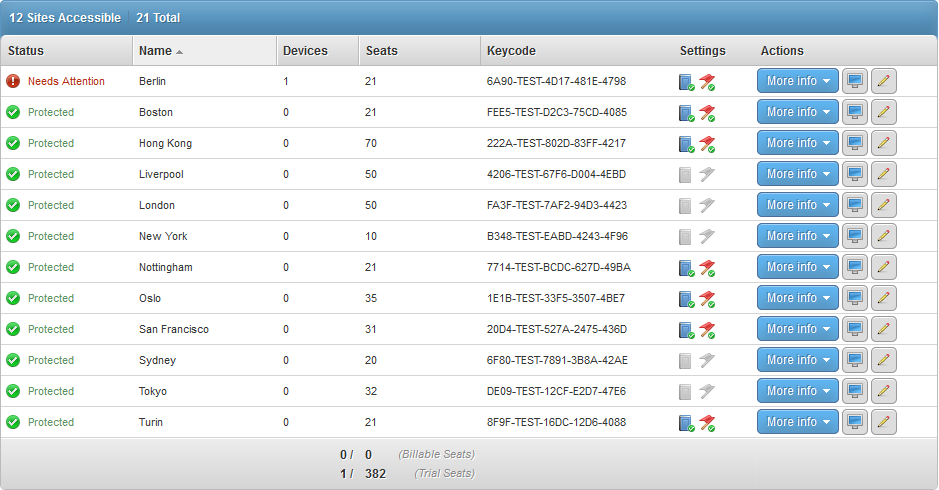
Easily sort sites by ‘Status,’ ‘Name,’ ’Devices,’ and ‘Seats’ headings.
- NEW – Suspend/Resume Protection - Sometimes a GSM administrator may wish to temporarily disable a site. Until now, their only option was to “deactivate” the site, which expires the keycode and uninstalls the software from all site endpoints. This isn’t ideal, as to “re-activate” their only option is to create a new site and re-deploy WSA using a brand new keycode. To resolve this problem, we have implemented the ability to “Suspend” and “Resume” protection for a site.
Suspending protection will now only temporarily expire the keycode, meaning the endpoints will revert into “Detection Only” mode. The SecureAnywhere software will continue to reside on the endpoints and detect malicious software, but it will not clean-up any malware encountered. Site level administrators access permissions will also be reduced to “View Only” mode when accessing the SecureAnywhere console. Then, once protection is ready to be re-enabled, the GSM administrator can simply select “Resume Protection,” at which point all that site’s endpoints will return to full clean-up functionality and access to the SecureAnywhere web console is returned to any site-level only administrator(s).

Simply, quickly, and easily suspend and reactivate sites.
- NEW – Administrator Deletion - Another important feature request has been for the ability to delete administrators from the SecureAnywhere web console. This feature is now available at both the GSM and Site levels, with the ability to delete administrators being available from within both the GSM “Admins” page, and the Site level “Manage Admins” pages.
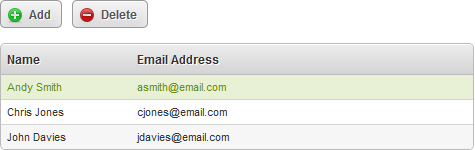
Delete an Administrator at the GSM level.
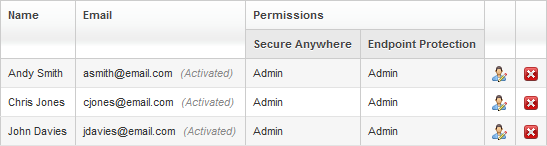
Delete an Administrator at the Site level.
PRODUCT UPDATE BULLETIN 19.1 - August 12th 2014
Following the release of version 19.0 in early July, we are continuing the development of the Webroot SecureAnywhere® Global Site Manager (GSM) console by adding Global Alerts with the release of version 19.1. We have also made optimizations to allow hundreds of sites to be managed under a single GSM console. This now lets our MSP Partners and large enterprise customers manage a large number of sites from one GSM console.
In this release we have also added to our Standard console the ability to easily deploy additional endpoints to a specific group.
NEW – Global Alerts – This latest addition to the Webroot SecureAnywhere “Global Site Manager” (GSM) console adds new “Global Alerts” features within the Global Settings section of the GSM console.
- New - Global Alerts - Allows an administrator to create alerts at a Global level, which are then be applied to any ‘child’ Endpoint Protection ‘site’ (customer) below. This significantly reduces the maintenance overhead as these can now all be handled from one shared location instead of having to manually manage individual site alerts.
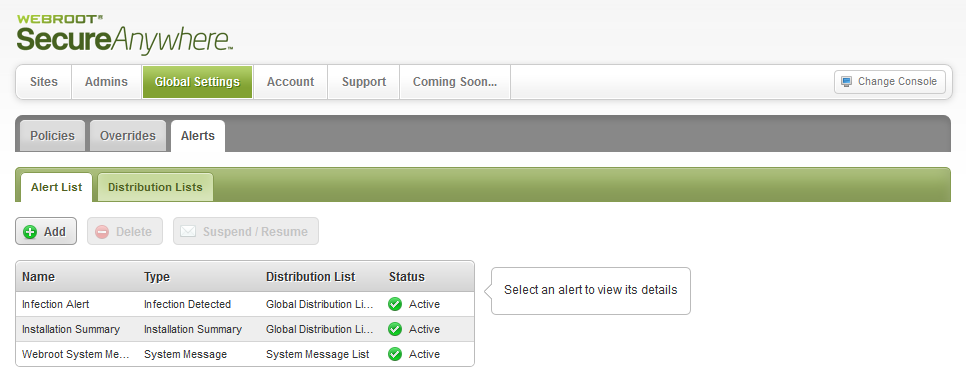
New centralized Global Alerts available within Global Settings tab.
Alerts can now be setup and managed centrally by simply selecting which type of alert you wish to receive (Infection Alert, Installation Alert, Infection Summary, or Installation Summary), along with the frequency at which these alerts should be sent.
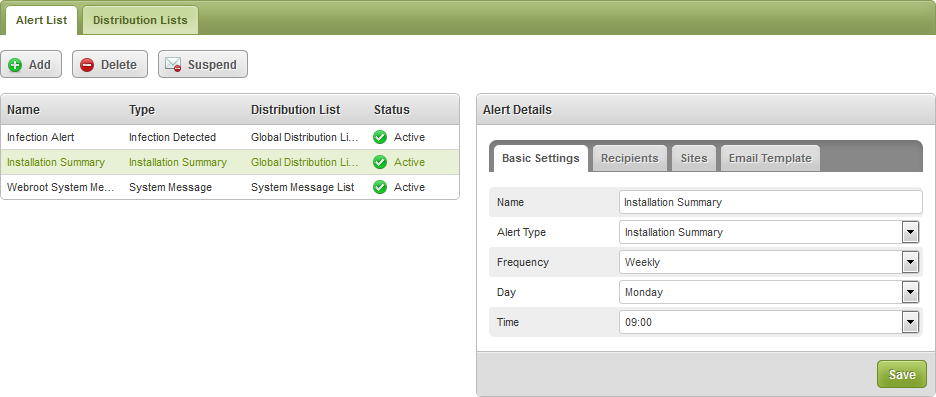
Simply add a new Alert using intuitive pull-down selections from Basic Settings tab.
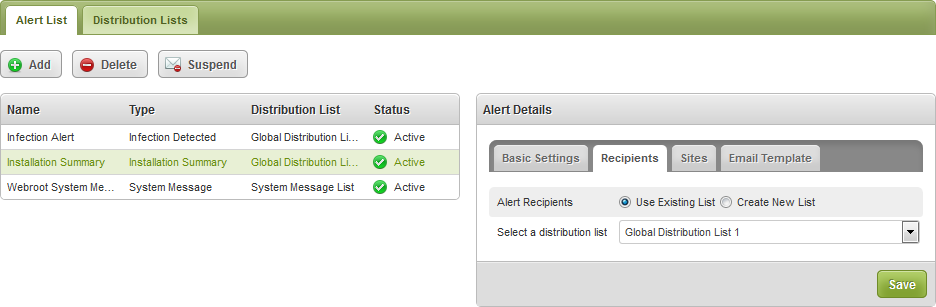
Use the Recipients tab to select an existing distribution list or create a new distribution list.
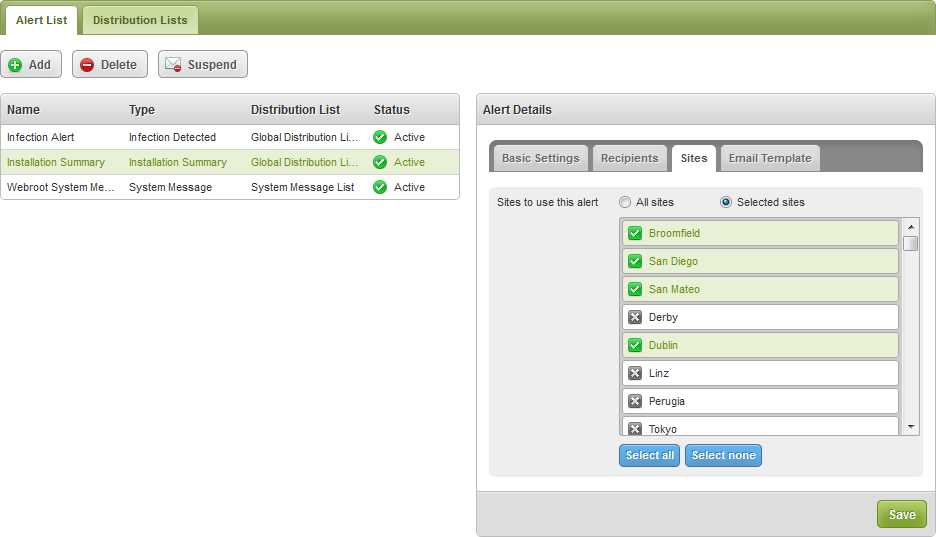
Use the Sites tab to select which sites you want to trigger the alert from.
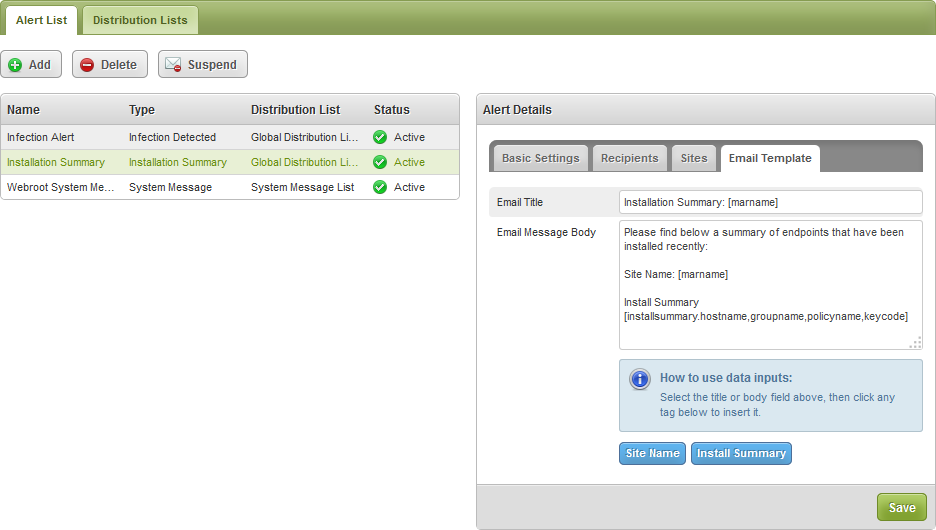
Then use the Email Template tab to create the message that should be sent out.
Email distribution lists are easily setup and managed by simply selecting an existing distribution list and editing it as necessary, or creating a new one by assigning a name and entering the email addresses you want to use for a new distribution list.
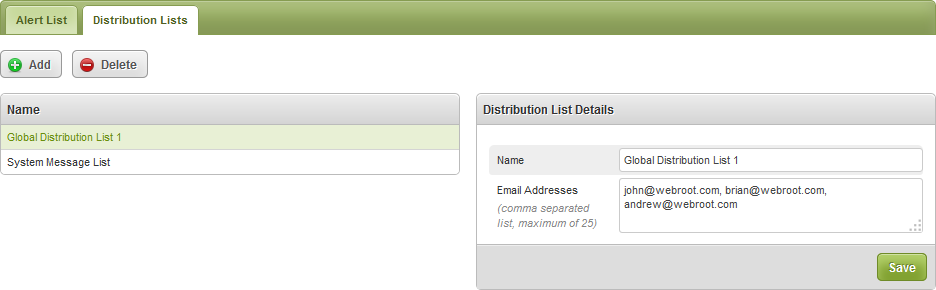
Simply select and edit an existing Alert Distribution List.
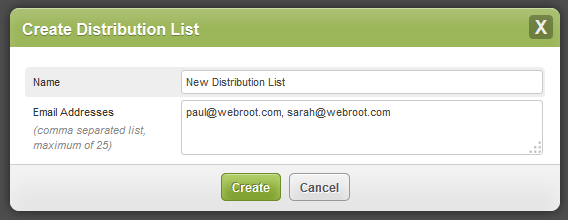
Or, easily create a new one from scratch.
The new Global Alerts created at the GSM level are also visible in a “View Only” mode at the ‘Site’ level, as changes to Global Alerts are only permitted at the GSM level.
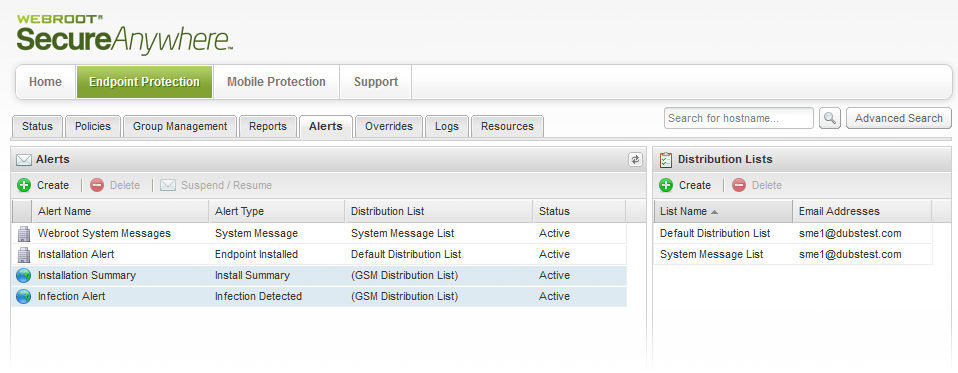
List view differentiates between Global and local Site level alerts.
Clicking on a Global Alert provides the following site level details.
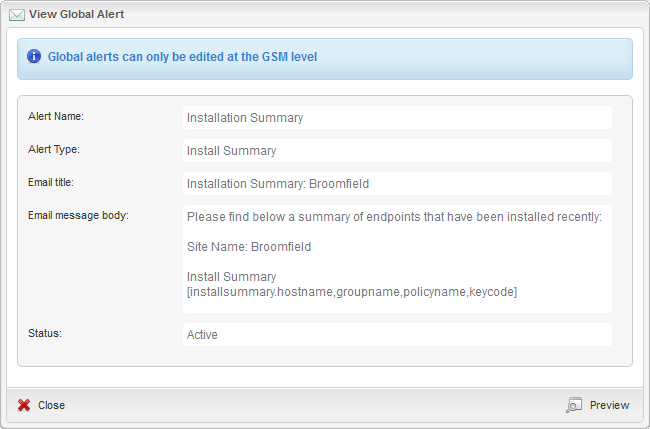
Read only view of Global Alerts at Site level.
PRODUCT UPDATE BULLETIN 19.0 - July 1st 2014
As part of the ongoing development of the Webroot SecureAnywhere® Global Site Manager (GSM) console, we are releasing version 19.0. This major release incorporates brand new "Global Settings" to make the management of multiple sites and customers more efficient by removing the need to manage policies individually.NEW – Global Settings – Enables a GSM Super Admin to create policies and overrides at the GSM level, which can then be applied to any Endpoint Protection site.
- Sites the current user has access to are now displayed, along with the number of sites in total which are active under the GSM console.
-
Quick overview of which sites have global policies and overrides enabled or disabled.
-
Visibility of the default policy for each site, along with the ability to quickly change this.
-
Days remaining is visible for any “Trial” sites created, along with expiring and expired statuses for each row.
- NEW – Global Settings – This new capability dramatically reduces the maintenance overhead for GSM administrators’, as these can now all be handled from one shared location, instead of having to manually manage each individual sites policies and overrides.
New Global Settings for faster and easier administration of multiple endpoint sites or customers.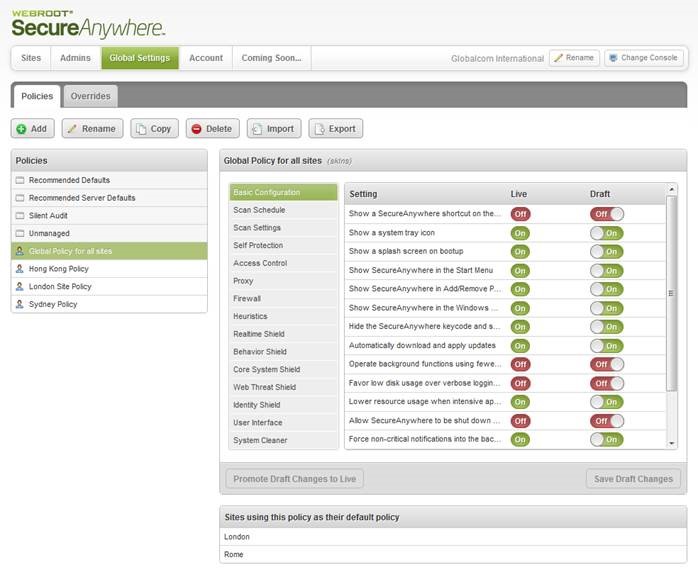
Full capabilities to create and manage policies are now available at the GSM level.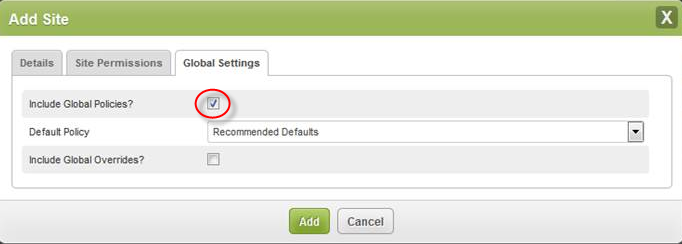
When creating or editing a site, you can now select whether this site should have global policies available and select which policy to apply as the "default" policy that endpoints will inherit upon installation.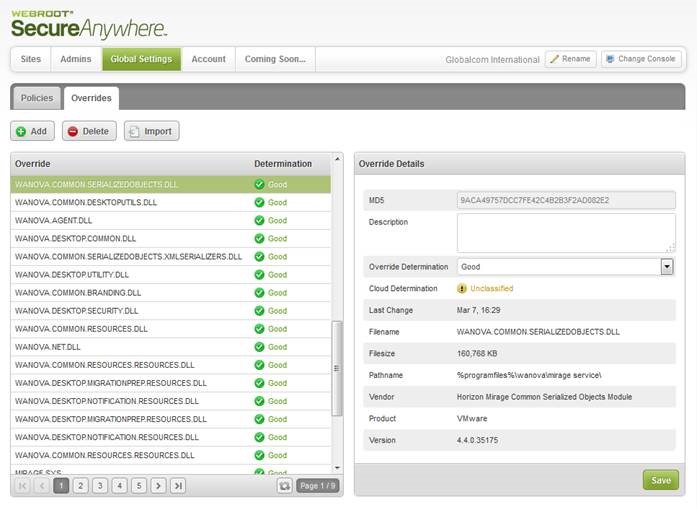
Full capabilities to create and manage overrides are now available at the GSM level.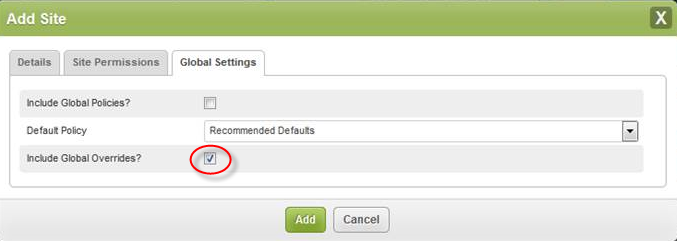
When creating or editing a site, you can now select whether this site should have global overrides available. - NEW – Import and Export Policies & Overrides – This update applies to both the GSM and Standard consoles. Within the policies page at both GSM and Site level, you can now select an “Import” option.
-
Automatic Import - by default, this is set to “auto” mode which displays a list of all policies across all sites which the logged on account has access to.
-
Select the policy you wish to import from the list, then click “Import” to transfer this into your current console.
This once again drastically reduces the maintenance overhead for any Endpoint Protection administrator, since they no longer have to manually recreate identical policies across multiple sites. Instead, you can create the policy once, then import into all sites where you wish it to be available. This is also useful at GSM level, since the GSM Super Admin can import a site level policy into the GSM console, make it global, and then instantly make it available across all sites with global policies enabled.-
Manual Import – for circumstance where an administrator wishes to import a policy from a site they do not have access to, only manual import is available.
-
Select the policy you wish to import manually, then click the “Export” button. This will display a “Transfer Code” which you can then enter during an import process to import that policy.
This is extremely useful for administrators’ who may have multiple accounts under different email addresses, or who may simply wish to email their transfer code to a friend for them to import into their own site.
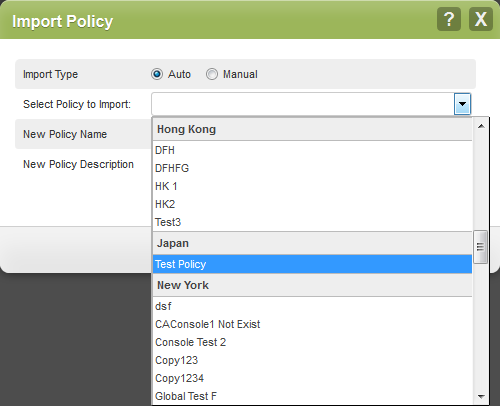
Auto and Manual Import of Policies.
Override Import - under the overrides page at both GSM and Site level, you can now select an “Import” option.-
Selecting this option displays a list of all sites which the logged on account has access to.
-
Simply select the site from where you wish to import all overrides and select from the various import options (overwrite existing overrides, etc.). Click “Import”. This will proceed to import all overrides from that site into your currently selected site.
Once again this proves extremely useful for administrators who wish to simply copy identical overrides from one site to another instead of manually having to create the same override for each site. For GSM Super Admins, this also means they can pull up overrides from a site, make them global, and apply them to all other sites which have the global overrides option selected.
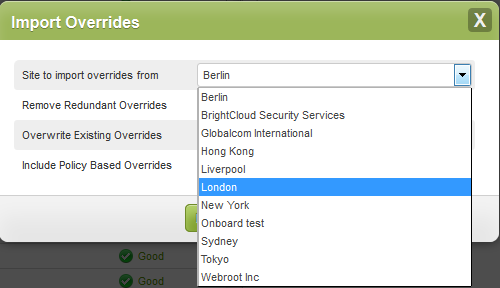
Simple importing of overrides.
-
- NEW – UI Informational Enhancements – A number of improvements to the UI now provide relevant information that simplifies administration.

-
Number of sites the logged on user has access to is now displayed, along with the number of sites in total which are active under the GSM console.
-
Quick overview of which sites have global policies and overrides enabled / disabled.
-
Visibility into the default policy for each site, along with the option to change this.
-
Days remaining is now visible for any “Trial” sites created, along with expiring and expired states for each row.
-
PRODUCT UPDATE BULLETIN 18.0.3 - May 7th 2014
Until now, accessing information via the management console has been limited to scrolling through data views and there were not many sophisticated search options. These restrictions are now swept away within this incremental 18.0.3 release for both the Standard and the new Webroot SecureAnywhere® Global Site Manager consoles. Both now provide advanced search and filtering. In the Global Site Manager console we have also added more information around Administrator Permissions.
NEW – Advanced Search and Filtering – Allows the administrator to use a wide range of parameters to create refined filtered searches, adding a great deal of speed and flexibility when looking to identify individual or groups of endpoints. This search and filtering is available within both Standard and Global Site Manager consoles.
- NEW – Advanced Search and filtering option under Change Console button in all console views.
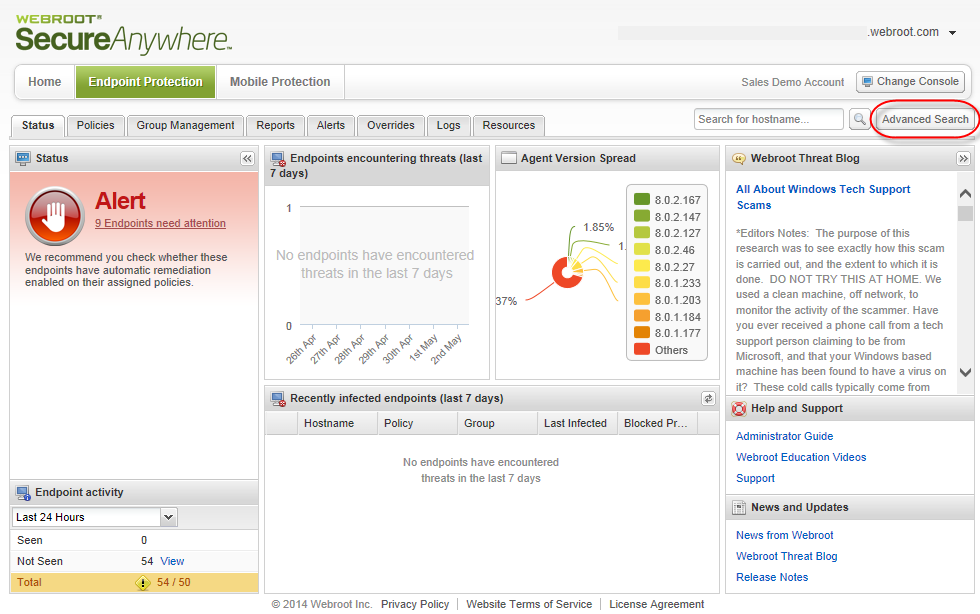
Easily access advanced search and filtering options for any endpoint managed
The new search and filtering options include:Field Options / Example Hostname [Free form Query] Status Protected
Infected
Expired
Infected & Expired
Not seen recentlyGroup [Generated from site groups] Policy [Generated from site policies] Active Directory [Free form Query] + [Generated from AD Tree] Keycode [Generated from attached keycodes] Operating System Windows XP
Windows Vista
Windows 7
Windows 8
Mac OS
OtherAdvanced: Agent Version [Free form Query] Agent Language [Pre-set list of all supported languages] VM Yes
NoDevice MID [Free form Query] Instance MID [Free form Query] Current User [Free form Query] Public IP Address [Free form Query] Internal IP Address [Free form Query] + [Generated form internal IP ranges] Workgroup [Generated from workgroups detected] MAC Address [Free form Query]
Clicking on the Advanced Search button under the Change Console button results in the following pop-up window appearing:
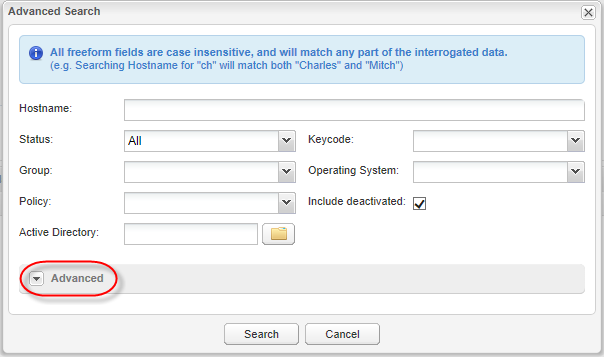
Advanced Search pop-up window with Advanced options available by simply clicking on Advanced.
The Advanced Search function is also selectable directly from within the Group Management beside the Groups and Views tabs.
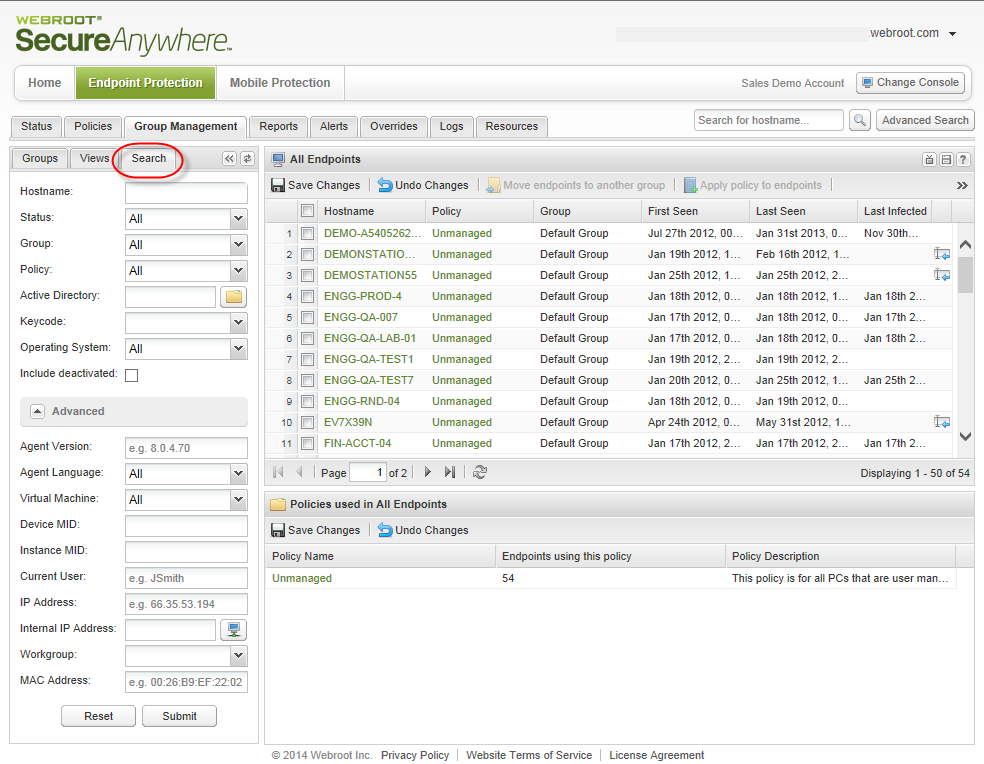
Advanced Search from within the Group Management tab - NEW - Admin Permissions Pop-Up Window to aid clarity of permissions being granted to each type of administrator.
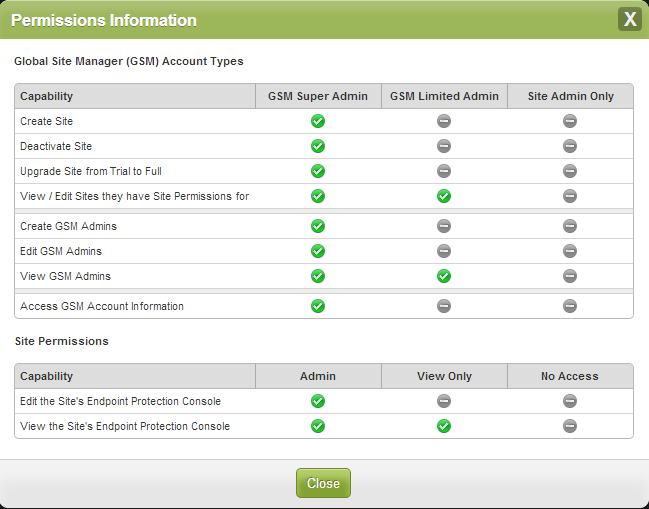
Create Admin pop-up window to clarify Admin capabilities
PRODUCT UPDATE BULLETIN 18.0.2- April 16th 2014
The Early Adopter release of the new Webroot SecureAnywhere® Global Site Manager console has included a stream of planned updates and additional requests. With this release of 18.0.2, we are introducing over ten enhancements and refinements to both Global Site Manager (GSM) and the Standard console.NEW – Search for and report on deactivated endpoints – Allows the administrator to easily search for any deactivated endpoints as well as using report option to create a deactivated endpoints report. (GSM and Standard console)
- NEW - In the Group Management view, Admins can easily search for and uncover any deactivated endpoints.
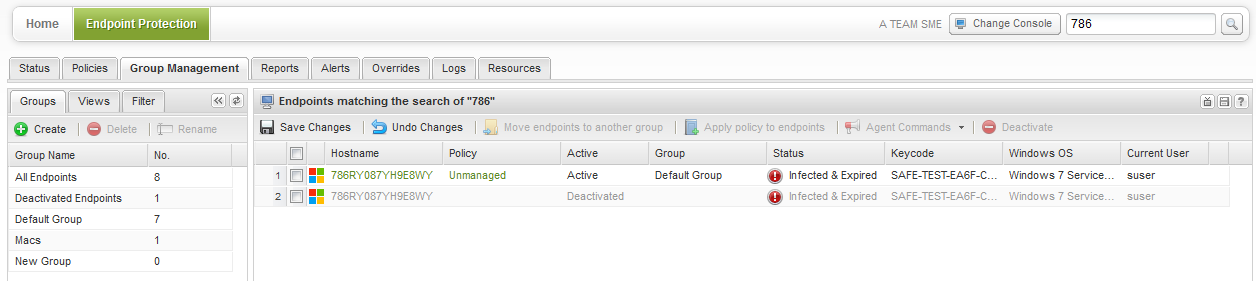
Easily search for deactivated endpoints
- NEW – Admins can use the new report option to create a deactivated endpoints report.
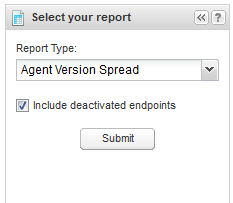
Simply select deactivated endpoints to report on them
- NEW – Direct access to Release Notes from the Administrator Login page.
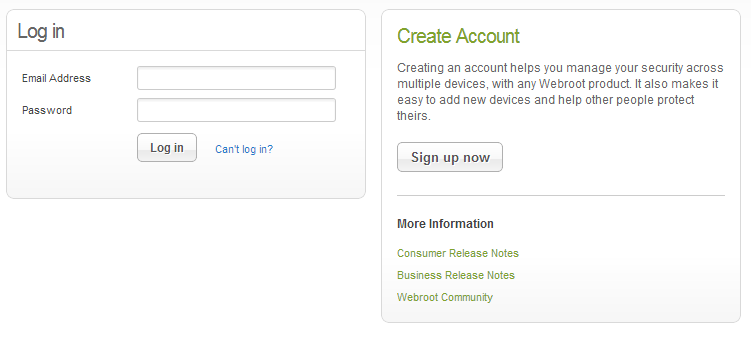
Easier access to Release Notes & Community links on the Login page
- NEW – Administrators now have the option to add explanatory comments to policy Overrides to explain the reason for the override to other Administrators.
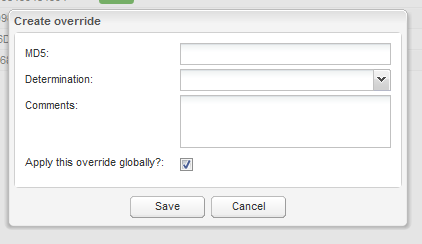
Easily add explanatory comments to policy overrides
- NEW – A new Change Log file provides transparency about when and who made changes to any Overrides.

Easily track and audit any override changes
- NEW – The rename of Global Site Manager Admins (View Only) clarifies the two Global Site Manager multi-site administration levels versus the basic Site Administration level.

Easily distinguish and assign Administration levels
- NEW – The highlight trial sites function lets you allocate Trials and have those seat counts excluded from the chargeable license count.
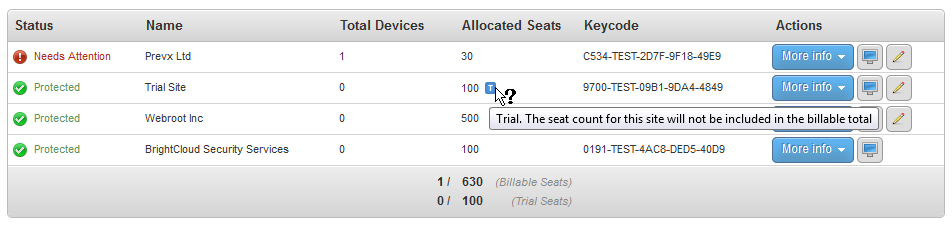
Easily manage Trials
- NEW - Rename a GSM console lets you edit Console names for easier administration.

Simply edit Console names
- NEW - Add new billing cycles lets an Administrator set-up the Billing cycle they want to charge for individual sites/customers.
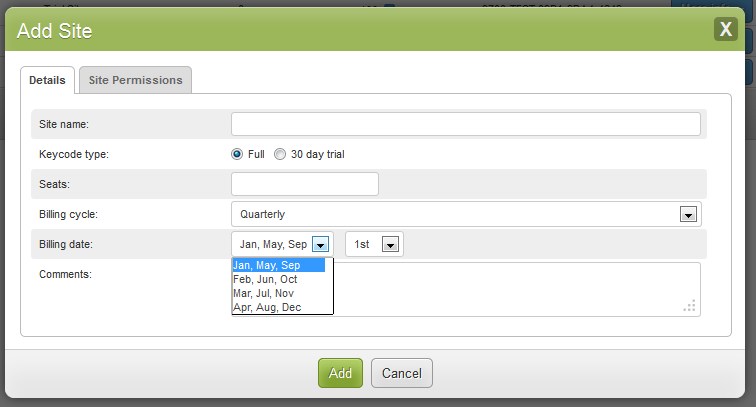
Easily set charging rules
- NEW – The ability to export GSM data to CSV lets an Administrator download and export usage reports to a CSV file.

Easily report on endpoint license usage by site
- NEW – The Site Administrators’ for each site and their Administration levels are now made visible on the Admins page.
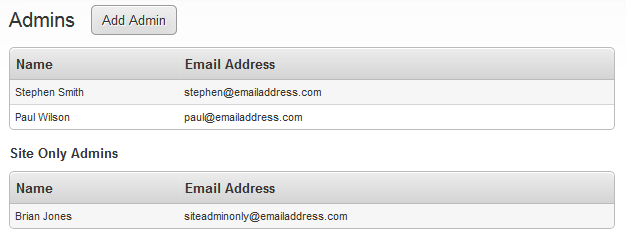
Easily see who has site Administration rights - Web Threat Shield has expanded Tooltip information to clarify the effect of switching web filtering setting on or off

Clearer Tooltip for Web Filtering policy option
- The Administrator sign-in drop down menu has been changed to read “Manage Admins” instead of “Manage Users.”
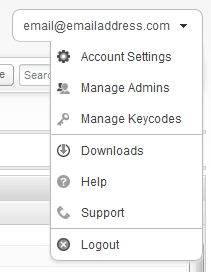
Changed Manage Users to Manage Admins
PRODUCT UPDATE BULLETIN 18.0.1 - March 27th 2014
In continuation to the announcement of the new Webroot SecureAnywhere Global Site Manager earlier this month, we are now introducing a number of developments. The majority of these are aimed at helping our Managed Service Provider (MSP) customers.The first enhancements to Global Site Manager (GSM) included in this release, adding many administration benefits, are as follows:
- NEW – Allow Trials under a Full Parent Key – The option to create a “Trial” site has been added, allowing MSPs to create a “Trial” account from within the GSM without the need to provision a separate keycode.
-
NEW – Add Keycode Logic – Administrators now have the ability to create a new console without needing to go through the existing registration process.
-
NEW – Global Site Manager – Product Tour – Now, when launching GSM for the first time, a new Product Tour will be displayed. The tour highlights all the current capabilities of the GSM and can also be accessed via your administrator drop-down menu.
-
NEW – Global Site Manager – Trial Notification Header – All GSM trials will have the remaining trial duration clearly stated on the console header. Clicking on the notification will bring up the standard Renew/Upgrade popup for GSM.
-
NEW – Show Site Creator – The Site creator will not be visible in the drop-down under a site.
-
NEW – Global Site Manager EULA Logic – The super Global Site Manager administrator will accept the EULA on behalf of all sites (customers) – meaning that if an MSP gave access to a site to one of their customers, the customer will not be presented with a EULA.
-
NEW – Coming Soon Tab – We have added a new “Coming Soon” tab to highlight new additions planned for the Global Site Manager console as it develops over the next few months, the features Webroot is working on for GSM, and to help answer your GSM development questions.
- NEW – Allow Trials under a Full Parent Key
Now, upon creation of a new site, the option to create it as a “Trial” has been added. This allows you to create a “Trial” directly within your GSM account without the need for provisioning a separate keycode. Once the “Trial” has been created, the administrator can simply convert it to a Full license simply by clicking on the Upgrade button.
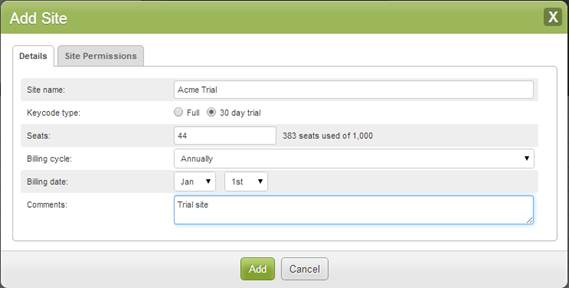
Easy to create a 30-day ‘Trial’ Site for a Prospect
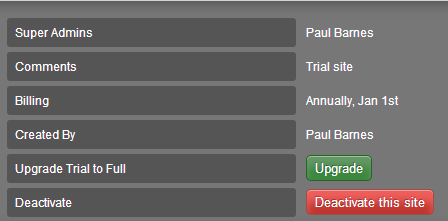
Easy to Upgrade Trial Site to A Full License
- New – Added Keycode Logic
Administrators that are not the Global Site Manager can create a new console without going through the existing registration process by using the new Add a Keycode panel, which will then add a new console within the console selection screen. This greatly simplifies the setting up of a new account, whether for “Trial” or “Production.”
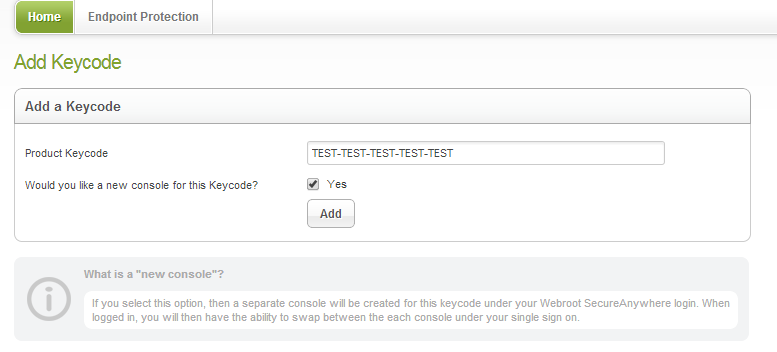
Quickly create a new console under a new keycode
- NEW – Global Site Manager – Product Tour
When launching Global Site Manager for the first time, a new Product Tour option will be displayed. The tour highlights all the current capabilities of GSM. It can be accessed any time later via your administrator settings drop-down menu.
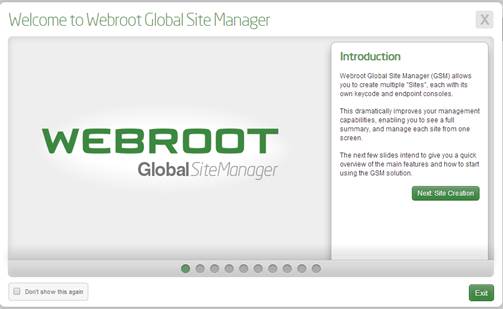
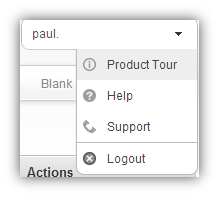
Global Site Manager Features Tour Repeat Access via Menu
- NEW – Global Site Manager – Trial Notification Header
All the Global Site Manager “Trials” will have their remaining trial duration clearly stated on their console header. Clicking on the notification will bring the standard Upgrade/Renew popup for GSM. This will help MSPs and customers using the trial remain aware of their stage in a trial.
Trial Notification in Console Header
- NEW – Show Site Creator
For easier management and administration tracking, whoever created a site will now be visible in the drop-down menu under any site.

Easy to Track who a Site is Created By
- NEW – Global Site Manager EULA Logic
The overall Global Site Manager administrator will accept the EULA on behalf of all of their sites – so that if you give access to a site to one of your customers, your customer will not be presented with a EULA.
- NEW – Delegated Console Access Rights
Delegated access rights and permissions for each customer or location console, with multi-tiered customizable administrator access rights and permissions.
New ‘Coming Soon’ Tab
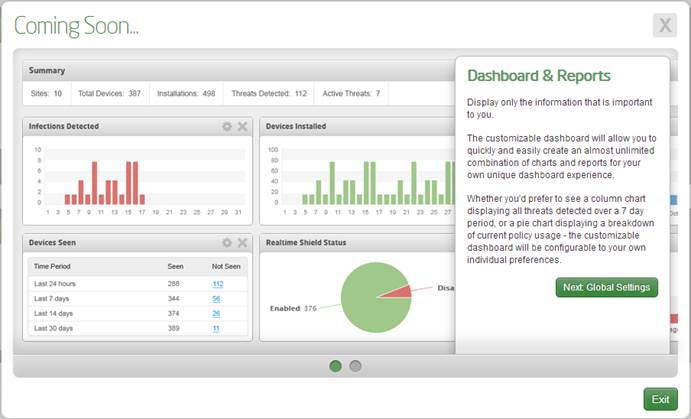
Sample of Coming Soon Content
PRODUCT UPDATE BULLETIN 18.0 - March 20th 2014
What's NEW!
Release 18 delivers a brand new management console option, the Global Site Manager console, that will be continuously enhanced with new features and capabilities during 2014.
It has been specifically designed to simplify the management of Webroot SecureAnywhere by Managed Services Providers (MSPs) and larger enterprise sized business customers that need more flexibility and ease of management over multiple customers, groups, locations, and multi-administrated deployments.
The first phase - Release 18.0 – will introduce basic Global Site Manager console functionality and features. It will also provide the multi-layered hierarchical management architecture that helps to deliver better visibility, easier administration, and smoother day-to-day operation of complex deployments. Global Site Manager is an additional and optional management console that is available instead of the standard management and deployment available through Webroot’s current web-based management console.
Any Webroot customer with over 100 seats under management and needing the flexibility of the Global Site Manager console will be able to migrate from their existing console. The first phase of Global Site Manager, release 18.0, offers the following benefits:
- NEW - Auto-Provisioning – A new parent and child keycode structure now means it’s a seamless process to provision new customers or locations, with no need to contact Webroot about issuing a new keycode. These are now controlled and automatically issued from within Global Site Manager.
-
NEW - Unique Site Consoles – The new hierarchical management views now enable you to issue individual customers, or locations, with their own unique console and keycode – simplifying deployment of new customers and also any individual account terminations.
-
NEW - Top Level Views – There are new top-level views of the customers or locations under management that provide real-time data on:
- Do any of endpoints need attention?
- How many devices have been deployed at this customer?
-
NEW - Site Notes – There is now the ability for administrators to add and write notes about each customer or location, for example:
- Customer billing cycles (for MSP reference only).
- Seats allocated to a customer/location – to more easily see how many seats have been used and avoid going over.
-
NEW – Delegated Console Access Rights – There are now delegated administration access rights and permissions for every customer or location/site console under management. This lets you provide customized access to individual management consoles and allocate multi-tiered access rights and permissions.
-
NEW - Direct Access Management – The new Global Site Manager console User Interface allows direct access to any customer or location console along with seamless integration to existing console selection screens. There is also the option to populate multiple MSP portals under a single account.
- NEW - Top Level Views
Gives you visibility over multiple customers or locations and lets you immediately see any that need attention or immediate intervention.
New custom policies can easily be created, as necessary, for each OS platform and assigned to a group or individual device.
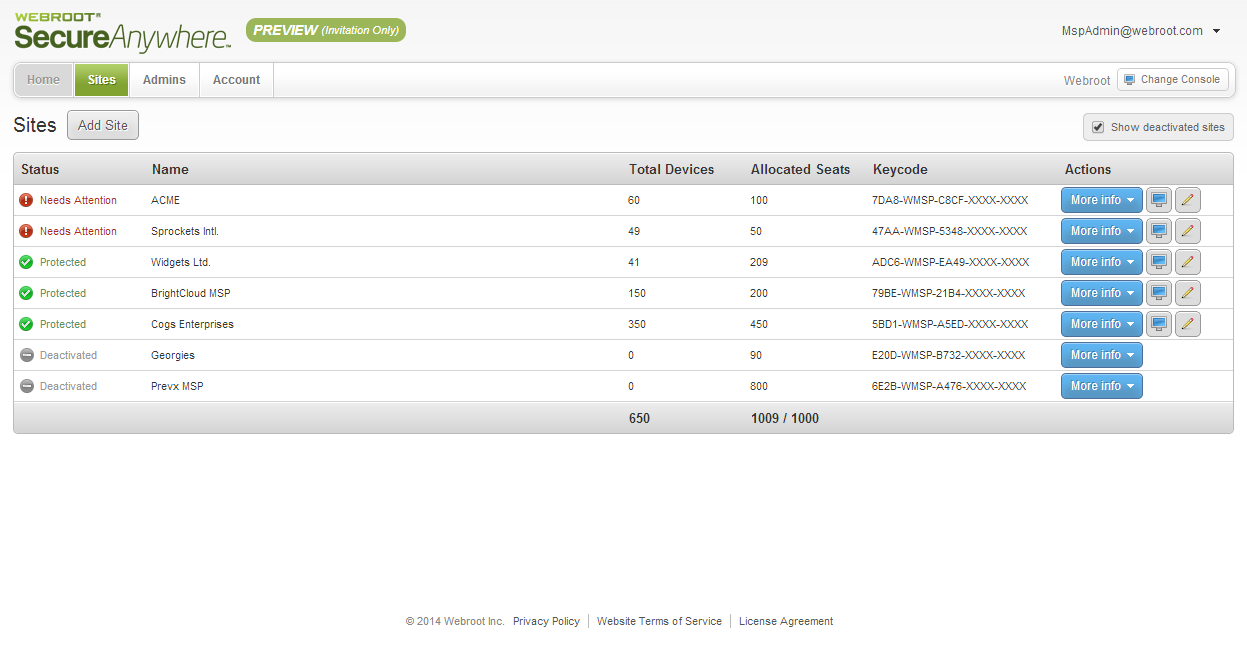
Notifies of any endpoints needing attention
- NEW – Auto-Provisioning
Let’s you easily provision a new customer or location without needing to contact Webroot

Fast Provisioning of New Customers & Customer Comments/Notes
- NEW – Delegated Console Access Rights
Delegated access rights and permissions for each customer or location console, with multi-tiered customizable administrator access rights and permissions.
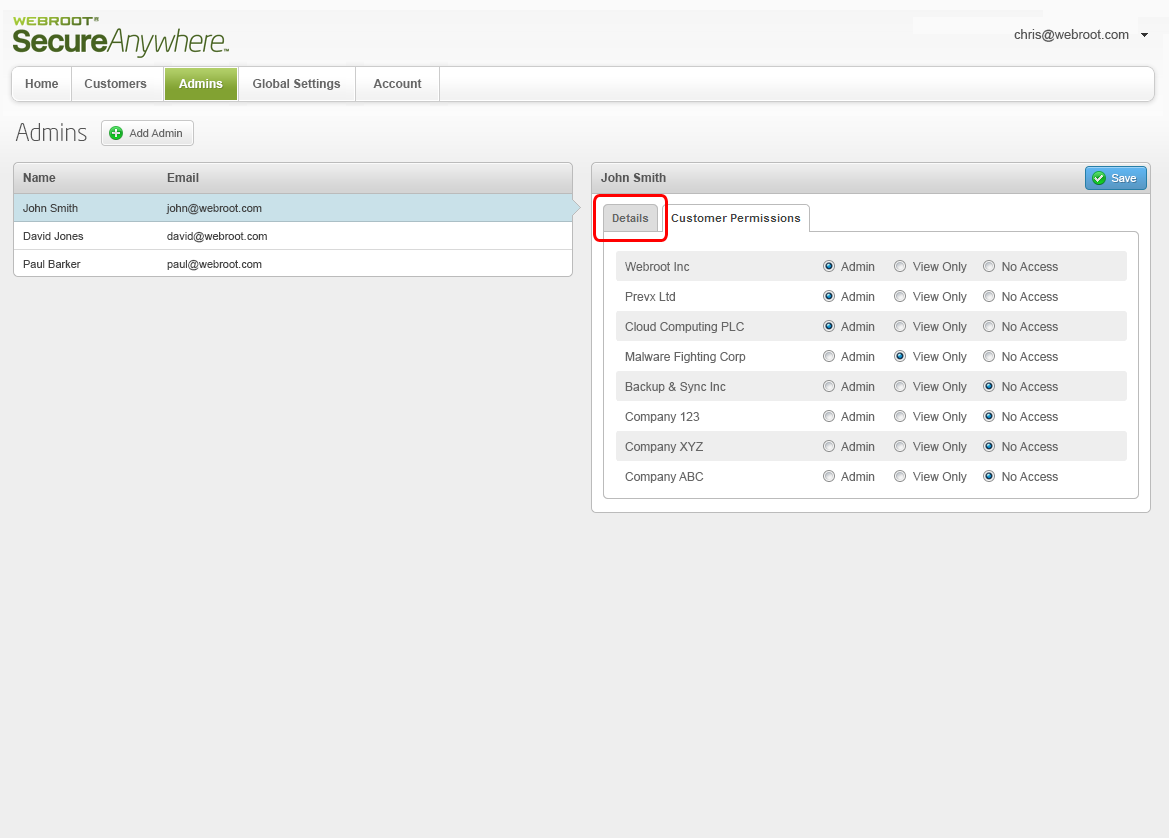
Release 18 is the first phase in a number of releases that will provide a new Global Site Manager console.
If you would like to look further into the new Global Site Manager console, or are considering migrating to Global Site Manager, please contact your Webroot Channel Account Manager or Webroot Sales Representative for more details.
Powered by noHold, Inc. U.S. Patent No. 10,659,398